
Last Summer, I went on my first cross country road to explore five different National Parks within Colorado and Utah. Traveling from Ohio, I knew very little about States out west and I spent several months doing research, making reservations in advance, and planning out a two week itinerary for my boyfriend and I. This trip included time in the Rocky Mountains National Park and time within Utah exploring 4 out of the 5 National Parks in the state. If you’re planning a similar trip, I hope this itinerary I developed is useful or gives some ideas to add to your own road trip itinerary!


Two Week Itinerary
Day One: Travel Day
Since we were traveling from Ohio, we decided to break the drive out to Colorado into two days. We stopped in Nebraska on our way after about 13 hours of driving. We found a hotel near Omaha, NE for the night.
🌛 Hotel in Omaha, NE
Day Two: Travel Day
On our second day, we left Omaha bright and early for a 7 hour drive to Boulder, CO. Once we arrived in Boulder we spent time walking around town and exploring Pearl St. which is an iconic spot in downtown Boulder that features fun shops and restaurants. My favorite part of this day was spending time at a free campsite we found just outside of Boulder, CO. This campsite was about an hour from downtown Boulder and 45 minutes to Rocky Mountains National Park.
Tips:
- I found all of our free campsites off the Campendium or freecampsites.net
- We purchased the America the Beautiful National Park pass which was $80 and covers entrances to all National Parks.
🌛 Beaver Reservoir Dispersed Camping


Day Three: Rocky Mountains National Park
On day three, we woke up bright and early to enjoy sunrise at our campsite before heading into Rocky Mountains National Park. On our way into the park, we stop in downtown Estes Park for some breakfast. We found Kind Coffee which was definitely a favorite stop of ours! After some coffee and breakfast we spent our first day hiking in the Bear Lake area and hiked to Bear, Nymph and Dream lakes. After hiking in this area, we stop at the visitor’s center and explored more of Estes Park. For the next two nights we stayed at one of the campgrounds in the Park, Glacier Basin.
Tips:
- I wrote a blog post about our experience in RMNP if you’re looking for an in depth guide, read here.
- Campground reservations can be made 6 months in advance, so if you know your dates book as soon as you can!
- Rocky Mountains National Park requires a vehicle reservation to enter the park during certain hours. I discuss this in depth in my post dedicate to RMNP.
🌛 Glacier Basin Campground


Day Four: Rocky Mountains National Park
Our second full day in RMNP was a busy one! We spent our entire morning hiking to Mount Ida. From the Glacier Basin campground, this trailhead is about an hour away. The best part about the drive there is driving along the iconic Trail Ridge Road which is the highest highway road in the country! It was incredible to experience the views and the road during sunrise. We saw so much wildlife and almost had the entire road to ourselves since it was so early. To hike Mount Ida, you can park at Milner Pass parking lot. This hike was a strenuous 9 mile hike but the views were some of the best I’ve ever seen! After this hike, we went into town to take a shower. We found a local laundry mat that had showers for visitors that cost $4. That evening we had dinner in town at the Bird & Jim, which was delicious!
🌛 Glacier Basin Campground


Day Five: Travel Day
We were pretty exhausted after a long hike the day before so we slept in and took our time leaving Colorado. We stopped in Estes Park for the last time and got another cup of Kind Coffee before starting a 6 hour drive to Moab, UT. We planned to car camp once we arrived to Moab and we were surprised to find several camping areas off the main road that were first come first serve. We picked the first one we could find which was Upper Big Bend Campground and paid $20 for a spot that night. This night was extremely hot compared to the nights we just experienced in Colorado. The campsite we chose was about 15 minutes from Arches National Park which was super convenient.
Tips:
- I have a blog post dedicated to our time in Arches National Park with more details of our experiences, read here.
- Arches National Park requires a vehicle reservation to enter the park during certain hours. I discuss this in depth in my post dedicated to ANP.
- All campgrounds in the area we stayed were $20 per night for a camp spot.
- The campgrounds off the main road that we found had no running water, no showers, and no flush toilets.
- Moab, UT is known as boondocking country, meaning there’s a lot of free camp spots surrounding Moab! Check out Campendium or freecampsites.net to find a free spot. Most are quite a drive from the park which is why we decided to pay $20 to be close.
🌛 Upper Big Bend Campground
Day Six: Arches National Park
We woke up around 3:30am tired but excited to drive into Arches National Park for the day. We drove to Delicate Arch trailhead to begin a sunrise hike to this iconic arch. It took about an hour to hike to the top and we made it just before the sun started to rise. Delicate arch is incredible in person and much bigger than I imagined. We spent a couple hours admiring Delicate Arch before hiking back down. Afterwards, we explored more Arches in the park. It was extremely hot so we didn’t last long out in the heat. This night we ended up booking a hotel room to escape the heat and it was definitely worth it!
🌛 Scenic View Inn and Suites Moab


Day Seven: Arches National Park/Travel Day
We slept in and explored downtown Moab before heading back into Arches National Park. We spent some more time driving through Arches National Park admiring Arches from a distance and stopping along viewpoints. We also took some time to explore Park Avenue which was one of the coolest spots we visited in the park. Afterwards, we prepared for a 4.5 hour drive to Bryce Canyon National Park. Once we arrived, we stayed at a free camp spot, Tom’s Best Spring Dispersed Camping which is about 15 minutes from the park.
🌛 Tom’s Best Spring Dispersed Camping


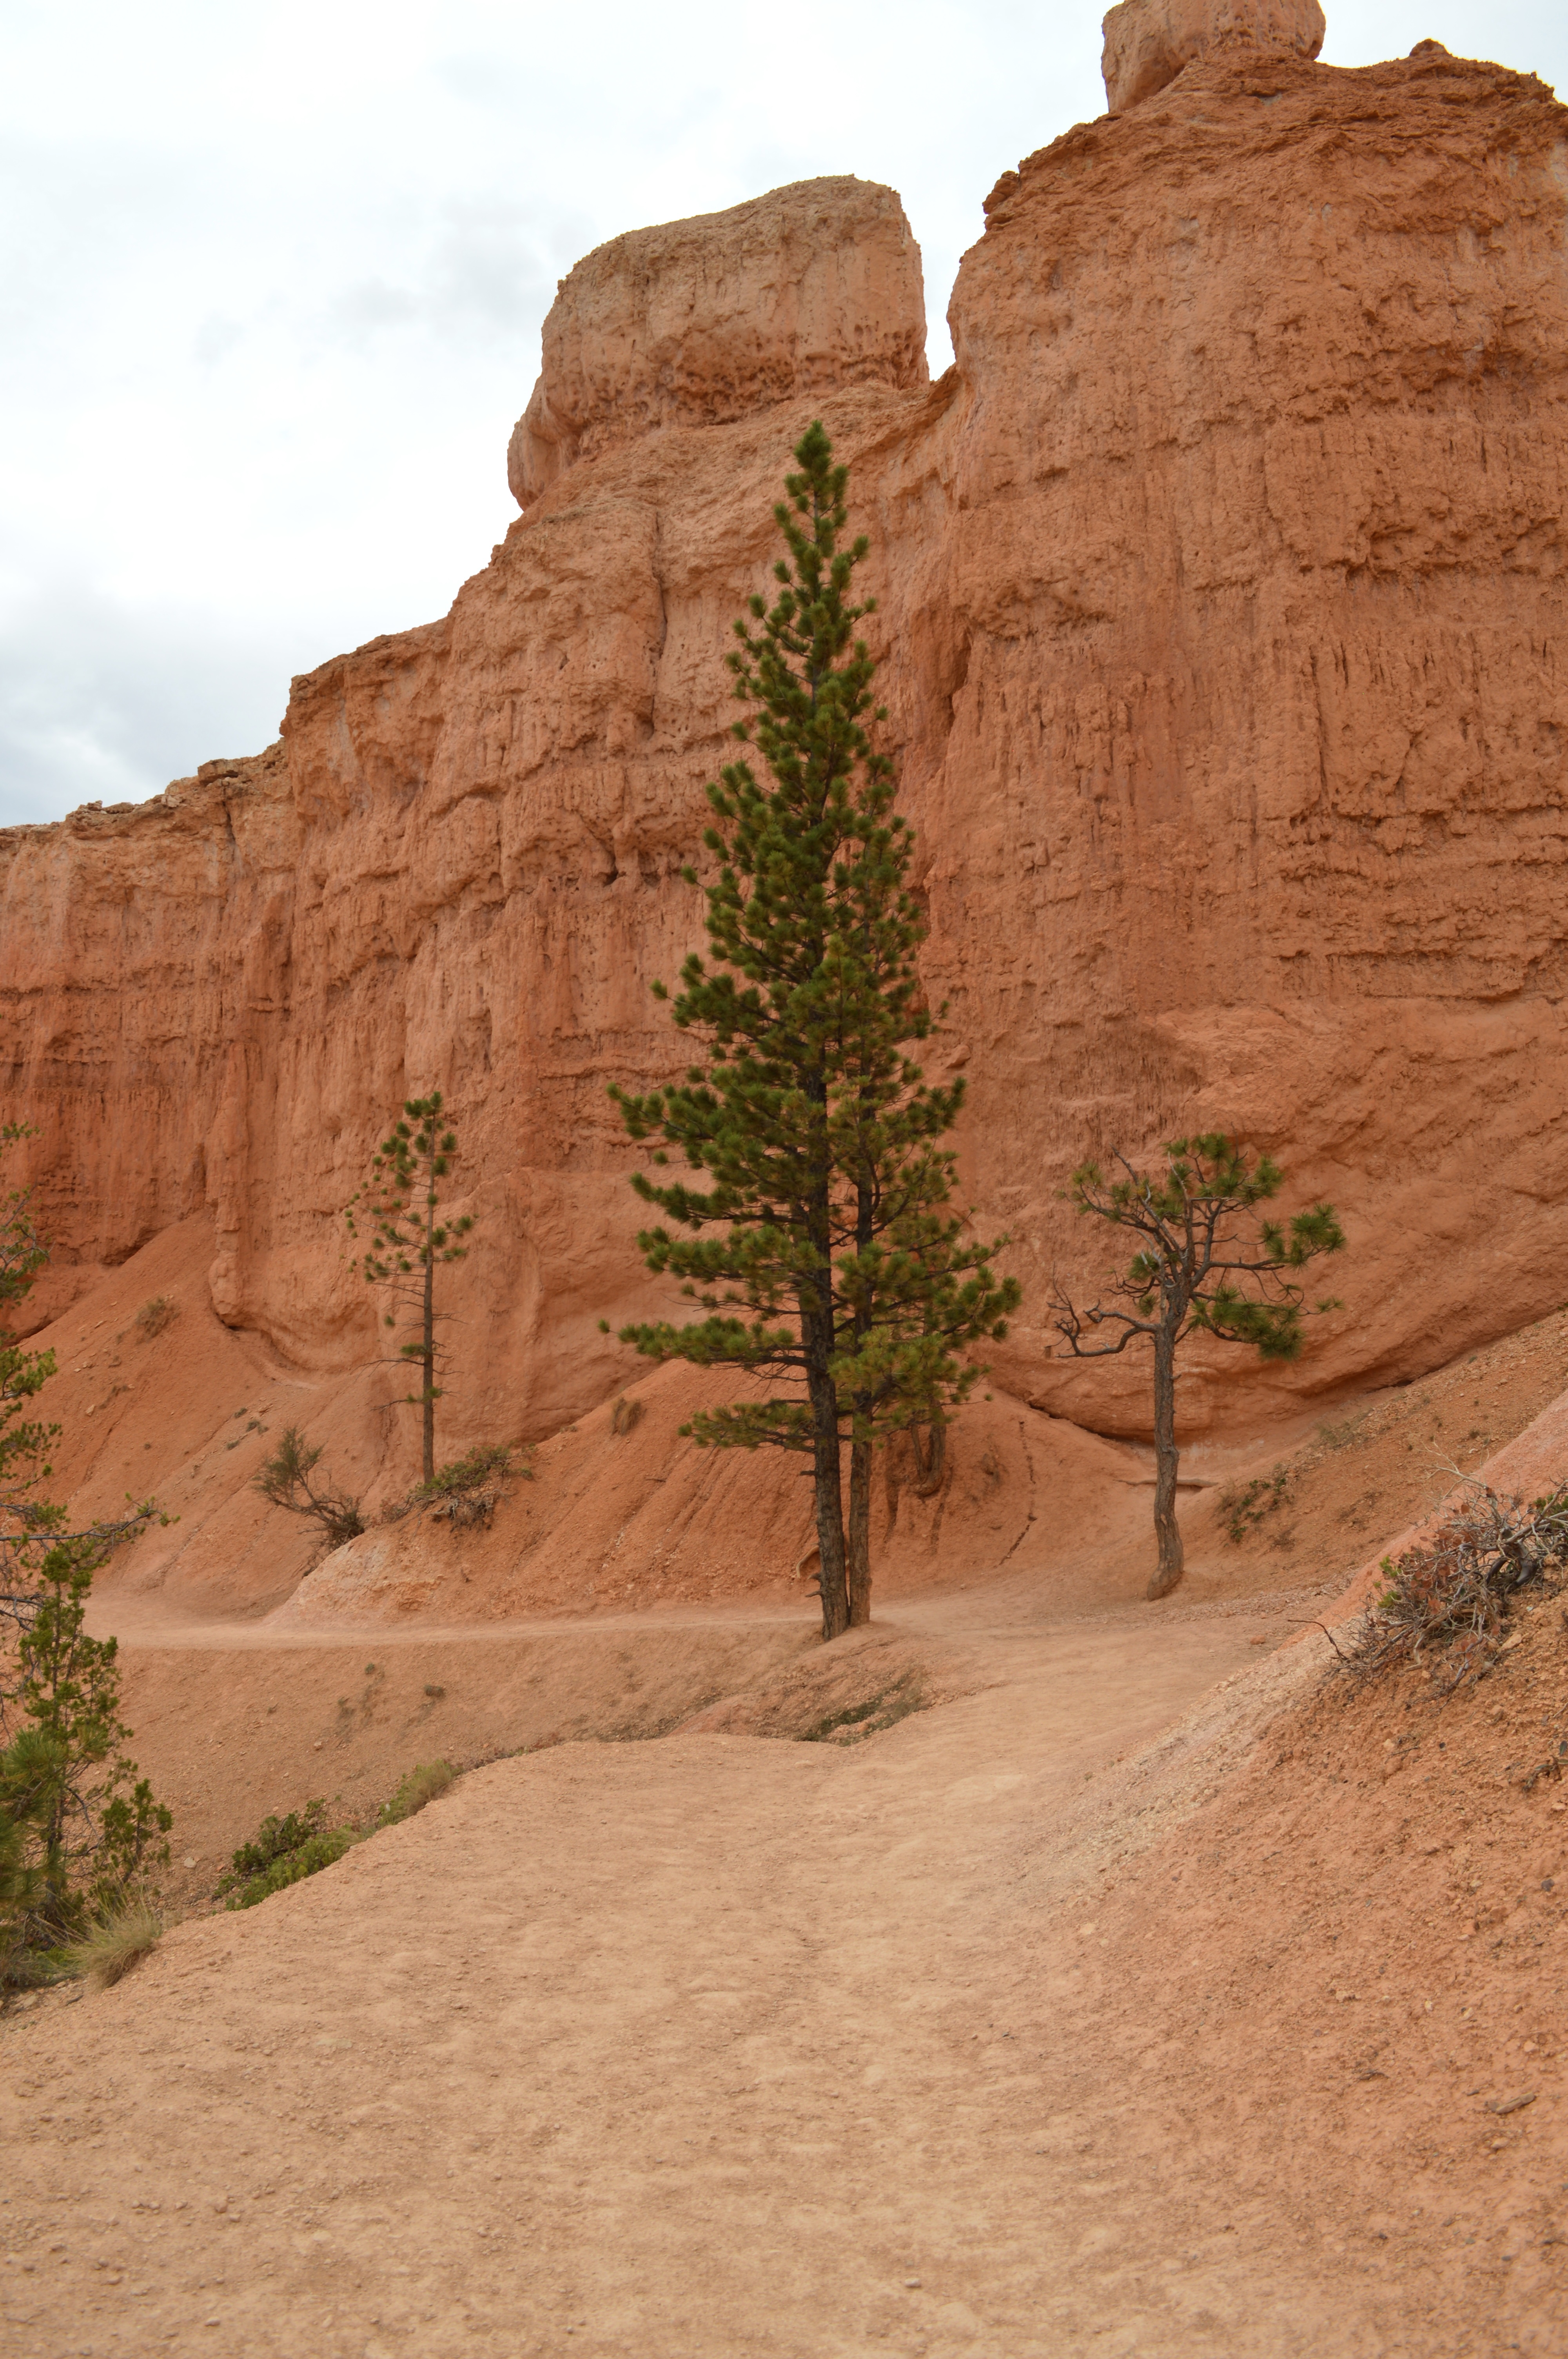
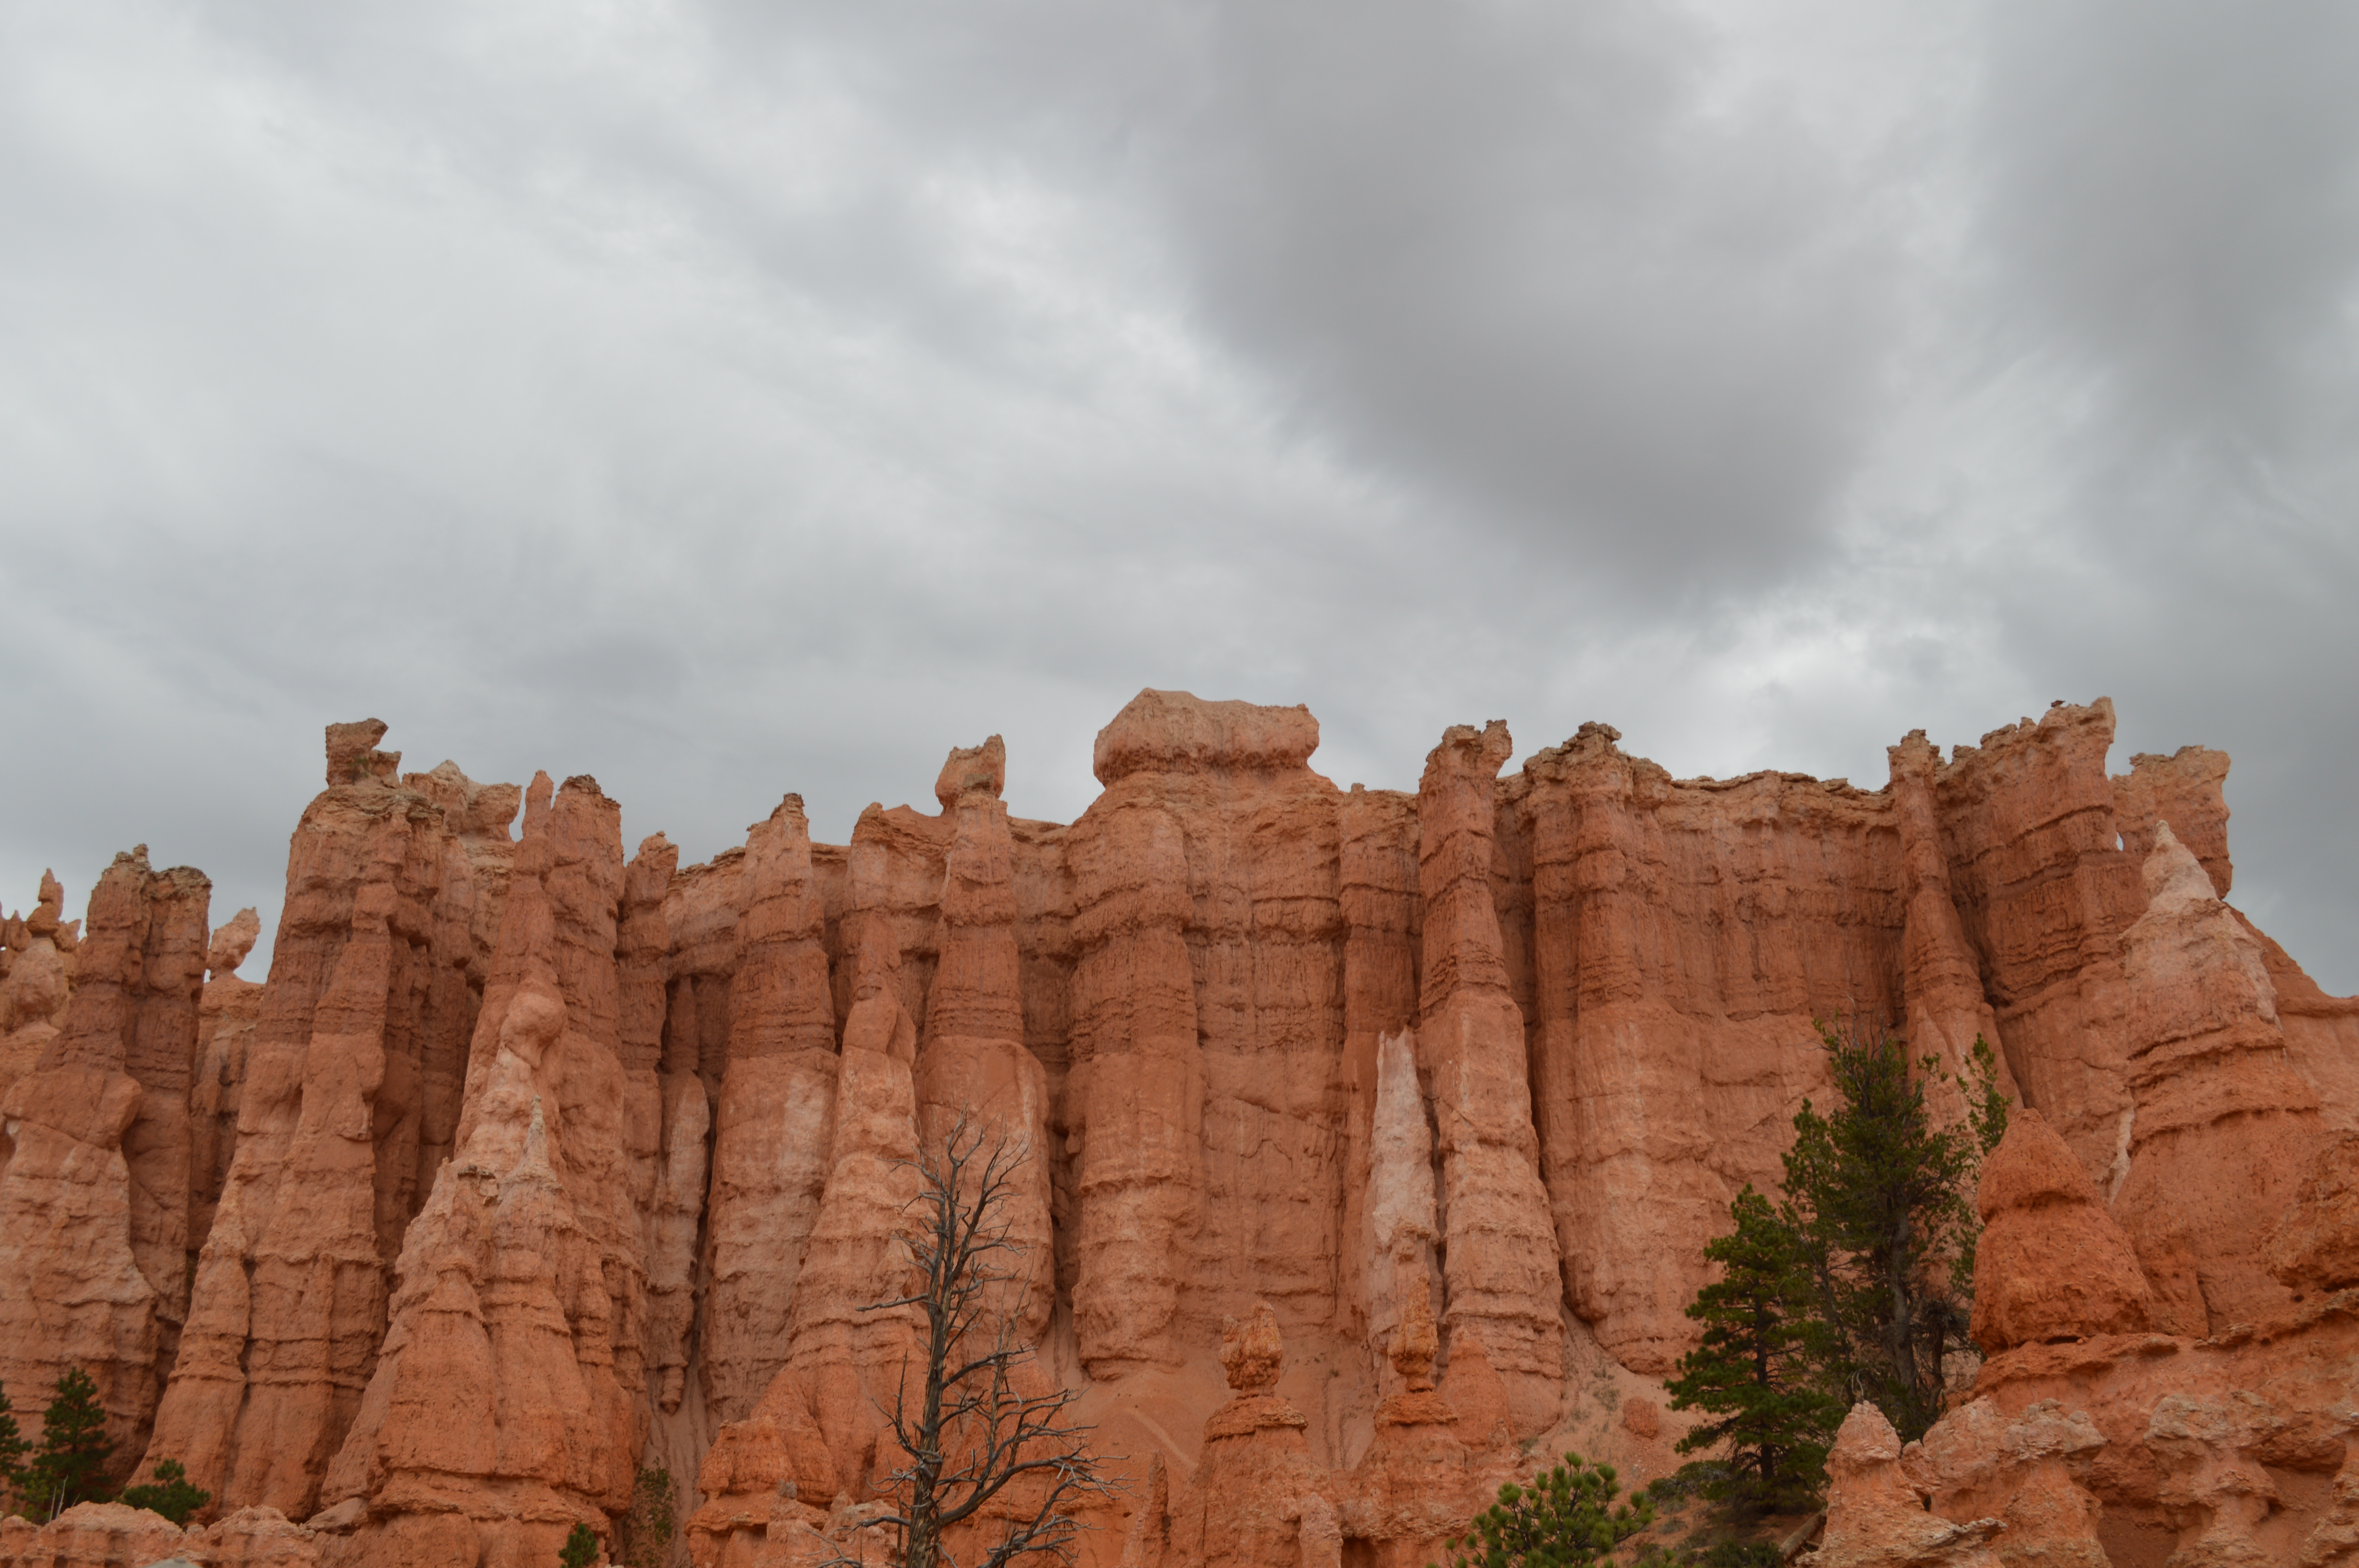
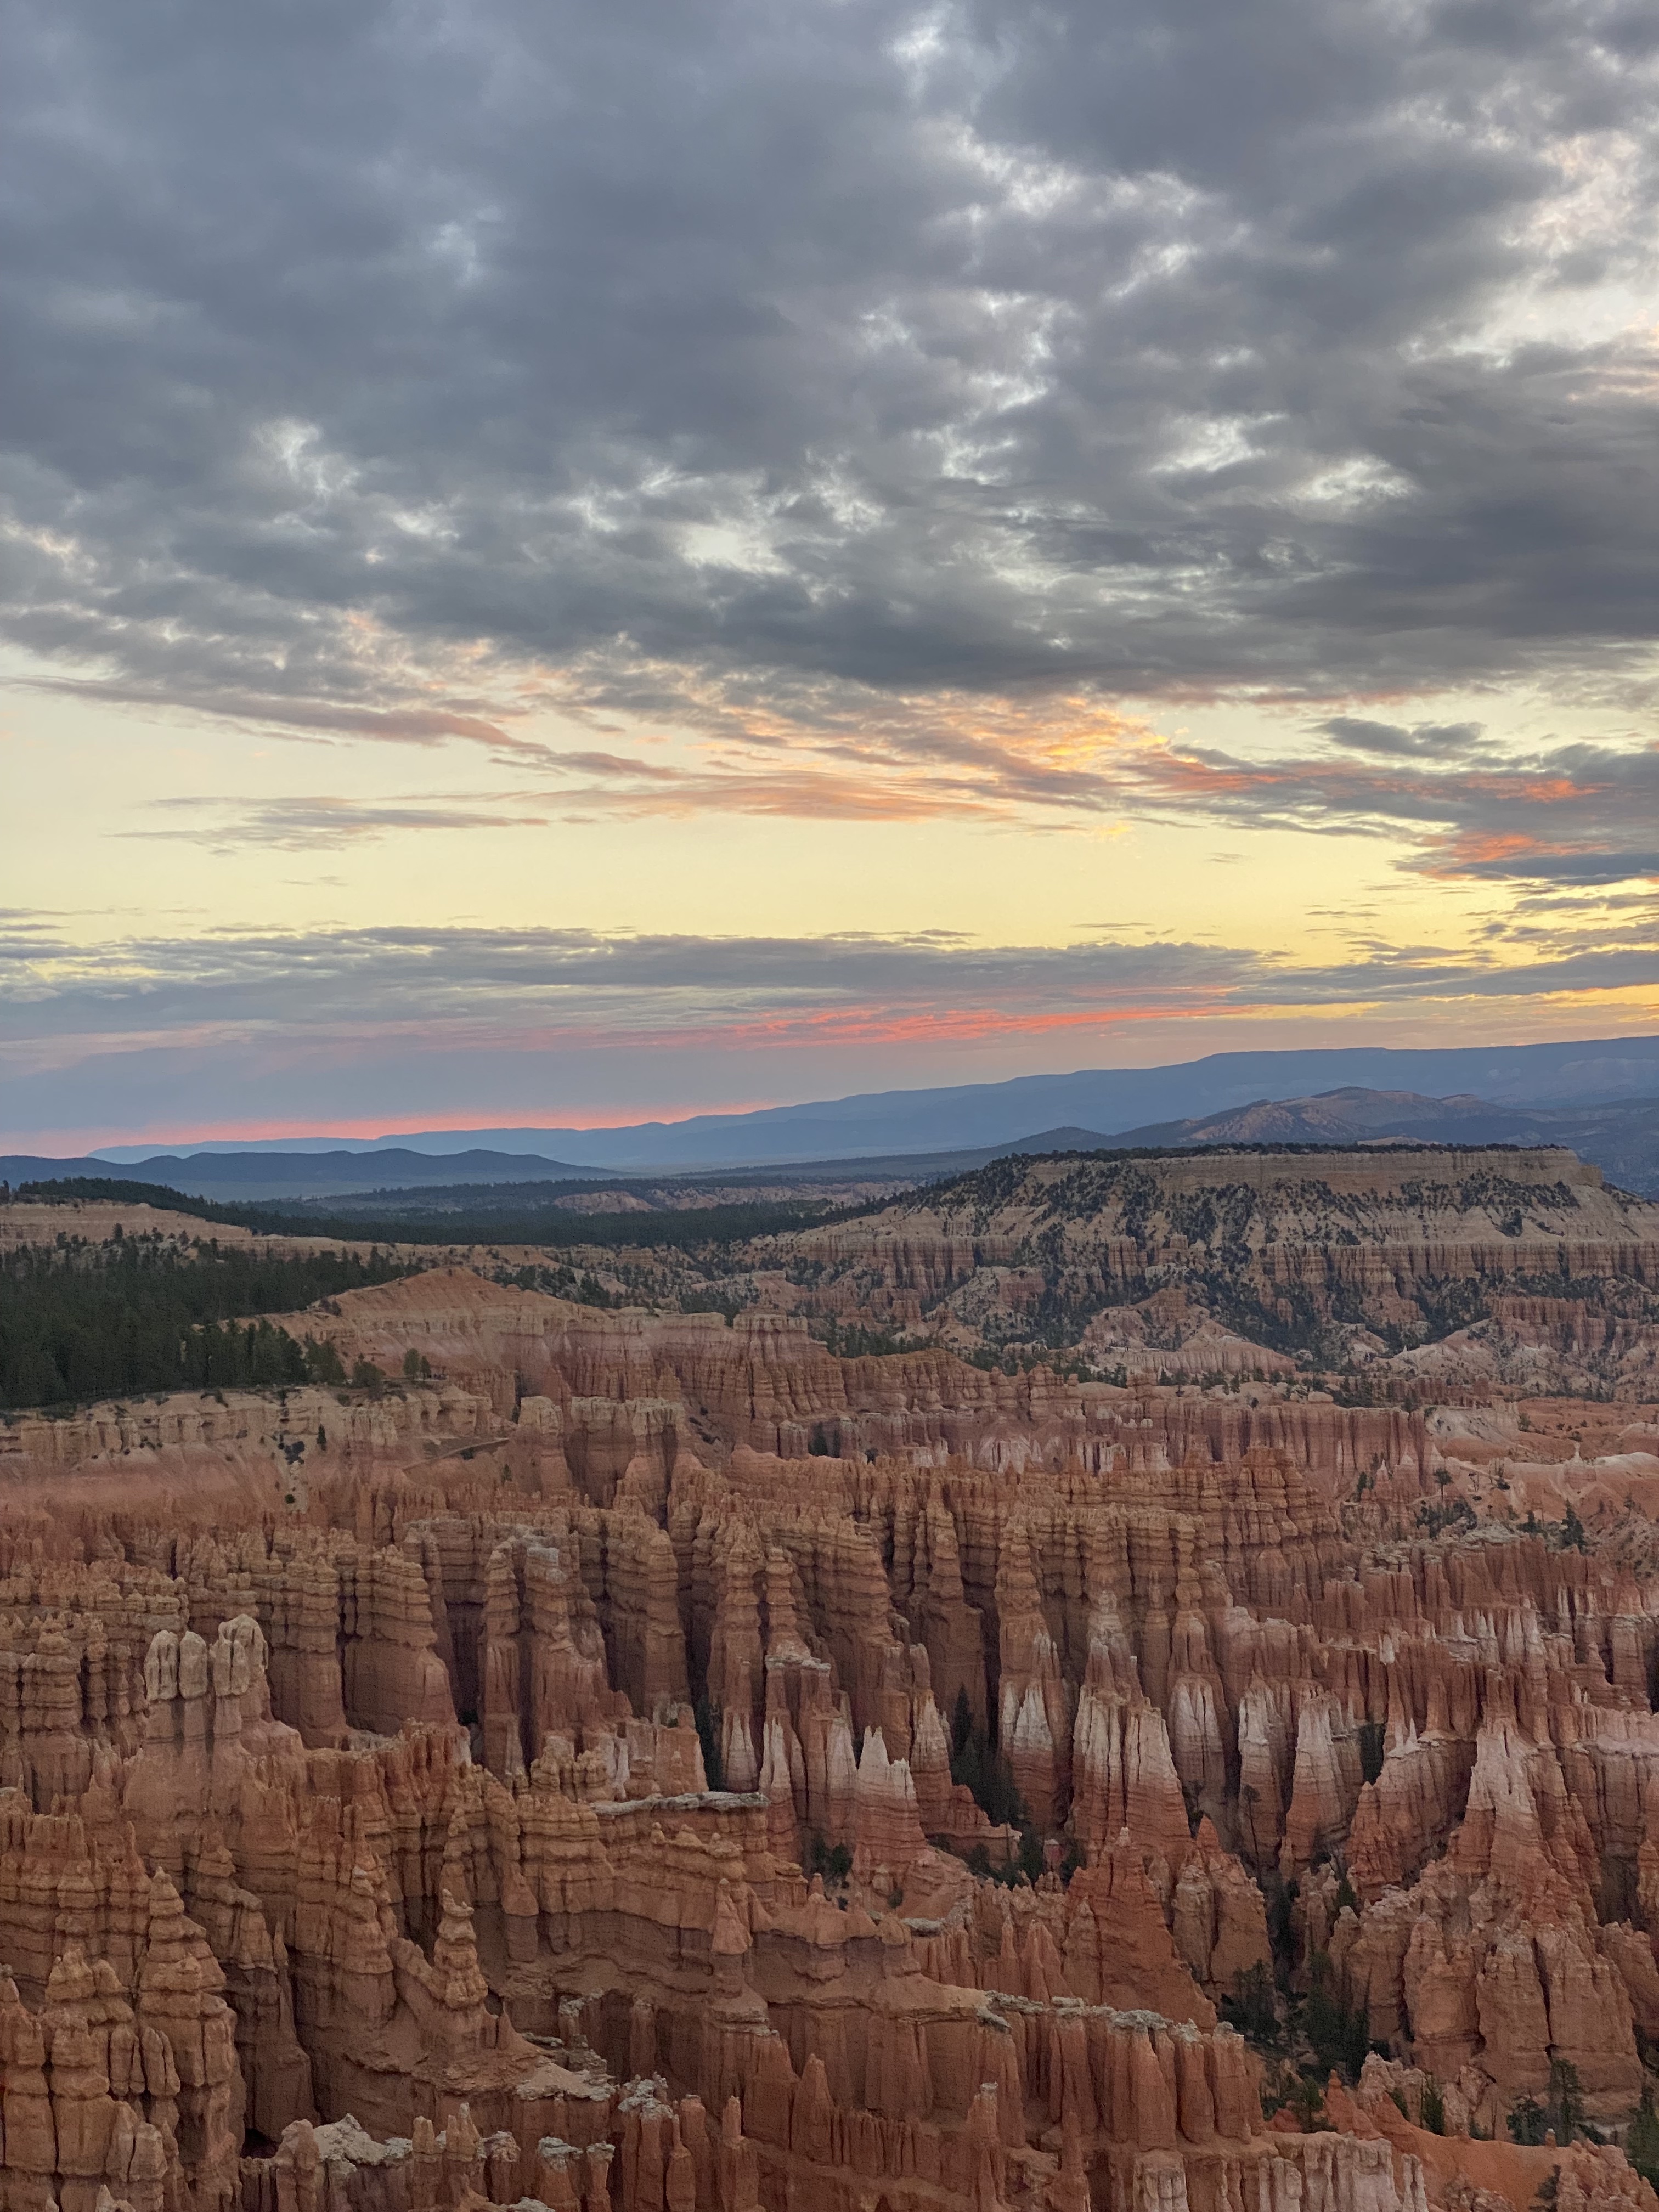
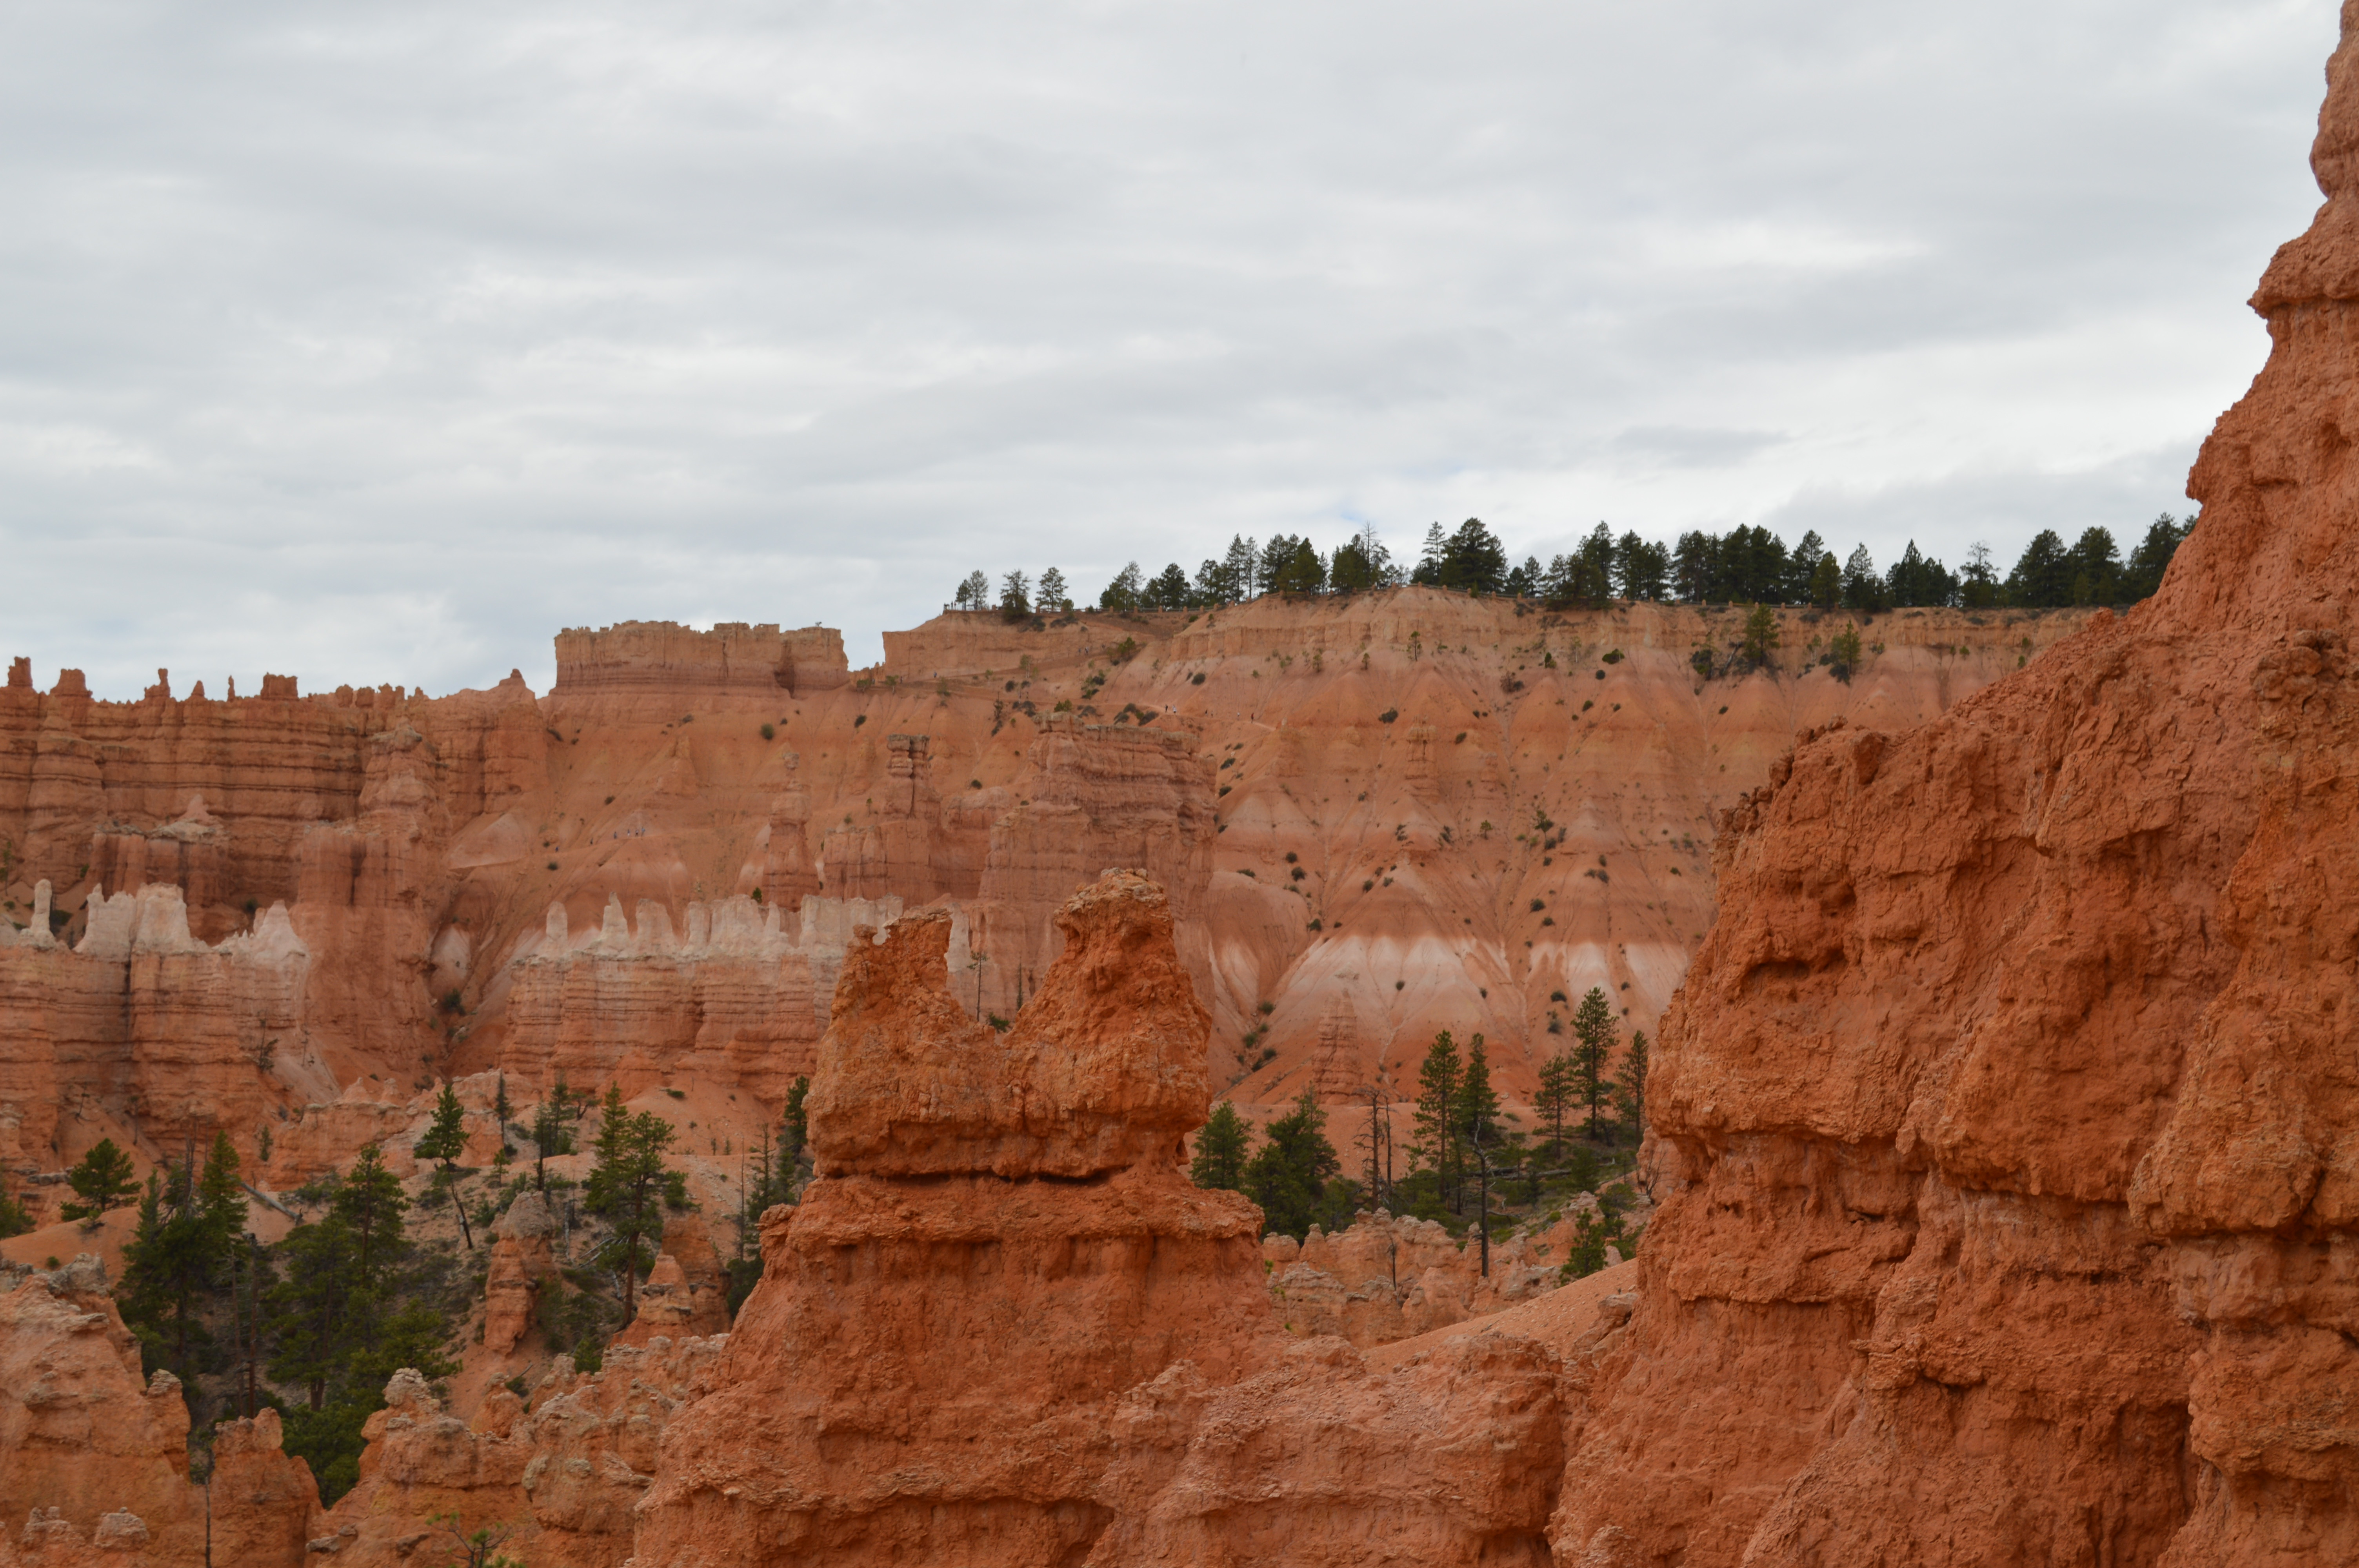
Day Eight: Bryce Canyon National Park
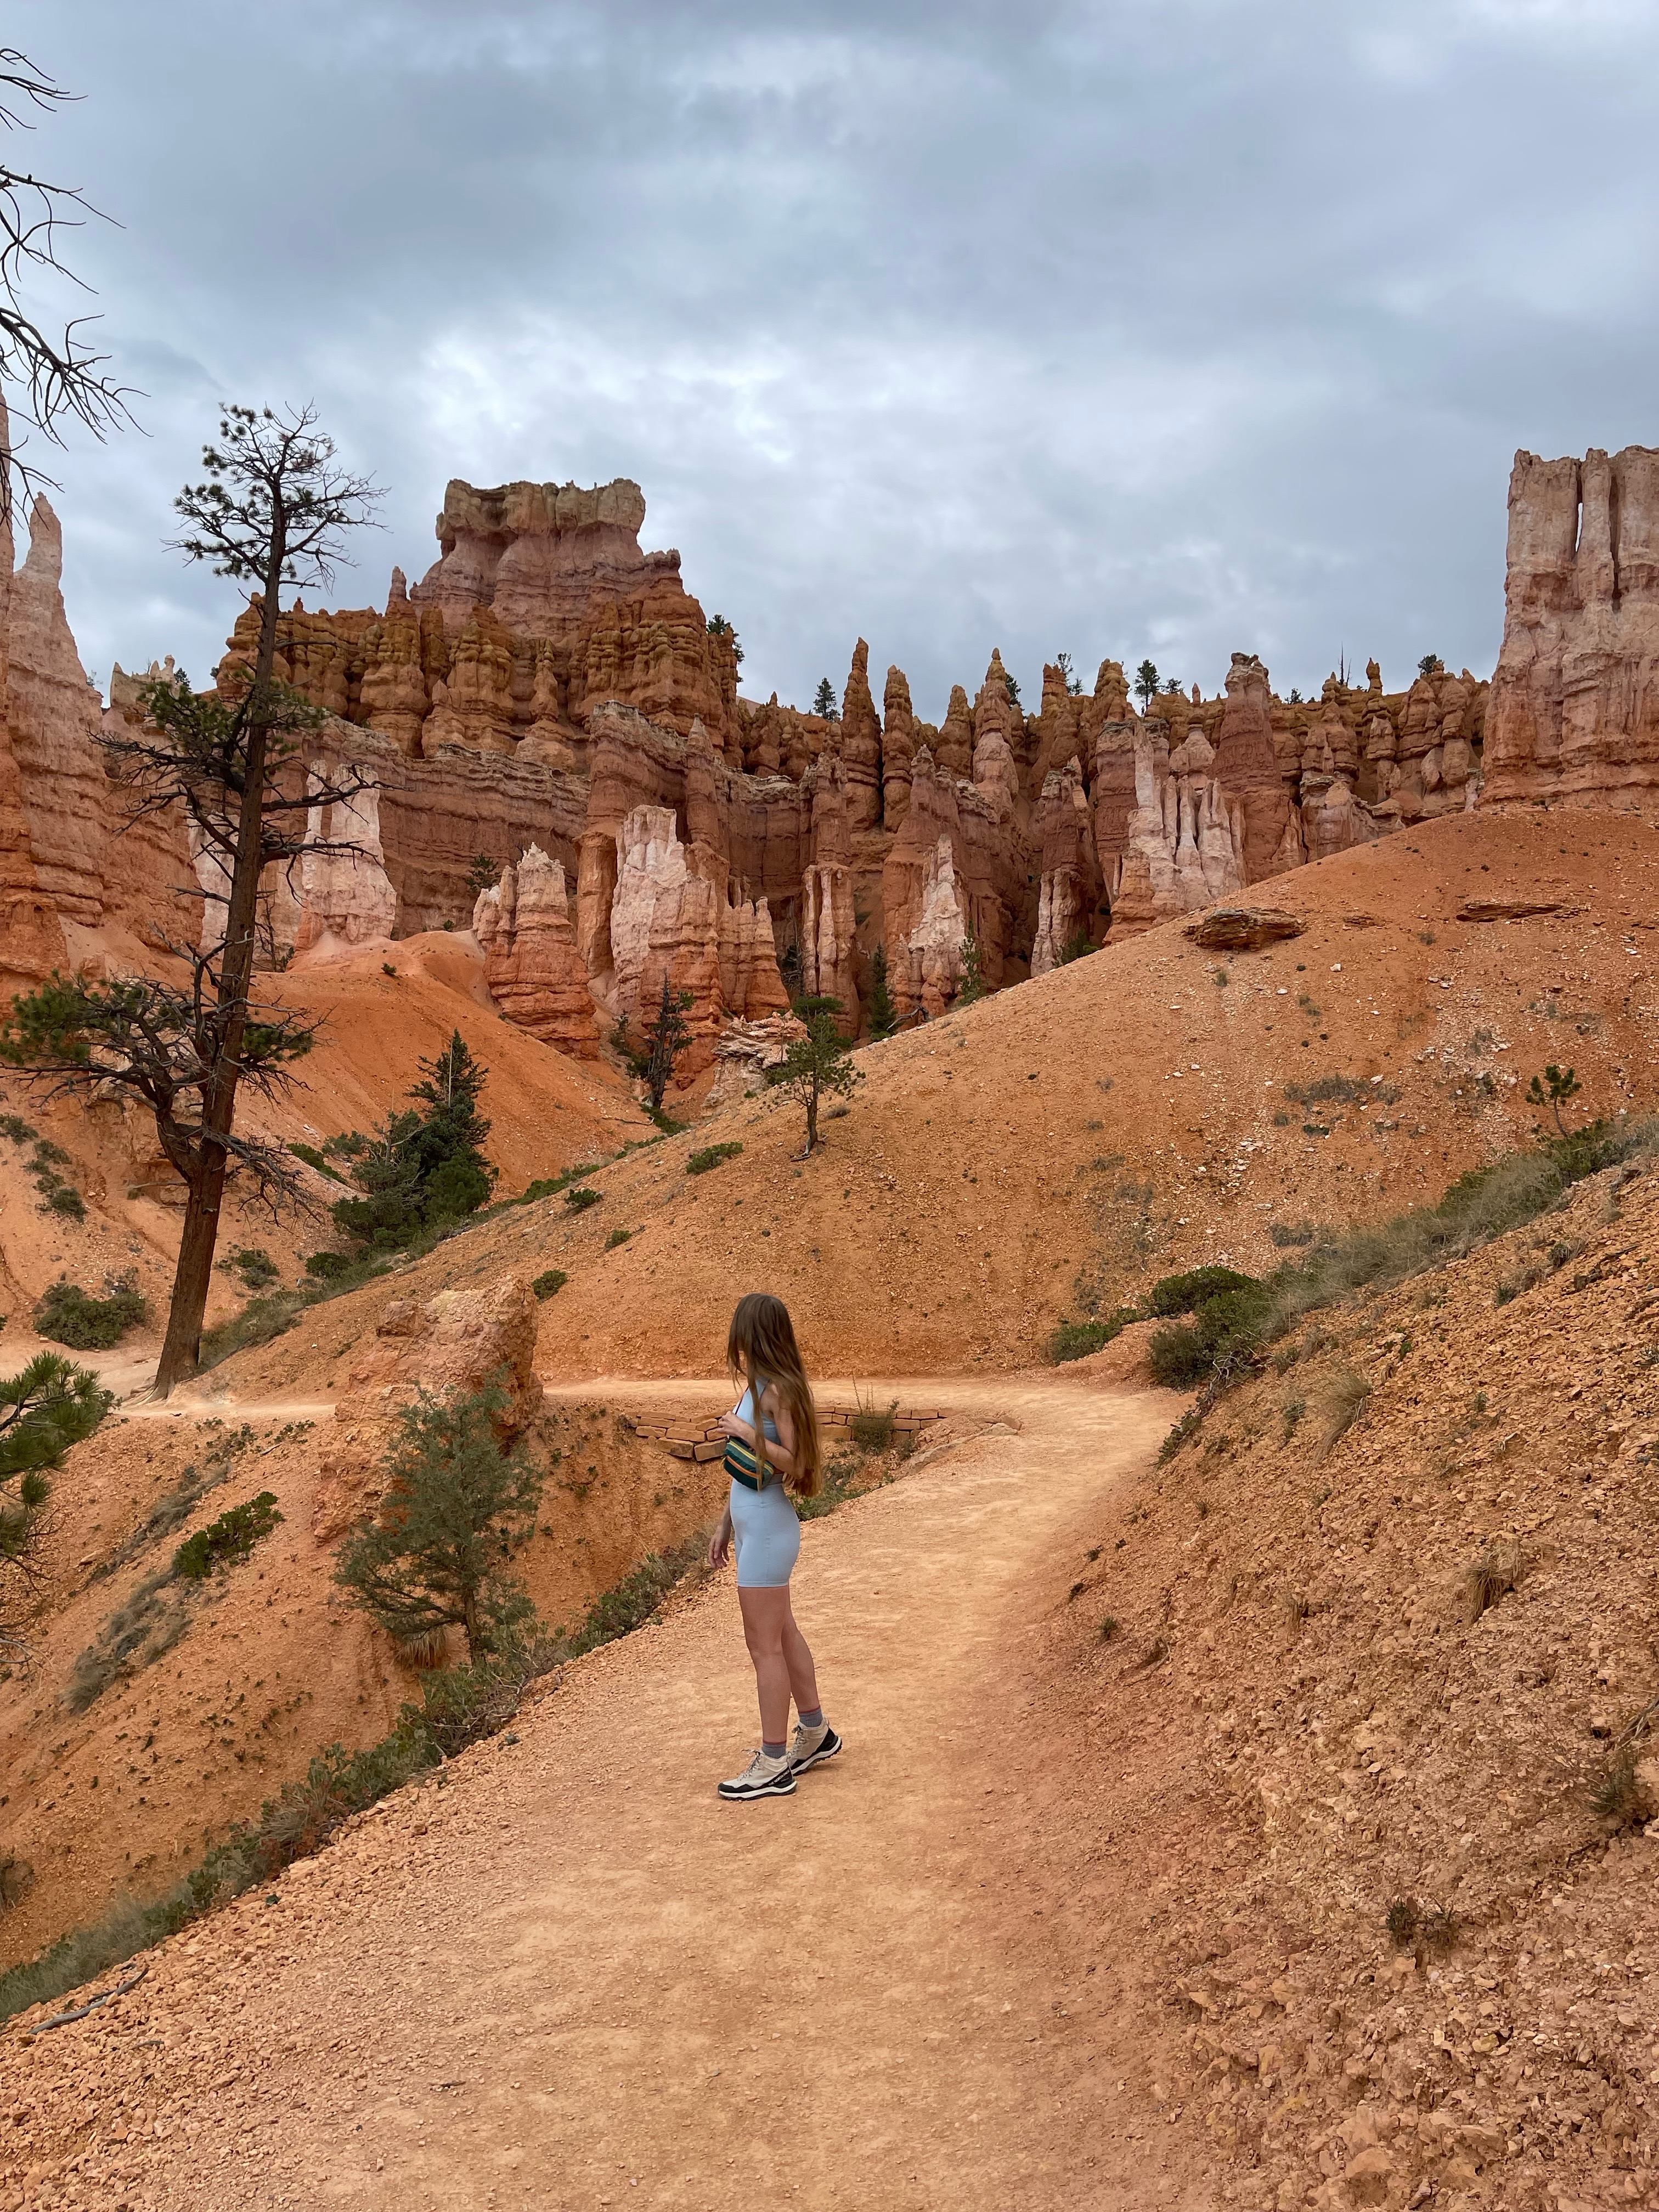
We only planned for one day in Bryce Canyon so we woke up early to make the most of our time. We started the morning at Inspiration Point for sunrise, this was an incredible spot but I imagine any spot in the park is amazing to watch sunrise. After sunrise, we drove to Sunset Point to hike the Navajo and Queen’s Garden loop trail. This was the perfect hike to do with only a day in the park. We were able to see the highlights of the park and spend time admiring all of the hoodoos! We ended the day by driving to Zion National Park which was a 2 hour drive.
Once we arrived in Zion, we went to Zion Outfitters to pick up rented gear for the Narrows hike. We then went to a free camp spot we found but ended up booking a reservation at Gooseberry Lodges last minute due to extreme heat temperatures and a thunder storm that was predicted. This was a great decision and gave us a comfortable place to sleep each night while visiting Zion. Gooseberry Lodges offer small private cabins for an affordable price and the location is about 45 minutes from the park.
Tips:
- I have a blog post dedicated to our time in Bryce Canyon National park, read here.
- Tom’s Best Spring Dispersed Camping was an awesome free spot, the spaces were spread out and there was cell service which was a first!
- I have a dedicated post to our time in Zion, read here.
🌛 Gooseberry Lodges


Day Nine: Zion National Park
Our first day in Zion was a full day! We started the day bright and early with a sunrise hike to Canyon Overlook which was one of my favorite memories, the views from this one mile hike were amazing. Afterwards we drove into Springsdale which is the closest town to Zion and got breakfast sandwiches from Deep Creek Coffee. Our next hike was The Narrows which was one I was most looking forward to as we planned our trip. We had already picked up our gear the night before which saved time. We got on the shuttle near the visitor’s center to begin our hike to The Narrows and got off at shuttle stop #9. We spent about 4 hours hiking in the Narrows. That night, we ordered dinner from a local spot near our cabin and enjoyed some time out by the fire after a long day of adventuring!
Tips:
- During busy season, Zion requires visitors to use their shuttle system to access most trailheads. The shuttle is free and the easiest spot to pick up the shuttle is at the visitor’s center.
- Canyon Overlook is one of the only areas you can drive in your personal vehicle to get to.
- I would definitely recommended renting the gear if you plan to hike the Narrows.
🌛 Gooseberry Lodges


Day Ten: Zion National Park
On our second full day in Zion, we planned to hike to Observation Point. This hike offers one of the best views in Zion and a lot safer then Angel’s Landing! Be sure to read my blog post about Zion if you’re planning to hike to Observation Point as there’s a lot to know in advance. After an afternoon hike to Observation Point we spent the rest of the day walking around Springsdale, souvenir shopping and catching up on laundry.
🌛 Gooseberry Lodges


Day Eleven: Travel Day
We slept in and drove into Springsdale to stop at our favorite coffee shop one last time, Deep Creek Coffee. Our last National Park on this road trip was Capitol Reef National Park, which is about 3.5 hours from Zion National Park. The drive to Capitol Reef from Zion is a bit boring and as you enter the nearby towns to Capitol Reef, it feels like you’re in a Western movie. Capitol Reef is quite literally in the middle of nowhere so restaurants and shops are very limited. Since we arrived to the park later in the afternoon, we didn’t hike but spent time exploring the scenic drive which is about 8 miles one way to Capitol Gorge. This is a historic drive that offers stunning views of the park, definitely a must see. After a long day of traveling, we checked into our hotel for the next two nights, Capitol Reef Resort.
Tips:
- I wrote a separate blog post about our time in Capitol Reef that provides more information about our time in the park, read here.
🌛 Capitol Reef Resort


Day Twelve: Capitol Reef National Park
Our first full day in Capitol Reef was actually my birthday so I picked the activities we did this day! I was most looking forward to hiking to Cassidy Arch which is an iconic spot in Capitol Reef. The hike to Cassidy Arch was tough but definitely worth the view at the end. Afterwards, we explored the fruita district of the park and stopped by Gifford Homestead for fresh pies, which were amazing! We also planned to hike the grand wash trail which is another popular spot in the park, but due to extreme heat temperatures we only hiked the beginning on this trail before turning back.
🌛 Capitol Reef Resort


Day Thirteen: Travel Day
We woke up early and enjoyed breakfast at the hotel before leaving Capitol Reef. We started our trip back to Colorado with a plan to stop in Vail, CO for the night. Vail is about 5.5 hours from Capitol Reef National Park. This trip felt longer than other days, most likely due to general exhaustion from a long road trip! Once we arrived in Vail, we camped at Camp Hale Memorial campground. This campground was stunning and so scenic and quiet. It truly was the perfect way to end our road trip. This campground was about $30 for the night and it was available to reserve in advance but when we arrived there were plenty of empty spots available as well.
🌛 Camp Hale Memorial Campground


Day Fourteen: Travel Day
From Vail, CO we woke up around 4am to drive towards Des Moines, IA for our stopping point. We drove about 12 hours to get to a hotel for the night. We arrived around dinner time and ordered in food at a nearby restaurant and went to bed early to prepare for another long travel day!
🌛 Hotel near Des Moines, IA
Day Fifteen: Travel Day
We left Des Moines bright and early and headed back towards Ohio which was about an 10 hour drive. We arrived home mid afternoon after a long two week road trip! This road trip gave me some of my best memories and it was definitely worth all the early mornings, days without service, heat exhaustion, and long days in the car.