Road Trip Guide: Yellowstone and Grand Teton National Parks

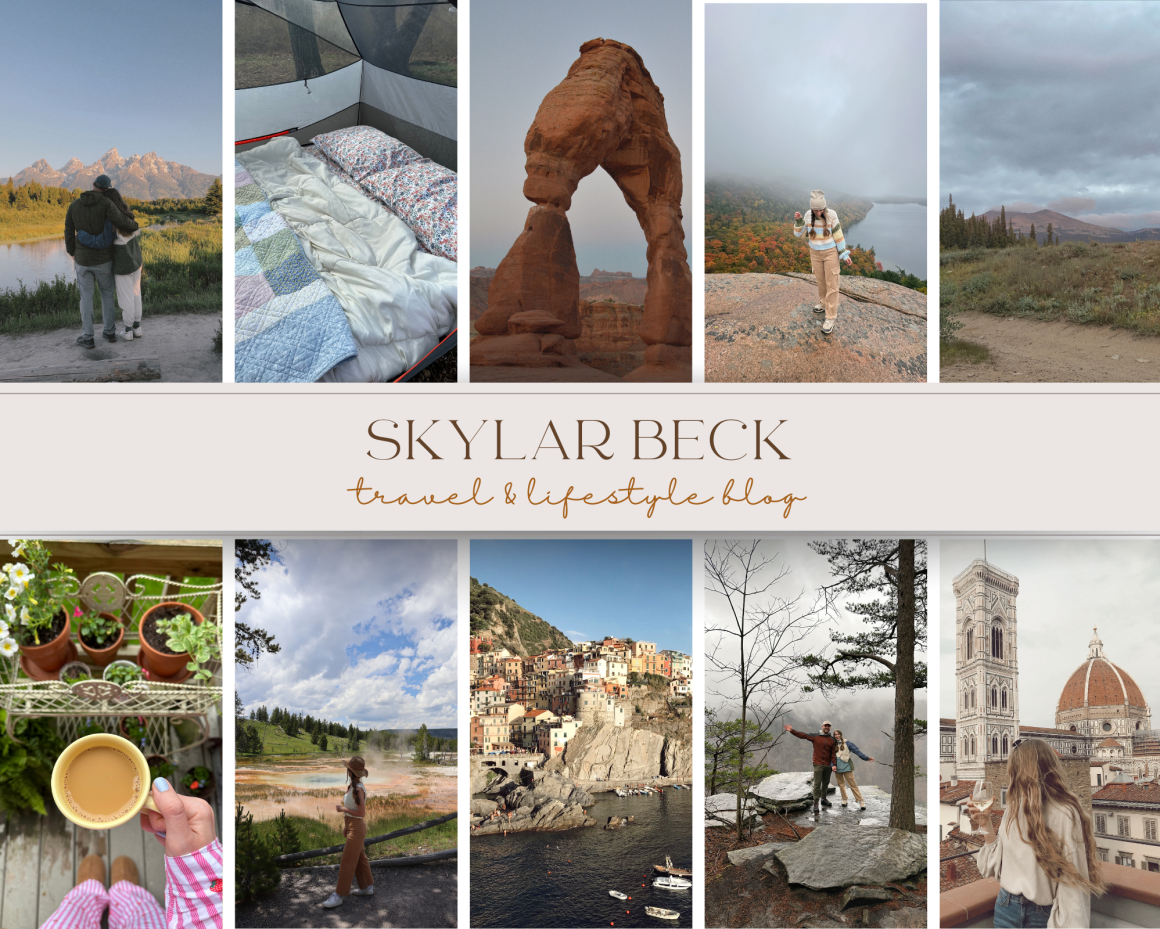
One of my favorite road trips I’ve ever done was exploring the national parks throughout Wyoming. Two of the most popular national parks in the country are also located here, Grand Teton and Yellowstone! These two parks are very close to each other which makes road tripping between the two convenient. In this guide, I’ll be sharing tips I gathered throughout my own experience from visiting these two incredible parks.

Things to Know Before Visiting

Best time of year to visit

It seems like the ideal time of year to visit either of these parks is the Summer or Fall. I also think Spring and Winter would be beautiful, but access to the park may be limited due to snow. By Summer time (May-August) the snow has melted, it’s warmer throughout the day, and the majority of the park is open.

Wildlife

Yellowstone and Grand Teton national parks are well known for their incredible wildlife. It’s important to respect the wildlife you may see by observing from a safe distance. The national park recommends you keep a 100 yard distance from bears and wolves, and 25 yards from bison and other animals. Both of the parks are also home to grizzly bears. And while this can seem scary, usually bears aren’t searching for you. However, if you plan to hike there’s a chance you may see or encounter a bear. If you can, it’s recommended you hike in small groups of three or more and carry bear spray or bells at all times. When we hiked, we also played music on some remote parts. The park also recommends making noise from the bells, music, or by talking to fellow hikers, this way, bears will know humans are in the area and will likely avoid that area.

Where to stay

If you like to camp, there are various campgrounds within the Grand Teton national park as well as free spots to camp for the night as well. Throughout our trip, we stayed at Jenny Lake campground and a few free camp spots I found on Campendium. Throughout the summer months there are also cabins and lodges within the park, check out here. Yellowstone national park also has a variety of campgrounds spread across the park. While we were in Yellowstone, we stayed at Canyon campground and loved it! There was laundry and shower amenities included in the reservation as well which was amazing. If you aren’t a camper, luckily, Grand Teton is close to Jackson Hole which is an amazing town with plenty of overnight accommodations. Similarly, Yellowstone has a variety of lodging options! As always, I’d recommend making any sleeping accommodations as far in advance as you can since the summer is peak season for both parks.

Park passes

I’d recommended buying the America the Beautiful park pass if you plan to visit both parks. Especially if you plan to continue on to other national parks nearby. The pass is $80 and gets you into national parks for a year. Otherwise it’s $35 to enter each park.

What to pack

  • Hiking shoes. Hiking boots or shoes will work best for the trails and long walks you’ll be taking while visiting both parks.
  • Hiking poles. These definitely come in handy when hiking up steep trails.
  • Layers. Even in the summer, the mornings and nights at both parks were chilly.
  • Backpack. This is handy when hiking or walking around to various sights.
  • Camera. A phone is great for this but if you do have a camera, bring it along too! There’s so much to capture on film while visiting both parks.
  • Navigation. I’d recommend downloading maps a head of time, both parks have limited cell service within the park. We love using google maps and park wolfe (free maps of the national parks that don’t require wifi or cell service to see) to navigate routes throughout the parks and AllTrails to download hikes in advance to follow the trail via your phone (helpful if you get lost or turned around on a trail!).
  • Headlamp. We love our headlamps for early morning hikes or adventures.
  • Water bottle.
  • Sunscreen.
  • Bug spay.
  • National park pass or entrance passes.
  • Camping or lodging reservations.

Itinerary Outline

Starting the trip will depend on where you are coming from. Since we were driving in from the East, we started our trip at Grand Teton. If you fly in, you can decide which location you’d rather start at (you can’t go wrong either!). For this itinerary, I’ll be sharing things to do in the Grand Teton and Yellowstone national parks based off our experience and I’lll also be adding a few stops and sights we didn’t get to see but I’d recommend!

Grand Teton National Park

Grand Teton national park is one of my favorite parks I’ve visited yet. There’s so much to see and do while visiting and I loved how close the park is to Jackson Hole. We spent about four days throughout the park which I thought was the perfect amount of time, but you definitely could see most highlights in two to three days if that’s all you have.

Must Do’s in the Tetons

Wake up early to catch a sunrise. Grand Teton was my favorite place to watch the sunrise. There was something so magical about the way the Teton mountains changed colors while the sun came up. A few great places to catch the sunrise are:

  • Mormon Row
  • Schwabacher Landing
  • Oxbox bend

Take a drive on the scenic roads within the park. Grand Teton offers two scenic routes, the outer road, also known as Highway 191 and the inner road, also known as the Teton Park road. See the map above for reference.

Inner road pull off spots to see:

  • Windy point turnout
  • Teton Glacier turnout
  • Jenny Lake overlook
  • Cascade Canyon turnout
  • Mountain View turnout
  • Mount Moran turnout
  • Potholes turnout
  • Oxbow Bend turnout

Outer road pull off spots to see:

  • Elk ranch flats turnout
  • Snake river overlook
  • Teton point turnout
  • Schwabacher landing road
  • Glacier view turnout

Take a hike! The Grand Tetons has some incredible hikes that offer some of the best views! A few hikes I’d recommend are:

  • Hiking to Hidden falls and Inspiration point. There’s a boat shuttle available you can take from Jenny Lake that drops you right near the trail head to hike up to hidden falls. If you feel up for a longer hike, continue on past Inspiration point and hike towards Cascade Canyon. This is a long hike but it’s worth doing parts of it!
  • Cascade Canyon. This is a long hike but we were able to hike parts of it and combined it with the Jenny lake loop so we could also see hidden falls and inspiration point like I mentioned above.
  • Delta lake. This is a stunning but strenuous hike that takes you to delta lake. We attempted to hike this trail but had to turn around after a few miles due to Patrick getting elevation sickness. Make sure you go prepared with plenty of water and snacks as well as giving yourself time to adjust to the elevation in the area.
  • Taggart Lake. This is a fairly moderate 4 mile hike that takes you to Taggart Lake. The views along this trail were beautiful and gives you another lake to spend time at within the park.

Stop by the Jenny Lake visitor’s center for some park souvenirs.

Drive the scenic Jenny Lake road and take a walk along the lake. This was such a hidden gem! It was such a special view of Jenny Lake, and both times we stopped by, there were barely other people there.

Spend time in Jackson Hole, Wyoming. Such a great town with a fun western vibe!

Drive to the Cotler Bay village area and spend time by the water. There’s also options to kayak or swim here.

Sunrise at Mormon Row
Oxbox Bend pull off spot along scenic “inner” road
Mountain View turnout spot along scenic road
Views along trail towards Cascade Canyon
Hidden falls
Sunrise at Schwabacher landing
Downtown Jackson Hole
Cowboy Bar in Jackson Hole
Jenny Lake scenic area

Yellowstone National Park

Yellowstone National park is so big, it’s technically in three different states (Wyoming, Montana, and Idaho!). For this guide, I’m recommending things we did on our trip that were mostly in Wyoming. We spent two days exploring but I’d recommend at least three to full experience the park. Yellowstone is divided into two loops: the northern and southern. If you can, I’d recommend spending part of the trip in the north loop and the other in the south loop if you want to cut down on driving time per day. We ended up driving back and forth between the loops throughout our trip and it was doable but more time consuming to get to various points so keep that in mind. For this guide, I’ve divided activities into the north and south loops to make it easier to plan and follow.

Must Do’s in Yellowstone

North Loop must do’s

Drive to Hayden or Lamar valley to watch wildlife. These are two valleys the park recommends that usually have bison and other wild life grazing. We had so much luck at Hayden valley, it was so incredible to see bison up close! We were able to marvel at these beautiful animals for the safe distance within our car. Hayden valley is closer to the Grand Canyon of Yellowstone and Lamar is more north on the northern loop of the park.

Check out the Grand Canyon of Yellowstone. This was one of my favorite experiences while visiting the park, it’s stunning and there are multiple few points to give different perspectives of the canyon. Our favorite few points to check out:

  • South Rim drive: Artist’s point and upper falls lookout point.
  • North Rim drive: brink of lower falls, inspiration point, grand view point, and lookout point

Stop by Tower Falls. We didn’t have the chance to see this but I’ve heard it’s a great spot to add on your Yellowstone itinerary.

Drive to see Mammoth hot springs. The lower terrace of the hot springs was so unique and stunning we were in shock. This is a fairly quick stop but I’d say it’s a must see while visiting Yellowstone. 

Spend time exploring the Norris Geyser Basin area to see more beautiful geysers and springs. This area is similar to the old faithful area, with boardwalks that lead you to view points of the various geysers and springs.

South Loop must do’s

Stop by Gibbon Falls. Around this area is also the Gibbon river which is a nice spot to fish if that’s your thing!

See ‘Old Faithful’ erupt! This is one of the most popular geysers to see, mostly because it erupts consistently every 60-90 minutes. We used the website, geyser times, to check in advance when the next predicted time frame was for Old Faithful to erupt so we didn’t have to wait too long.

See other geysers and pools in the old faithful area. There’s so many geysers and spring pools in this area connected by boardwalks which make it easy to site see. Some other geysers or pools I’d recommend checking on in this area:

  • Castle geyser
  • Daisy geyser
  • Spa geyser
  • Morning Glory pool
  • Grotto geyser
  • Grand geyser
  • Beauty pool

Check out the Grand Prismatic spring. This is another iconic spot in the park that is a must see! We drove to the fairy falls trailhead to hike to the overlook which gives you an above view of the spring. The hike to the overlook is about 1.5mile and a bit steep at times, but the view is definitely worth it! There’s also the option of viewing the grand prismatic at ground level, but I’ve heard this angle makes it harder to see all of the vibrant colors.

Watch the sunset. I’d recommend watching the sunset back at Hayden valley, which is what we did, and it was beautiful!

Stop at any ‘Yellowstone General Store.’ While we visited, there were so many of these stores throughout the park that offer restrooms, souvenirs, and food options.

Old Faithful viewing area
Spring pools
Bison!
Grand Spring Prismatic
Mammoth Hot Springs
Geyser pools
Grand Canyon of Yellowstone
Exploring geysers and pools
Morning glory
Bison at Hayden Valley

More Guides to Read

Two Days in Yellowstone National Park

Travel Guide to Grand Teton National Park

Detailed Road Trip Itinerary: South Dakota, Wyoming, and Montana

Two Week Out West Trip Itinerary: Colorado and Utah

Last Summer, I went on my first cross country road to explore five different National Parks within Colorado and Utah. Traveling from Ohio, I knew very little about States out west and I spent several months doing research, making reservations in advance, and planning out a two week itinerary for my boyfriend and I. This trip included time in the Rocky Mountains National Park and time within Utah exploring 4 out of the 5 National Parks in the state. If you’re planning a similar trip, I hope this itinerary I developed is useful or gives some ideas to add to your own road trip itinerary!

Two Week Itinerary

Day One: Travel Day

Since we were traveling from Ohio, we decided to break the drive out to Colorado into two days. We stopped in Nebraska on our way after about 13 hours of driving. We found a hotel near Omaha, NE for the night.

πŸŒ› Hotel in Omaha, NE

Day Two: Travel Day

On our second day, we left Omaha bright and early for a 7 hour drive to Boulder, CO. Once we arrived in Boulder we spent time walking around town and exploring Pearl St. which is an iconic spot in downtown Boulder that features fun shops and restaurants. My favorite part of this day was spending time at a free campsite we found just outside of Boulder, CO. This campsite was about an hour from downtown Boulder and 45 minutes to Rocky Mountains National Park.

Tips:

  • I found all of our free campsites off the Campendium or freecampsites.net
  • We purchased the America the Beautiful National Park pass which was $80 and covers entrances to all National Parks.

πŸŒ› Beaver Reservoir Dispersed Camping

Day Three: Rocky Mountains National Park

On day three, we woke up bright and early to enjoy sunrise at our campsite before heading into Rocky Mountains National Park. On our way into the park, we stop in downtown Estes Park for some breakfast. We found Kind Coffee which was definitely a favorite stop of ours! After some coffee and breakfast we spent our first day hiking in the Bear Lake area and hiked to Bear, Nymph and Dream lakes. After hiking in this area, we stop at the visitor’s center and explored more of Estes Park. For the next two nights we stayed at one of the campgrounds in the Park, Glacier Basin.

Tips:

  • I wrote a blog post about our experience in RMNP if you’re looking for an in depth guide, read here.
  • Campground reservations can be made 6 months in advance, so if you know your dates book as soon as you can!
  • Rocky Mountains National Park requires a vehicle reservation to enter the park during certain hours. I discuss this in depth in my post dedicate to RMNP.

πŸŒ› Glacier Basin Campground

Day Four: Rocky Mountains National Park

Our second full day in RMNP was a busy one! We spent our entire morning hiking to Mount Ida. From the Glacier Basin campground, this trailhead is about an hour away. The best part about the drive there is driving along the iconic Trail Ridge Road which is the highest highway road in the country! It was incredible to experience the views and the road during sunrise. We saw so much wildlife and almost had the entire road to ourselves since it was so early. To hike Mount Ida, you can park at Milner Pass parking lot. This hike was a strenuous 9 mile hike but the views were some of the best I’ve ever seen! After this hike, we went into town to take a shower. We found a local laundry mat that had showers for visitors that cost $4. That evening we had dinner in town at the Bird & Jim, which was delicious!

πŸŒ› Glacier Basin Campground

Day Five: Travel Day

We were pretty exhausted after a long hike the day before so we slept in and took our time leaving Colorado. We stopped in Estes Park for the last time and got another cup of Kind Coffee before starting a 6 hour drive to Moab, UT. We planned to car camp once we arrived to Moab and we were surprised to find several camping areas off the main road that were first come first serve. We picked the first one we could find which was Upper Big Bend Campground and paid $20 for a spot that night. This night was extremely hot compared to the nights we just experienced in Colorado. The campsite we chose was about 15 minutes from Arches National Park which was super convenient.

Tips:

  • I have a blog post dedicated to our time in Arches National Park with more details of our experiences, read here.
  • Arches National Park requires a vehicle reservation to enter the park during certain hours. I discuss this in depth in my post dedicated to ANP.
  • All campgrounds in the area we stayed were $20 per night for a camp spot.
  • The campgrounds off the main road that we found had no running water, no showers, and no flush toilets.
  • Moab, UT is known as boondocking country, meaning there’s a lot of free camp spots surrounding Moab! Check out Campendium or freecampsites.net to find a free spot. Most are quite a drive from the park which is why we decided to pay $20 to be close.

πŸŒ› Upper Big Bend Campground

Day Six: Arches National Park

We woke up around 3:30am tired but excited to drive into Arches National Park for the day. We drove to Delicate Arch trailhead to begin a sunrise hike to this iconic arch. It took about an hour to hike to the top and we made it just before the sun started to rise. Delicate arch is incredible in person and much bigger than I imagined. We spent a couple hours admiring Delicate Arch before hiking back down. Afterwards, we explored more Arches in the park. It was extremely hot so we didn’t last long out in the heat. This night we ended up booking a hotel room to escape the heat and it was definitely worth it!

πŸŒ› Scenic View Inn and Suites Moab

Day Seven: Arches National Park/Travel Day

We slept in and explored downtown Moab before heading back into Arches National Park. We spent some more time driving through Arches National Park admiring Arches from a distance and stopping along viewpoints. We also took some time to explore Park Avenue which was one of the coolest spots we visited in the park. Afterwards, we prepared for a 4.5 hour drive to Bryce Canyon National Park. Once we arrived, we stayed at a free camp spot, Tom’s Best Spring Dispersed Camping which is about 15 minutes from the park.

πŸŒ› Tom’s Best Spring Dispersed Camping

Day Eight: Bryce Canyon National Park

We only planned for one day in Bryce Canyon so we woke up early to make the most of our time. We started the morning at Inspiration Point for sunrise, this was an incredible spot but I imagine any spot in the park is amazing to watch sunrise. After sunrise, we drove to Sunset Point to hike the Navajo and Queen’s Garden loop trail. This was the perfect hike to do with only a day in the park. We were able to see the highlights of the park and spend time admiring all of the hoodoos! We ended the day by driving to Zion National Park which was a 2 hour drive.

Once we arrived in Zion, we went to Zion Outfitters to pick up rented gear for the Narrows hike. We then went to a free camp spot we found but ended up booking a reservation at Gooseberry Lodges last minute due to extreme heat temperatures and a thunder storm that was predicted. This was a great decision and gave us a comfortable place to sleep each night while visiting Zion. Gooseberry Lodges offer small private cabins for an affordable price and the location is about 45 minutes from the park.

Tips:

  • I have a blog post dedicated to our time in Bryce Canyon National park, read here.
  • Tom’s Best Spring Dispersed Camping was an awesome free spot, the spaces were spread out and there was cell service which was a first!
  • I have a dedicated post to our time in Zion, read here.

πŸŒ› Gooseberry Lodges

Day Nine: Zion National Park

Our first day in Zion was a full day! We started the day bright and early with a sunrise hike to Canyon Overlook which was one of my favorite memories, the views from this one mile hike were amazing. Afterwards we drove into Springsdale which is the closest town to Zion and got breakfast sandwiches from Deep Creek Coffee. Our next hike was The Narrows which was one I was most looking forward to as we planned our trip. We had already picked up our gear the night before which saved time. We got on the shuttle near the visitor’s center to begin our hike to The Narrows and got off at shuttle stop #9. We spent about 4 hours hiking in the Narrows. That night, we ordered dinner from a local spot near our cabin and enjoyed some time out by the fire after a long day of adventuring!

Tips:

  • During busy season, Zion requires visitors to use their shuttle system to access most trailheads. The shuttle is free and the easiest spot to pick up the shuttle is at the visitor’s center.
  • Canyon Overlook is one of the only areas you can drive in your personal vehicle to get to.
  • I would definitely recommended renting the gear if you plan to hike the Narrows.

πŸŒ› Gooseberry Lodges

Day Ten: Zion National Park

On our second full day in Zion, we planned to hike to Observation Point. This hike offers one of the best views in Zion and a lot safer then Angel’s Landing! Be sure to read my blog post about Zion if you’re planning to hike to Observation Point as there’s a lot to know in advance. After an afternoon hike to Observation Point we spent the rest of the day walking around Springsdale, souvenir shopping and catching up on laundry.

πŸŒ› Gooseberry Lodges

Day Eleven: Travel Day

We slept in and drove into Springsdale to stop at our favorite coffee shop one last time, Deep Creek Coffee. Our last National Park on this road trip was Capitol Reef National Park, which is about 3.5 hours from Zion National Park. The drive to Capitol Reef from Zion is a bit boring and as you enter the nearby towns to Capitol Reef, it feels like you’re in a Western movie. Capitol Reef is quite literally in the middle of nowhere so restaurants and shops are very limited. Since we arrived to the park later in the afternoon, we didn’t hike but spent time exploring the scenic drive which is about 8 miles one way to Capitol Gorge. This is a historic drive that offers stunning views of the park, definitely a must see. After a long day of traveling, we checked into our hotel for the next two nights, Capitol Reef Resort.

Tips:

  • I wrote a separate blog post about our time in Capitol Reef that provides more information about our time in the park, read here.

πŸŒ› Capitol Reef Resort

Day Twelve: Capitol Reef National Park

Our first full day in Capitol Reef was actually my birthday so I picked the activities we did this day! I was most looking forward to hiking to Cassidy Arch which is an iconic spot in Capitol Reef. The hike to Cassidy Arch was tough but definitely worth the view at the end. Afterwards, we explored the fruita district of the park and stopped by Gifford Homestead for fresh pies, which were amazing! We also planned to hike the grand wash trail which is another popular spot in the park, but due to extreme heat temperatures we only hiked the beginning on this trail before turning back.

πŸŒ› Capitol Reef Resort

Day Thirteen: Travel Day

We woke up early and enjoyed breakfast at the hotel before leaving Capitol Reef. We started our trip back to Colorado with a plan to stop in Vail, CO for the night. Vail is about 5.5 hours from Capitol Reef National Park. This trip felt longer than other days, most likely due to general exhaustion from a long road trip! Once we arrived in Vail, we camped at Camp Hale Memorial campground. This campground was stunning and so scenic and quiet. It truly was the perfect way to end our road trip. This campground was about $30 for the night and it was available to reserve in advance but when we arrived there were plenty of empty spots available as well.

πŸŒ› Camp Hale Memorial Campground

Day Fourteen: Travel Day

From Vail, CO we woke up around 4am to drive towards Des Moines, IA for our stopping point. We drove about 12 hours to get to a hotel for the night. We arrived around dinner time and ordered in food at a nearby restaurant and went to bed early to prepare for another long travel day!

πŸŒ› Hotel near Des Moines, IA

Day Fifteen: Travel Day

We left Des Moines bright and early and headed back towards Ohio which was about an 10 hour drive. We arrived home mid afternoon after a long two week road trip! This road trip gave me some of my best memories and it was definitely worth all the early mornings, days without service, heat exhaustion, and long days in the car.