Grand Teton National Park, Wyoming

The Grand Teton national park will hold a top spot on my favorite national parks lists. I finally had the chance to visit this incredible park and I was in awe with its beauty. We spent a few days in the park and we were able to see most of the highlights. Here’s an overview of what we did and some tips I learned from after our experience.

Things to Know About the Grand Teton National Park

  • The park requires an entrance fee. It’s $35 for a 7 day period. I’d highly recommend purchasing the America the Beautiful pass if you plan to visit multiple national parks at once (like combining the Tetons and Yellowstone into one trip). The annual pass is $80 and gets you into any national park for a year!
  • The Grand Teton’s closet town is Jackson Hole, Wyoming. I would recommend spending time in Jackson, it’s about 30-40 minutes outside of the park, depending on the area you’re staying in. There’s plenty of restaurants, stores, and accommodations if you’re unable to stay inside the park.
  • The Grand Teton is about an hour and a half from the southern part of Yellowstone national park, which is why many people travel to both these parks in the same trip!
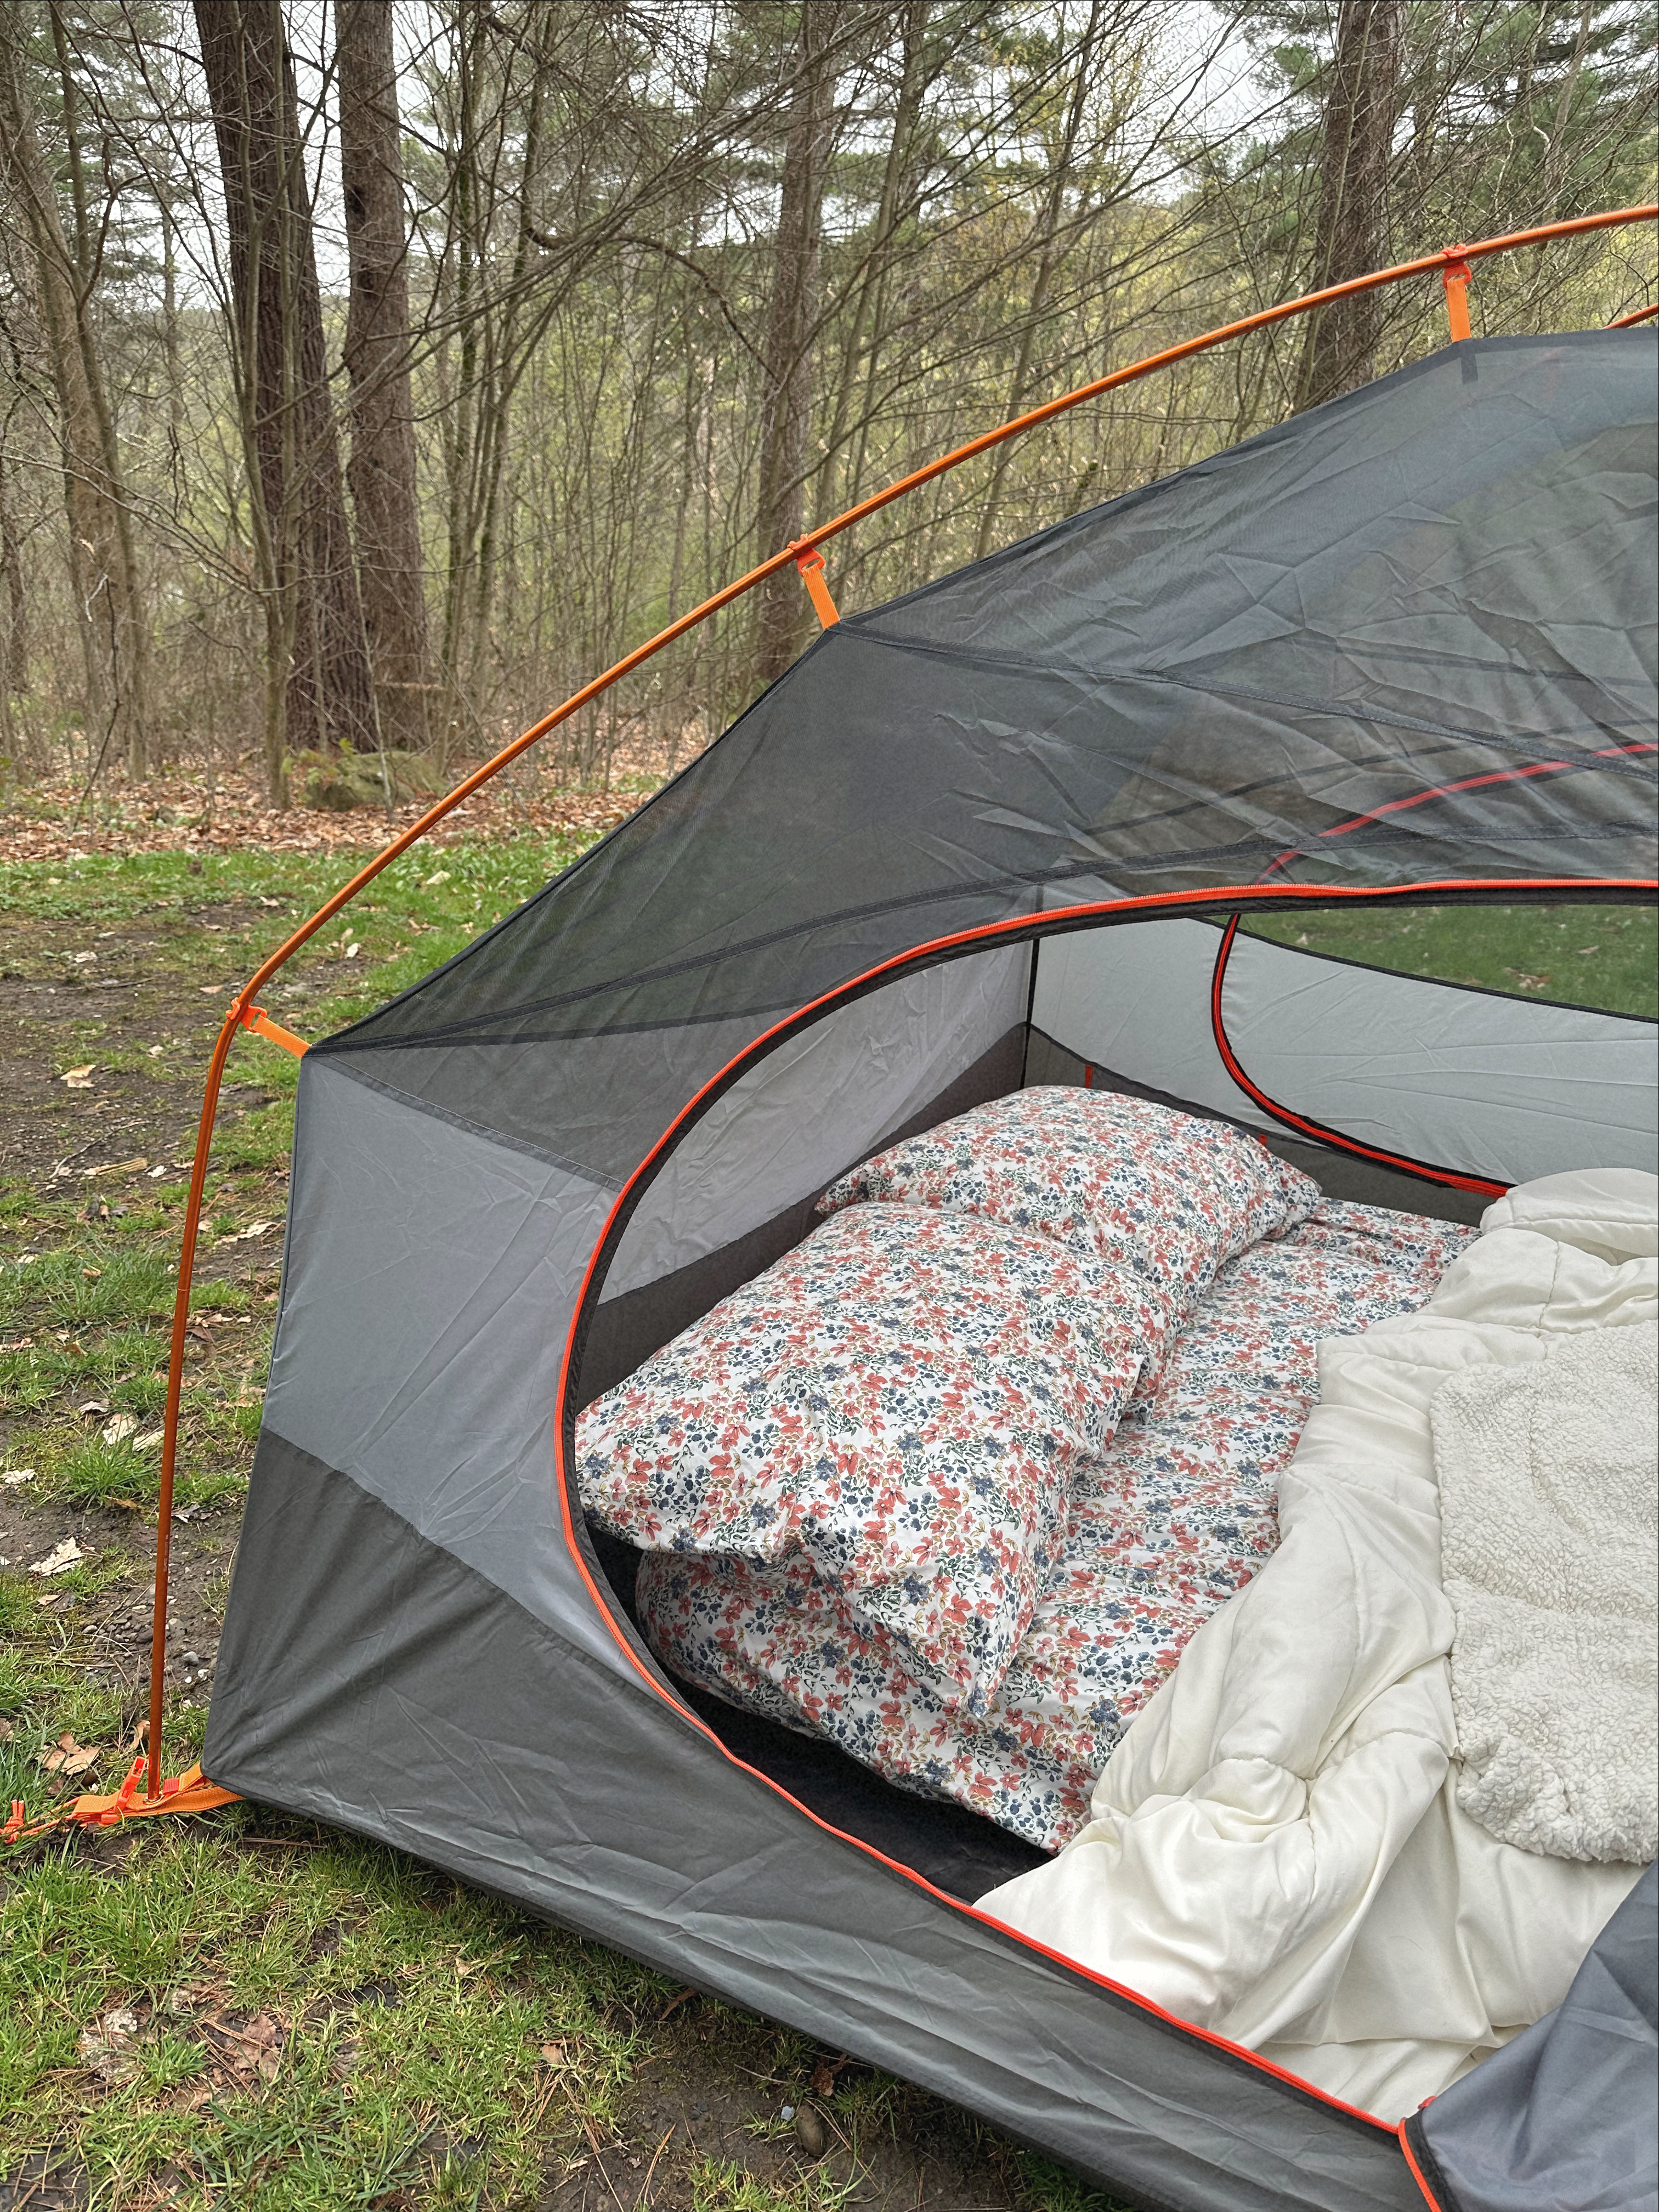
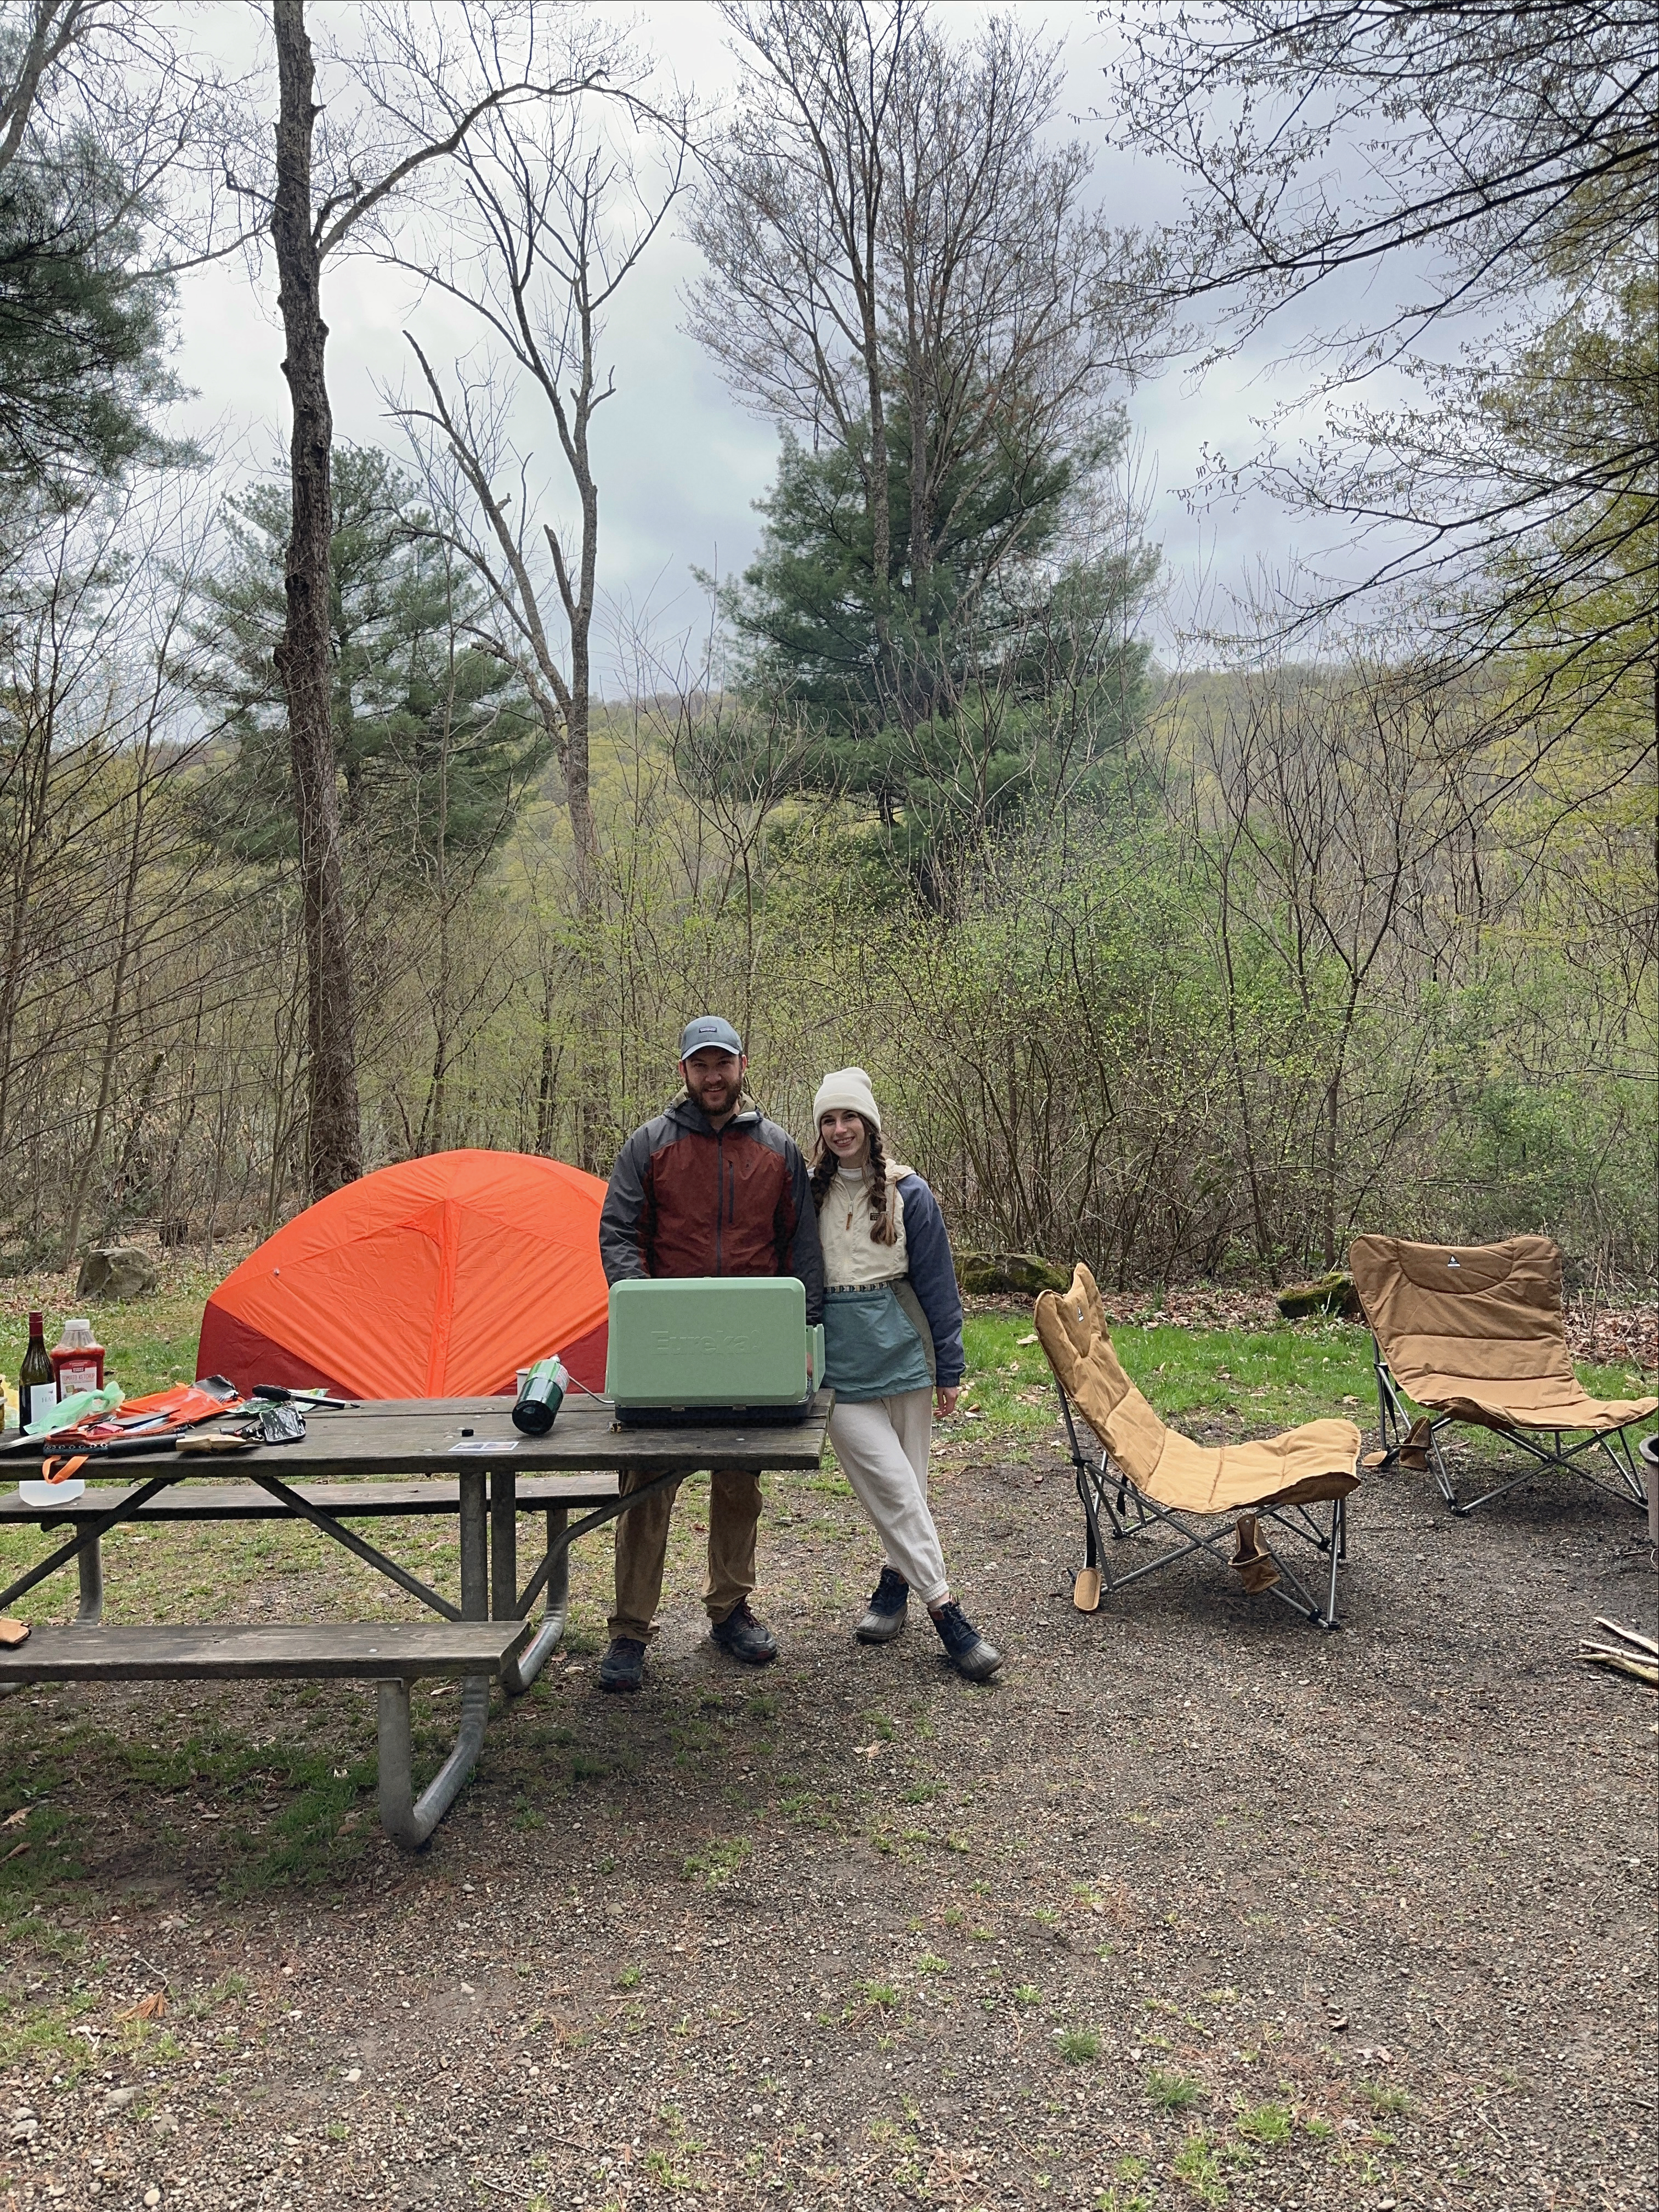
  • There are six established campgrounds within the GTNP which are all conveniently located throughout the park. As always, I’d suggest making a reservation well in advance if you plan to camp. We stayed at Jenny Lake campground which is tent only and this was a very central location. Be sure to research on where in the park you’d like to be, the campgrounds are spread across the entire park.
  • Other than campgrounds, there were a decent amount of free camp spots which was a nice surprise! We stayed at a free spot for three nights before moving to our campground. These free camp spots were definitely more crowded then others we’ve stayed at but it was nice to have a free sleep!
  • There are camp showers available for $6 at Signal Mountain and Colter Bay campgrounds. We went to Signal Mountain every day until we checked into Jenny Lake campground, which also has showers. Signal Mountain and Colter Bay areas also have laundry services available for use.
  • The Grand Teton is a relatively small national park and there’s two sides to it, one is highway 191 (outer road) and the other is the scenic drive (inner road) which includes many beautiful look out points and access to popular trails. Interestingly, if you stay on the side of highway 191, you don’t have to pay an entrance fee even though you’re technically in the park!

Things to Do in GTNP:

Day One

Overview:

  • Sunrise at Mormon Row
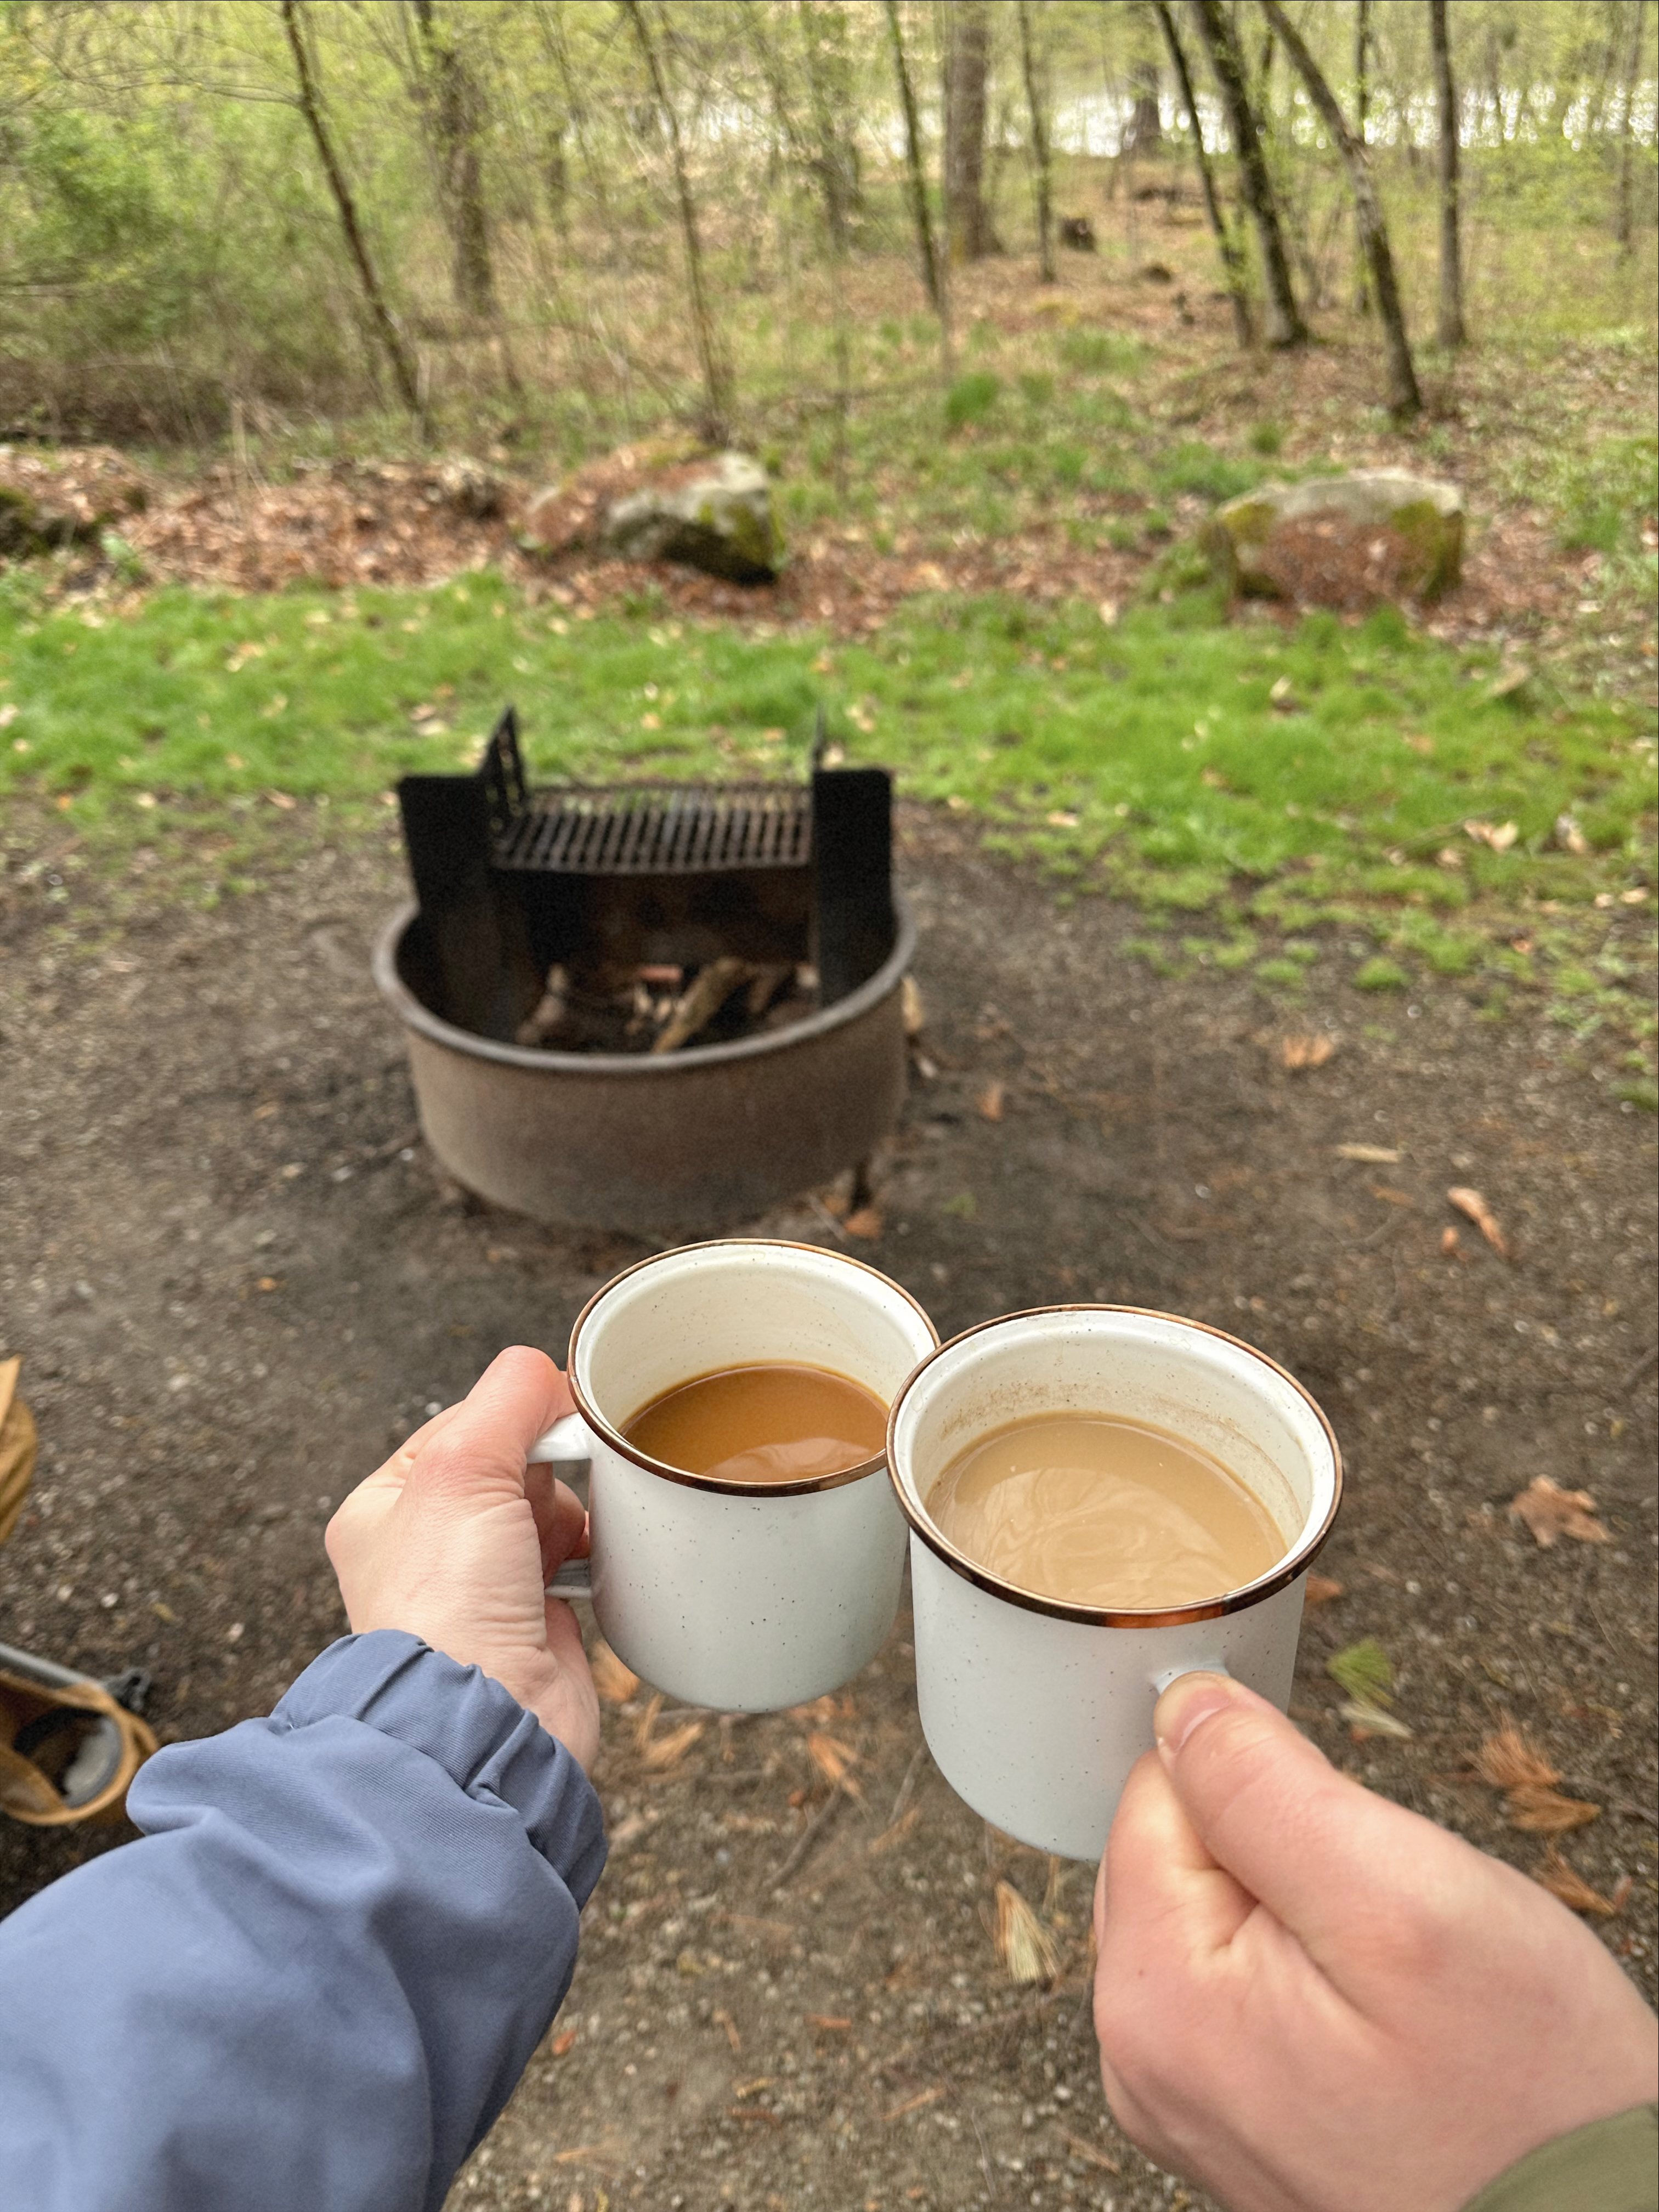
  • Stop at Cowboy Coffee
  • Explore Jackson
  • Fishing stop at Pacific creek
  • Drive along Teton park road

On our first full day in the park, we started the morning bright and early for sunrise at Mormon Row. This was by far one of the most beautiful sunrises I’ve ever seen. The one take away I had from our time in the Tetons was to never miss a sunrise. Mormon row was full of other people even at 5am waiting to watch the sun come over the Tetons. The lighting in the morning changed so fast here, the pink sky only lasted for a few minutes which made the experience even more magical. After sunrise, we drove into Jackson for coffee and breakfast. One of our favorite spots in Jackson was Cowboy Coffee. It’s a popular place for good reason!

After breakfast we walked around Jackson before driving back into the park. Most of the afternoon we spent time at Pacific Creek because Patrick wanted to fly fish. There were some great spots for fly fishing if that’s your thing too! While Patrick fished, I spent time exploring nearby areas and taking photos. We ended our first day driving along the Teton park road (the “inner” road of the park). After a beautiful first day, we went to our free camp spot for the night, which I found using the campendium app.

Sunrise at Mormon Row
Exploring Jackson
Cowboy Coffee
Exploring Jackson
Sunrise view of the Tetons at Mormon Row

Day Two

Overview:

  • Sunrise at schwabacher landing
  • Hike part of Cascade Canyon
  • Spend the afternoon in Jackson souvenir shopping
  • Dinner at Hand Fire Pizza

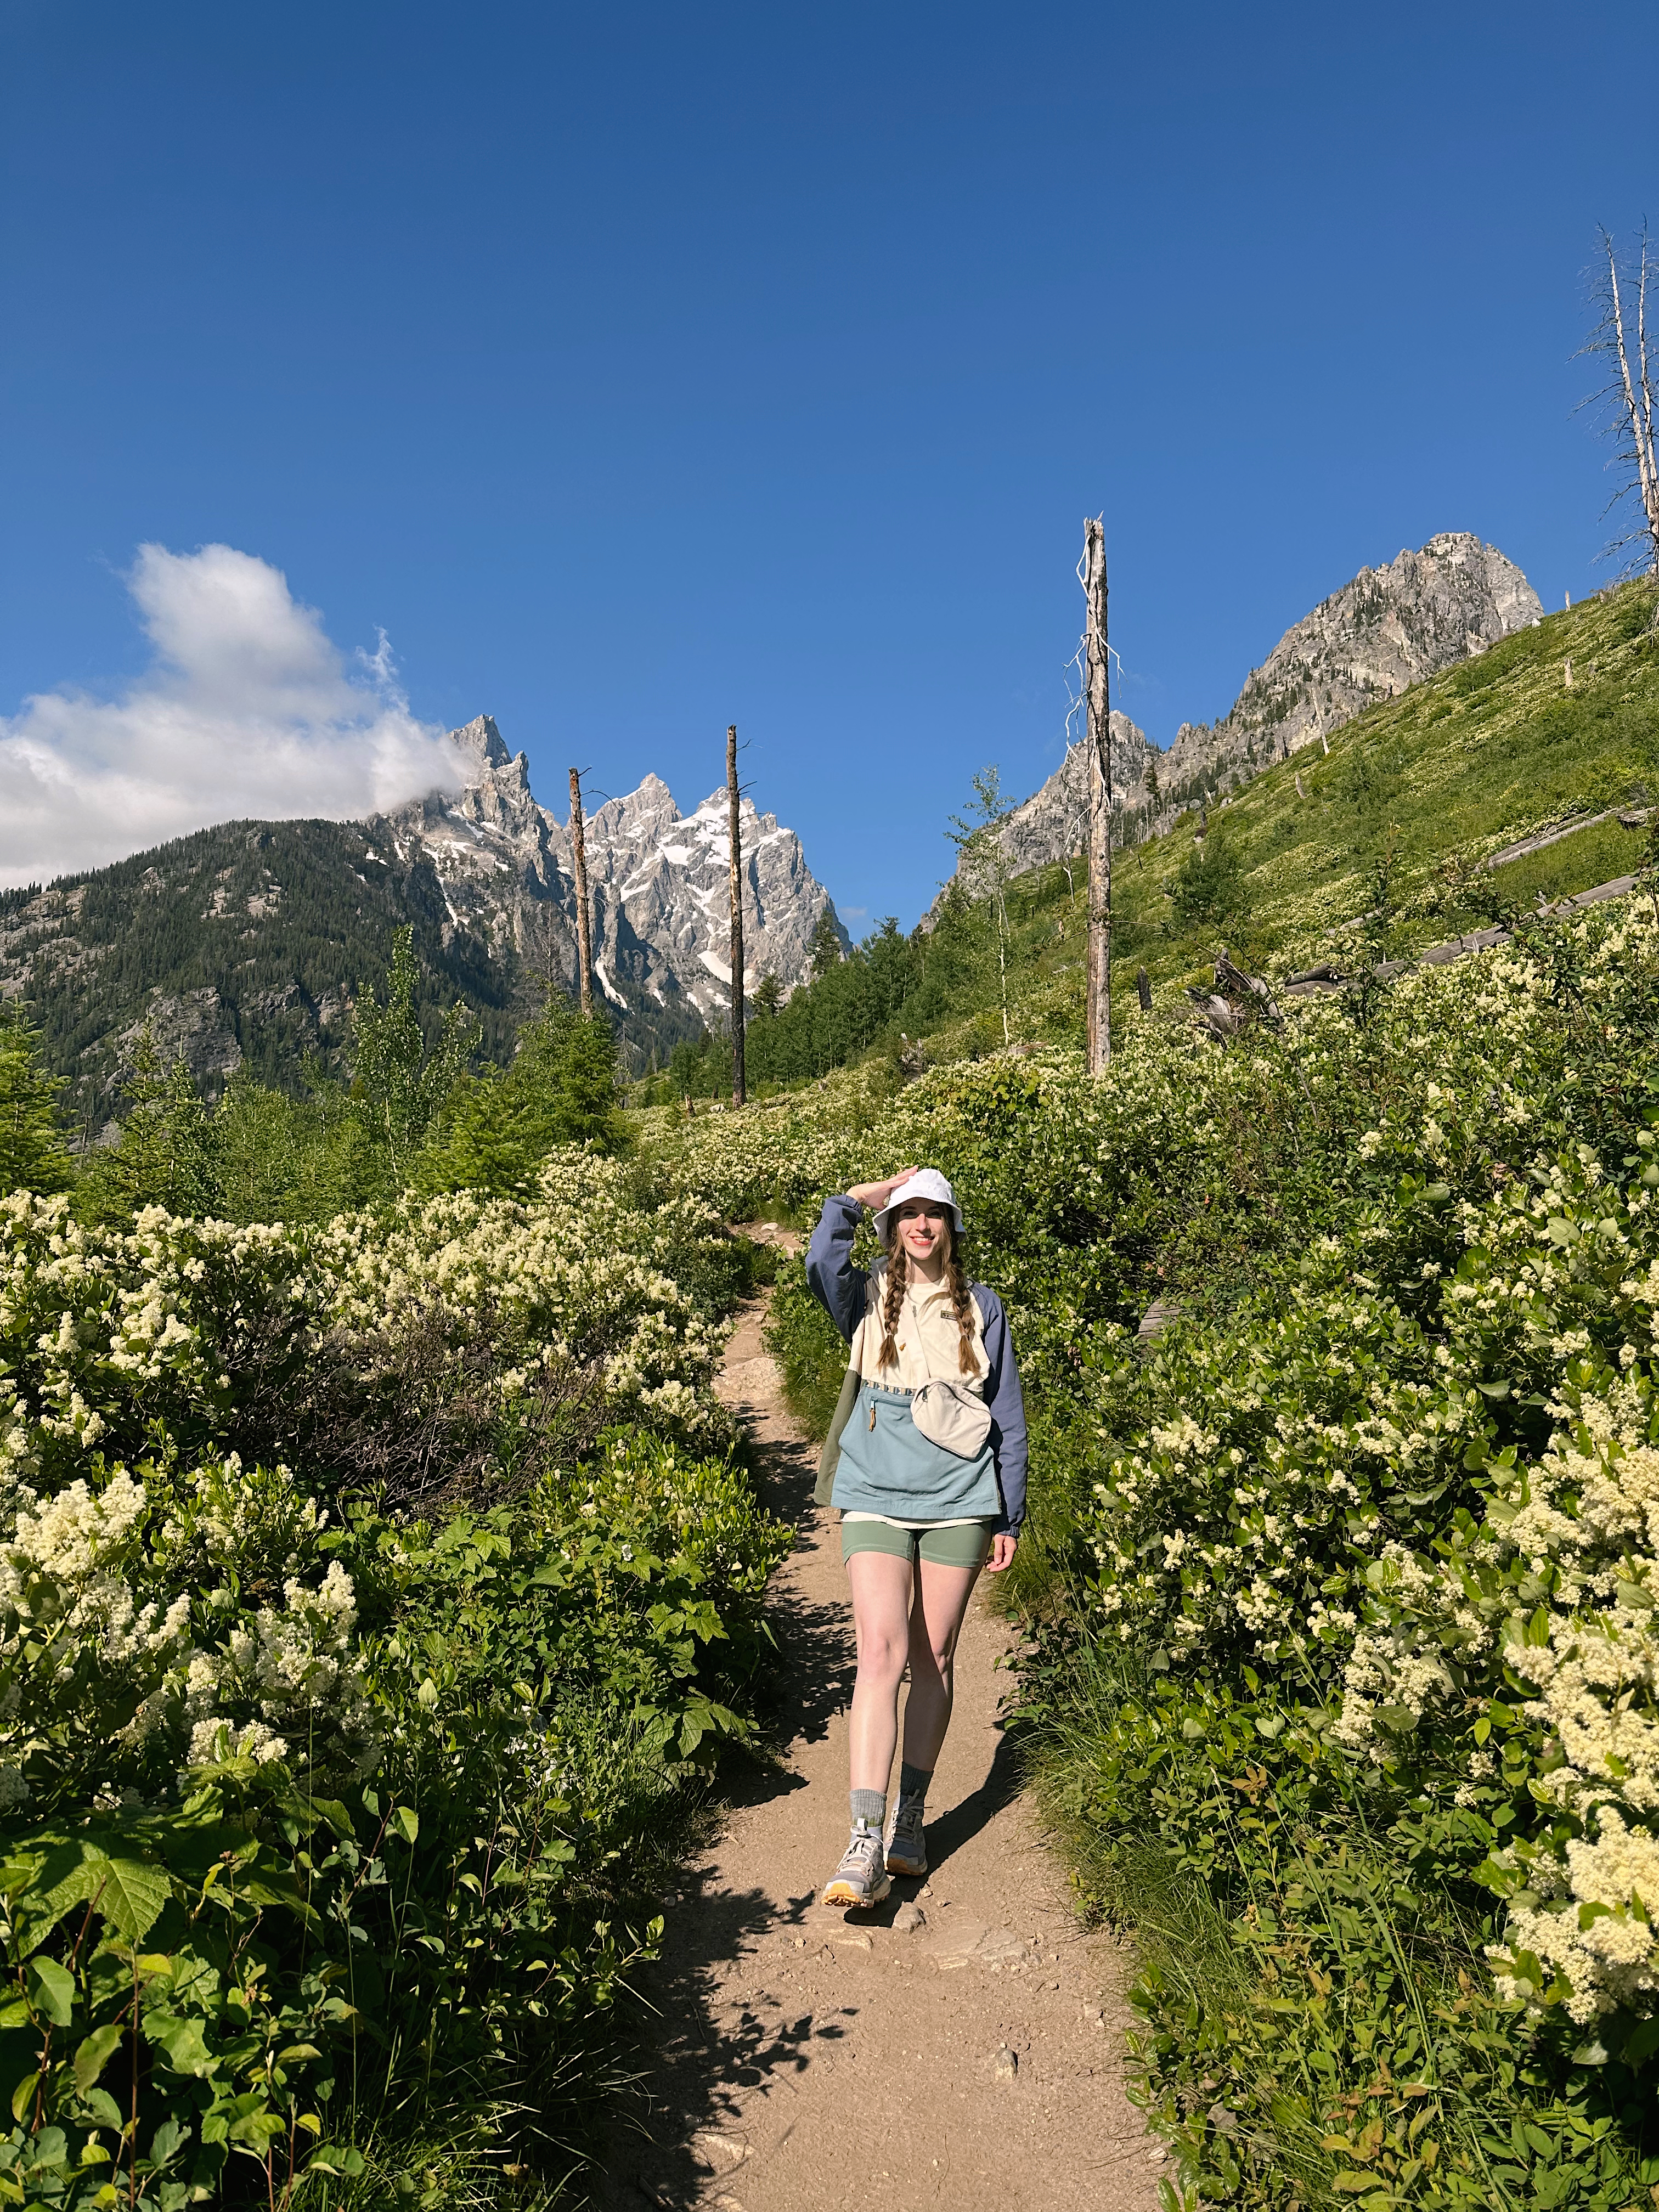
Day two was on of our favorite days in the park! We started the morning at another well known sunrise spot, Schwabacher landing. This spot is on the “outer” road of the park, along highway 191. There were a lot of other people here for sunrise, but we still managed to have a great view to watch the sun rise over the Tetons. We spent a couple hours here before heading back to the car to make breakfast and coffee. After some fuel, we headed to the String Lake area to access the Cascade Canyon trail. There are a few different ways to access this trial. We started at String Lake and walked along Jenny lake before connecting to the Cascade Canyon trail head. We didn’t plan to hike the entirety of cascade canyon but total we hiked about 8 miles. This was a stunning hike and we were able to see some famous spots in the park along this trail such as:

  • Inspiration point
  • Hidden Falls
  • Jenny Lake loop

After a full afternoon hiking, we stopped by signal mountain camp area to shower. Showers here are available for $6 and it gives you 7 minutes to shower. The showers here were extremely clean and lots of room which was a luxury compared to other public showers we’ve used. We then drove into Jackson for dinner and souvenir shopping. We decided to have dinner at Hand Fire Pizza which was amazing! After dinner we headed back into the park to set up camp for our first night at Jenny Lake campground.

Sunrise at Schwabacher landing
Morning coffee
Sunrise at Schwabacher landing
View along Cascade Canyon trail
Views along Cascade Canyon trail
Hidden Falls

Day Three

Overview:

  • Sunrise exploring scenic highway
  • Breakfast at Jenny Lake visitor’s center
  • Taggart Lake
  • Jenny Lake scenic drive

On our last full day in the tetons, we woke up bright and early. Patrick wanted to fish again so I dropped him off at Pacific Creek. For the rest of the morning I explored parts of the scenic drive, pulling over for photos as the sun rose over the tetons. I made my way back to camp and walked around the Jenny Lake visitor’s center area. Inside one of the general store’s in this area, they serve coffee and breakfast sandwiches. It started for campers but is now available for anyone stopping by the area in the morning. The breakfast sandwich was delicious and just what I need after an early morning. Once Patrick was done fishing, we went for a short hike at Taggart Lake. This is a brief loop trail that takes you around Taggart Lake. It’s a fairly moderate hike that can be completed in a couple of hours or less. We took showers at our campground, Jenny Lake, and it was $5 for 6 minutes.

For our last night in the Grand Teton national park, we drove along the Jenny Lake scenic drive. This drive is so beautiful and perfectly hidden from the main road, we were one of the only ones there exploring. Along the drive there’s some pull off areas for hikes accessed from this road and parking for the Jenny Lake lodge. Our favorite part of this scenic drive was the look out point for Jenny lake. There’s a path where you can walk along the water and take in the views of Jenny lake. It’s such a sweet spot, I would definitely add this to your itinerary while visiting the park. We spent our last night at camp cooking dinner before heading to bed.

Stop along scenic highway
Stop along scenic drive, Oxbow Bend
Path along Jenny Lake accessed from scenic drive
Path along Jenny lake
Views along tagart lake trail

Lakeside Marblehead, Ohio

Along Lake Erie, just past Sandusky, you’ll find the charming quaint town of Lakeside. Lakeside is a special place for me, as my family used to visit regularly in the summertime when I was a child. I haven’t been back in years so Patrick and I decided to revisit during labor day weekend! I had such a great time reminiscing on childhood memories and relaxing in this timeless town, it truly has the same charm I remember from years ago. Lakeside is the perfect spot for a small town getaway! Here is some tips and things to keep in mind before visiting Lakeside.

Things to know about Lakeside

  • During the summer months (Memorial Day through Labor Day) Lakeside requires visitors to purchase day passes and auto passes. These gate fees can be purchased online before hand or when you first arrive at the gate. Lakeside is open all year and the gate fees are only during the summer season.
  • There are several hotels and bed and breakfasts and cottages available. This trip we booked our stay at Hotel Lakeside and loved it! All accommodations can be found on the website.
  • During the summer months we noticed most restaurants were open in the mornings until 3pm and closed and reopened at 5pm for the dinner crowds.
  • The town has a newspaper published with events happening each week, be sure to grab one when arriving to stay up to date.
  • Parking is limited and confusing. There aren’t many designated spots for those who aren’t staying in a cottage. You may have to do several loops around the area to find a parking spot.

We spent two days at Lakeside and this was the perfect amount of time for a short getaway. During our stay, we booked a room at the Hotel Lakeside which is an iconic landmark in the park. The hotel was built in 1875 and the charm is still alive today! If you visit for longer than a weekend, I’d recommend renting a cottage.

Things to do in Lakeside

  • Wake up early for donuts at The Patio. They have the best cake donuts! They still taste the same as they did when I was a kid.
  • Grab a cup of coffee at Coffee and Cream or Oh La La. Both cafe’s are nice options with a variety of coffee choices as well as breakfast and lunch bites.
  • Play mini golf. The course is unique and with 15 holes, it will make for a fun day or night activity!
  • Stop by the t-shirt shop under the dock awning! It’s a small little shop with some of the coolest apparel to take as souvenirs.
  • Have lunch at Blue Bird cafe. Located just near the dock in the center of town, Blue Bird has delicious sandwiches and salads with a great outdoor seating area right near the water.
  • Rent a bike or golf cart at Sypherd Cycle. One of my favorite parts about Lakeside is that almost everyone bikes or rides golf carts around the town. We rented bikes and it was so fun to feel like a local for the weekend.
  • Have dinner at Lakeside pizzeria, former known as Sloopy’s pizza. This is a town favorite for pizza!
  • Go for a swim in Lake Erie! There’s access from the “beach” area or from the dock.
  • See a concert or speaker at the Hoover Auditorium. Lakeside does a nice job finding entertainment for visitors and access to the auditorium is included in the gate fee.
Trail along beach
Room at Hotel Lakeside
Details in hotel room
Florals along hotel
Screened porch view at the hotel
Screened porch at hotel
Key for hotel room
Enjoying donuts by the beach
Ice cream from the patio
View of Lake Erie from the dock
Biking riding around town
Sunrise at the beach
Morning donuts from the patio
Iconic Lakeside dock awning

Two Days in Yellowstone National Park

Patrick and I recently returned home from another out west national park trip! One of the most memorable national parks we visited on this trip was Yellowstone. Yellowstone national park is the first national park in the country, established in 1872 and the charm and western feel of the park is still alive today. We had two full days in the park and we focused on seeing the major highlights. Here is an overview of how we spent our time in Yellowstone.

Things to know about Yellowstone

  • Yellowstone is huge! It’s separated into two loops, the northern and the southern. In hindsight, it would make sense to spend part of the trip in the north loop and part in the south loop to reduce drive time during the day. We ended up driving back and forth between the loops throughout the two days which is doable but plan to spend lots of time driving!
  • There are so many bisons! We were so surprised with how comfortable the bison are within the park. There were bison on the sides of the road throughout most of the park!
  • Yellowstone national park requires a fee for entrance into the park. It’s $35 for a 7 day period. As always, I’d highly recommend purchasing the America the Beautiful pass. It’s $80 and gets you into national parks for a year!

Day One

On our first day in the park, we decided to start at the most famous geyser, Old Faithful. Old Faithful is one of the oldest erupting geysers in the park and it erupts consistently every hour to hour and a half. We used a website called geyser times to check in on the old faithful’s next predicted eruption before showing up. This was helpful to have a gauge on how much time we would have to wait. After watching Old Faithful, we walked along the boardwalk (upper geyser trail) that takes you to many other geysers and pools in the park. This was a pleasant walk and we went all the way to morning glory pool and back which was about 3 miles total. There is so much to see in this part of the park so make it your own! Some geysers or pools I’d recommend are:

  • Old Faithful
  • Castle geyser
  • Daisy geyser
  • Spa geyser
  • Morning Glory pool
  • Grotto geyser
  • Grand geyser
  • Beauty pool

After exploring this part of the park, we took a 15 minute drive to the fairy falls trailhead to hike to the overlook of Grand Prismatic spring. This is an iconic spring because it’s colors are so vibrant. There is access to see this spring up close but we preferred the overlook to see the spring from above. The hike to the overlook is about 1.5mile and a bit steep at times, but the view is definitely worth it!

We stayed at Canyon Campground while visiting Yellowstone and it was wonderful! The reservation here covered a shower a day for each camper and they had laundry facilities for campground guests.

Exploring geysers
Spring from along the boardwalk trail
Canyon Campground
Geyser along upper geyser trail
Morning Glory pool
Grand Prismatic spring via fairy falls overlook trail
Crowds at Old Faithful
Geyser along upper geyser trail

Day Two

Day two in Yellowstone started at Hayden valley to watch bison! Hayden valley is a well known spot in the park to capture an up close view of bison. I was hopeful we’d see some bison but I was in awe of how many bison we did see and how comfortable they all were walking near the road! Please respect the bisons home and space, we were able to see these incredible animals up close from the safety of our car, it’s not necessary to get out of the car. It’s also not safe to do so, these are wild animals after all.

After a beautiful morning in Hayden valley, we headed to the Grand Canyon of Yellowstone. The Grand Canyon of Yellowstone is such an underrated spot in my opinion! This was a stunning canyon different than others I’ve seen before. I appreciated that the park had several different viewpoints of the canyon and waterfall that are all well marked while driving through this area. We started along the south rim drive at Artist’s point which was beautiful and probably my favorite of all the view points. I’d also recommend:

  • South Rim drive: Artist’s point and upper falls lookout point.
  • North Rim drive: brink of lower falls, inspiration point, grand view point, and lookout point

After spending time exploring the various view points of the grand canyon, we headed towards the northern loop of the park to drive through Lamar valley, another famous valley where bison are known to graze. The drive to this part of the park was beautiful, there were so many scenic pull off areas with mountain views. Unfortunately when we reached Lamar valley, there weren’t many bison at all which we believed was due to the construction going on. Regardless, it was still a beautiful drive.

From here, we continued driving to another famous spot in the park, Mammoth Hot springs. This was a crowded spot for good reason! The lower terrace of the hot springs was so unique and stunning we were in shock. This is a fairly quick stop but I’d say it’s a must see while visiting Yellowstone. From here, we continued around the northern loop and stopped at the Norris Geyser Basin area to see more beautiful geysers and springs. This area is similar to the old faithful area, with boardwalks that lead you to view points of the various geysers and springs.

After a busy second day, we ended our last night in Yellowstone by cooking dinner at camp before heading back to Hayden valley for sunset. One of our favorite parts of the park was watching the bison! When we went back to Hayden valley after dinner, there were herds of bison moving together. It was so magical to watch the animals in their natural habit settle for the night. We parked the car on the side of the road and had a front row seat!

Bison!
Grand canyon of Yellowstone
Artist’s view lookout
upper falls look out
Norris Geyser basin
Bison in Hayden Valley
Mammoth hot springs

Yellowstone Tips

  • Book a campground early if you plan to camp! There are several campgrounds within the park, all of which seem to fill up pretty quickly. I can’t speak for the other campgrounds in the park but we were very impressed with canyon campground! I’d recommended picking a campground close to sites you’d like to see since the park is so large.
  • You will do a lot of driving! Regardless of where you stay within the park, if you plan to see many of the park’s highlights, be prepared to drive a lot during the day.
  • Look up Old Faithful’s eruption times prior to stopping by
  • Pack your own food. There are several restaurants and “general stores” at major sites in Yellowstone, but the food wasn’t the best and it was pretty expensive.
  • Check out the park’s website for closures and construction zones. When we visited, there were several spots under construction which caused delays.

Things To Do In & Around Badlands National Park, South Dakota

Our road trip this summer started with some time in South Dakota. As someone who has never visited South Dakota, I was surprised by it’s beauty and unique features throughout the state. We planned to spend our short time in South Dakota stopping by Badlands National Park, the iconic Wall Drug store and Mount Rushmore before moving on to Wyoming. Combining these three destinations within two days worked out well for us before moving on to other parks. Here’s an overview of how we spent time in South Dakota.

Badlands National Park

Badlands is a park that truly surprised me! From the highway, this area of South Dakota seems pretty rural and green but as soon as you enter the park, there are desert like features and stunning badlands. Badlands is a small park but it did offer a lot of activity and sites to see in our short visit.

Things to do:

  • Check out the visitor’s center.
  • Hike the Notch trail. This trail is beautiful and offers a fun ladder to climb partially through the hike. Unfortunately we didn’t get to hike the entirety of this trail due to crowds. We made the mistake of trying to hike this mid day and once we reached the ladder, there was a huge line.
  • Hike the Window and Door trails. These are short trails along boardwalks that take you to a beautiful opening of more badlands.
  • Drive along the scenic road within the road. The road that takes you through the park is the scenic road and there are several pull off areas to stop to enjoy more badlands views.
Badlands overlook
Driving along the scenic road
Badlands overlook
Badlands overlook
The notch trail
Entering the park

Wall Drug store

I didn’t know about Wall Drug until I started researching things to do in South Dakota. This is a huge tourist attraction about 15 minutes from Badlands National Park. The day we drove into South Dakota, we started seeing signs and billboards for Wall Drug 3 hours out! Although it’s a tourist stop, it was definitely a fun experience and I’d recommend stopping. The whole place feels western and old fashion which is part of the charm. Wall Drug is famous for it’s 5 cent coffee and free ice water which was historic years ago for travelers passing through.

After exploring Badlands and Wall Drug, we drove about an hour and a half to a campground in Custer State park, Center Lake campground, to be closer to our next destination. This was a wonderful campground for the night and the best part was we were only 30 minutes from Mount Rushmore!

Wall Drug
5 cent coffee
Free ice water
The original drug store front
Menu at cafe
Souvenir shopping

Mount Rushmore

We woke up bright and early to visit Mount Rushmore before the crowds. If you can, I’d highly recommend this. We arrived around 5:30am and were one of the only ones visiting the monument. It was so peaceful and relaxing to experience this iconic monument without having to fight crowds. We spent a lot of time taking photos before walking the presidential trial. This trail is a little less then a mile and well paved with boardwalks and steps that give you an up close view of the monument. There’s also the sculptor’s studio along this trail that gives more information about the building process, practice sculptures that were built and the overall history of the monument. Since we were there so early this was closed (opens at 8am) but I would have loved to explore this part as well. Keep in mind, the monument itself is free to visit, however, it does cost $10 to park.

Mount Rushmore after sunrise
One of the only ones there this early
Polaroid shot of monument
Sculptor’s studio
Up close view along Presidential trail
Presidential trail

There is so much to see throughout South Dakota and I wish we would’ve had more time. Wind Caves National Park is also extremely close to this area too if you want to add another stop along the way. If you’re short on time like us or just passing through, these three stops are must sees!

Tips For Planning a National Park Trip

Planning a trip to a national park can feel intimidating when there’s so much to plan for! Although a trip to a national park could be planned last minute, from experience I’d recommend planning well in advance to guarantee more options and less stress. Throughout the last two years, most of my trips have been to national parks. I’ve learned so much about the planning process and wanted to share some tips. This summer I’ll be going on another cross country road trip to visit 4 more national parks and these are the tips I followed to help us plan another amazing trip!

My Tips

  • If you’re planning to stay at a campground, be sure to book at least 6 months in advance for most national parks. This is the number one tip I have. Many people want to guarantee they will have an accommodation well in advance from their trip, especially during busy season which is usually summer. We are going to Glacier National Park this summer and I booked the campground for us in January (!). If planning this far in advance isn’t an option, most national parks do save ‘first come first serve’ spots at campgrounds but it is generally competitive. This tip could also apply to hotels or other accommodations near a national park.
  • Similar to tip one, if you’re planning to stay at a campground do some research on the area you’d like to be in. The campgrounds in most national parks are spread out and not necessarily close to popular sites and trails. If this is important to you, you’ll want to try and book the most central campground in the park, which no surprise, is usually the campground that fills up the fastest!
  • Take time to plan out hikes or other activities you’d like to do. Each national park has their own website that highlights the hikes within the park, campgrounds, historic sites, and other activities. If you plan to do a lot of hiking, I’d suggest mapping out the trails you’d like to do. On the website, you’ll find how long each hike is and the difficulty level (which is important to be aware of beforehand).
  • Research other reservation requirements. Since the pandemic, several national parks have been requiring additional vehicle timed entry reservations or reservation passes for popular sites to reduce crowds. As of this year, many popular national parks are still enforcing this and it’s important to know in advance because it’s not possible to get a reservation on site. I discuss the vehicle reservation system in some of my national park posts, there are ways around this if you’re unable to get a pass in advance. These requirements will be clearly listed on each park’s website.
  • Look up trail statuses on the national park’s website. As I mentioned earlier, each national park has their own website and updates are posted daily. This is particularly helpful if you’re going to a park with lots of wildlife, or drastic weather changes. Sometimes trails close if there’s too much wildlife activity or due to weather conditions. Speaking from experience, it’s better to check before hand or else you’ll arrive at the trail feeling disappointed!
  • If you plan to visit multiple national parks in one trip, I’d recommend investing in the America The Beautiful pass, it’s $80 and gives you access to any national park for one year! Most national parks cost $35 for entry so the pass will definitely pay for itself if you have plans to visit more then one park within a year!
  • Pack extra layers. This is a tip I learned from experience, even if you’re visiting a national park during the summer months, I found most nights or early mornings were still chilly, especially if you’re hiking in higher elevations! The climate definitely changes the higher up you hike.
  • Arrive early to trailheads. Popular hikes within a national park become very crowded! I’d suggest arriving to most trailheads before 7am if you’d like to explore without crowds. This is also beneficial for securing a parking lot at a trailhead as these fill up quickly too depending on the popularity.

Camping in Allegheny National Forest, Pennsylvania

Last weekend, Patrick and I spontaneously decided to go camping in Allegheny National Forest. Camping has always been something that helps ground us and provide the perfect reset when life feels stressful. We’ve always talked about going to Allegheny and we finally made the trip happen! Here’s some photos of our quick trip to Allegheny and the camping list we always use that gives us the most comfort while camping.

Our time in Allegheny was short and sweet but it definitely has me excited to visit again in the future. We found a couple campgrounds in the area that were open already for the season, most were first come first serve, which always makes me a little anxious but luckily we were able to find a great spot. We stayed at Red Bridge Campground and we loved it! This campground felt scenic and secluded but also had plenty of amenities which is always a luxury while camping. I would highly recommend this campground, we plan to stay here again during our next visit.

Our Camp List

This is our camping list that we use when we go on quick weekend trip or a long road trip. Some of these items were investments to ensure we had the most comfort, especially for our longer trips. Most of these items aren’t necessary especially for a quick weekend trip but they definitely make us feel more at ease and comfortable which is our goal while camping or traveling on the road.

Sleep

  • Tent, with rain cover
  • Air mattress
  • Sheets
  • Blankets
  • Sleeping bags
  • Pillows

Hygiene

  • Travel toilet
  • Biodegradable waste bags
  • Toilet paper
  • Trash bags
  • Body wash and shampoo
  • Tooth brush and tooth paste

Cook

  • Newair refrigerator or cooler
  • Cooking utensils
  • Eating utensils
  • Plates
  • Bowls
  • Coffee mugs
  • Pots and pans
  • Stove top and propane
  • Jetboil
  • Cutting board
  • Stanley pour over stand
  • Containers/bags to store leftover food
  • Water cooler
  • Collapsible sink
  • Campsuds dish soap
  • Sponge to wash dishes

Comfort

  • Rinse kit (helpful for a quick rinse off or to assist with washing dishes)
  • Camp chairs
  • Hammock
  • Quick dry towels
  • Jackery generator (we use this to keep our refrigerator powered and other things we need to charge)
  • Cameras
  • String lights
  • Journals/books
  • Card games

Safety

  • Medicine kit
  • Lantern
  • Garmen inreach mini satellite gps (helpful when there’s no service!)
  • Quick start car battery charge

Misc.

  • Fire starter supply
  • Citronella candle
  • Small hatchet/shovel
Tent set up
Morning coffee
Red Bridge Campground
Prepping dinner
Morning at camp
Starting a campfire for the evening
Camp breakfast
View of our setup
S’mores!
Walking around the campground

Two Week Out West Trip Itinerary: Colorado and Utah

Last Summer, I went on my first cross country road to explore five different National Parks within Colorado and Utah. Traveling from Ohio, I knew very little about States out west and I spent several months doing research, making reservations in advance, and planning out a two week itinerary for my boyfriend and I. This trip included time in the Rocky Mountains National Park and time within Utah exploring 4 out of the 5 National Parks in the state. If you’re planning a similar trip, I hope this itinerary I developed is useful or gives some ideas to add to your own road trip itinerary!

Two Week Itinerary

Day One: Travel Day

Since we were traveling from Ohio, we decided to break the drive out to Colorado into two days. We stopped in Nebraska on our way after about 13 hours of driving. We found a hotel near Omaha, NE for the night.

πŸŒ› Hotel in Omaha, NE

Day Two: Travel Day

On our second day, we left Omaha bright and early for a 7 hour drive to Boulder, CO. Once we arrived in Boulder we spent time walking around town and exploring Pearl St. which is an iconic spot in downtown Boulder that features fun shops and restaurants. My favorite part of this day was spending time at a free campsite we found just outside of Boulder, CO. This campsite was about an hour from downtown Boulder and 45 minutes to Rocky Mountains National Park.

Tips:

  • I found all of our free campsites off the Campendium or freecampsites.net
  • We purchased the America the Beautiful National Park pass which was $80 and covers entrances to all National Parks.

πŸŒ› Beaver Reservoir Dispersed Camping

Day Three: Rocky Mountains National Park

On day three, we woke up bright and early to enjoy sunrise at our campsite before heading into Rocky Mountains National Park. On our way into the park, we stop in downtown Estes Park for some breakfast. We found Kind Coffee which was definitely a favorite stop of ours! After some coffee and breakfast we spent our first day hiking in the Bear Lake area and hiked to Bear, Nymph and Dream lakes. After hiking in this area, we stop at the visitor’s center and explored more of Estes Park. For the next two nights we stayed at one of the campgrounds in the Park, Glacier Basin.

Tips:

  • I wrote a blog post about our experience in RMNP if you’re looking for an in depth guide, read here.
  • Campground reservations can be made 6 months in advance, so if you know your dates book as soon as you can!
  • Rocky Mountains National Park requires a vehicle reservation to enter the park during certain hours. I discuss this in depth in my post dedicate to RMNP.

πŸŒ› Glacier Basin Campground

Day Four: Rocky Mountains National Park

Our second full day in RMNP was a busy one! We spent our entire morning hiking to Mount Ida. From the Glacier Basin campground, this trailhead is about an hour away. The best part about the drive there is driving along the iconic Trail Ridge Road which is the highest highway road in the country! It was incredible to experience the views and the road during sunrise. We saw so much wildlife and almost had the entire road to ourselves since it was so early. To hike Mount Ida, you can park at Milner Pass parking lot. This hike was a strenuous 9 mile hike but the views were some of the best I’ve ever seen! After this hike, we went into town to take a shower. We found a local laundry mat that had showers for visitors that cost $4. That evening we had dinner in town at the Bird & Jim, which was delicious!

πŸŒ› Glacier Basin Campground

Day Five: Travel Day

We were pretty exhausted after a long hike the day before so we slept in and took our time leaving Colorado. We stopped in Estes Park for the last time and got another cup of Kind Coffee before starting a 6 hour drive to Moab, UT. We planned to car camp once we arrived to Moab and we were surprised to find several camping areas off the main road that were first come first serve. We picked the first one we could find which was Upper Big Bend Campground and paid $20 for a spot that night. This night was extremely hot compared to the nights we just experienced in Colorado. The campsite we chose was about 15 minutes from Arches National Park which was super convenient.

Tips:

  • I have a blog post dedicated to our time in Arches National Park with more details of our experiences, read here.
  • Arches National Park requires a vehicle reservation to enter the park during certain hours. I discuss this in depth in my post dedicated to ANP.
  • All campgrounds in the area we stayed were $20 per night for a camp spot.
  • The campgrounds off the main road that we found had no running water, no showers, and no flush toilets.
  • Moab, UT is known as boondocking country, meaning there’s a lot of free camp spots surrounding Moab! Check out Campendium or freecampsites.net to find a free spot. Most are quite a drive from the park which is why we decided to pay $20 to be close.

πŸŒ› Upper Big Bend Campground

Day Six: Arches National Park

We woke up around 3:30am tired but excited to drive into Arches National Park for the day. We drove to Delicate Arch trailhead to begin a sunrise hike to this iconic arch. It took about an hour to hike to the top and we made it just before the sun started to rise. Delicate arch is incredible in person and much bigger than I imagined. We spent a couple hours admiring Delicate Arch before hiking back down. Afterwards, we explored more Arches in the park. It was extremely hot so we didn’t last long out in the heat. This night we ended up booking a hotel room to escape the heat and it was definitely worth it!

πŸŒ› Scenic View Inn and Suites Moab

Day Seven: Arches National Park/Travel Day

We slept in and explored downtown Moab before heading back into Arches National Park. We spent some more time driving through Arches National Park admiring Arches from a distance and stopping along viewpoints. We also took some time to explore Park Avenue which was one of the coolest spots we visited in the park. Afterwards, we prepared for a 4.5 hour drive to Bryce Canyon National Park. Once we arrived, we stayed at a free camp spot, Tom’s Best Spring Dispersed Camping which is about 15 minutes from the park.

πŸŒ› Tom’s Best Spring Dispersed Camping

Day Eight: Bryce Canyon National Park

We only planned for one day in Bryce Canyon so we woke up early to make the most of our time. We started the morning at Inspiration Point for sunrise, this was an incredible spot but I imagine any spot in the park is amazing to watch sunrise. After sunrise, we drove to Sunset Point to hike the Navajo and Queen’s Garden loop trail. This was the perfect hike to do with only a day in the park. We were able to see the highlights of the park and spend time admiring all of the hoodoos! We ended the day by driving to Zion National Park which was a 2 hour drive.

Once we arrived in Zion, we went to Zion Outfitters to pick up rented gear for the Narrows hike. We then went to a free camp spot we found but ended up booking a reservation at Gooseberry Lodges last minute due to extreme heat temperatures and a thunder storm that was predicted. This was a great decision and gave us a comfortable place to sleep each night while visiting Zion. Gooseberry Lodges offer small private cabins for an affordable price and the location is about 45 minutes from the park.

Tips:

  • I have a blog post dedicated to our time in Bryce Canyon National park, read here.
  • Tom’s Best Spring Dispersed Camping was an awesome free spot, the spaces were spread out and there was cell service which was a first!
  • I have a dedicated post to our time in Zion, read here.

πŸŒ› Gooseberry Lodges

Day Nine: Zion National Park

Our first day in Zion was a full day! We started the day bright and early with a sunrise hike to Canyon Overlook which was one of my favorite memories, the views from this one mile hike were amazing. Afterwards we drove into Springsdale which is the closest town to Zion and got breakfast sandwiches from Deep Creek Coffee. Our next hike was The Narrows which was one I was most looking forward to as we planned our trip. We had already picked up our gear the night before which saved time. We got on the shuttle near the visitor’s center to begin our hike to The Narrows and got off at shuttle stop #9. We spent about 4 hours hiking in the Narrows. That night, we ordered dinner from a local spot near our cabin and enjoyed some time out by the fire after a long day of adventuring!

Tips:

  • During busy season, Zion requires visitors to use their shuttle system to access most trailheads. The shuttle is free and the easiest spot to pick up the shuttle is at the visitor’s center.
  • Canyon Overlook is one of the only areas you can drive in your personal vehicle to get to.
  • I would definitely recommended renting the gear if you plan to hike the Narrows.

πŸŒ› Gooseberry Lodges

Day Ten: Zion National Park

On our second full day in Zion, we planned to hike to Observation Point. This hike offers one of the best views in Zion and a lot safer then Angel’s Landing! Be sure to read my blog post about Zion if you’re planning to hike to Observation Point as there’s a lot to know in advance. After an afternoon hike to Observation Point we spent the rest of the day walking around Springsdale, souvenir shopping and catching up on laundry.

πŸŒ› Gooseberry Lodges

Day Eleven: Travel Day

We slept in and drove into Springsdale to stop at our favorite coffee shop one last time, Deep Creek Coffee. Our last National Park on this road trip was Capitol Reef National Park, which is about 3.5 hours from Zion National Park. The drive to Capitol Reef from Zion is a bit boring and as you enter the nearby towns to Capitol Reef, it feels like you’re in a Western movie. Capitol Reef is quite literally in the middle of nowhere so restaurants and shops are very limited. Since we arrived to the park later in the afternoon, we didn’t hike but spent time exploring the scenic drive which is about 8 miles one way to Capitol Gorge. This is a historic drive that offers stunning views of the park, definitely a must see. After a long day of traveling, we checked into our hotel for the next two nights, Capitol Reef Resort.

Tips:

  • I wrote a separate blog post about our time in Capitol Reef that provides more information about our time in the park, read here.

πŸŒ› Capitol Reef Resort

Day Twelve: Capitol Reef National Park

Our first full day in Capitol Reef was actually my birthday so I picked the activities we did this day! I was most looking forward to hiking to Cassidy Arch which is an iconic spot in Capitol Reef. The hike to Cassidy Arch was tough but definitely worth the view at the end. Afterwards, we explored the fruita district of the park and stopped by Gifford Homestead for fresh pies, which were amazing! We also planned to hike the grand wash trail which is another popular spot in the park, but due to extreme heat temperatures we only hiked the beginning on this trail before turning back.

πŸŒ› Capitol Reef Resort

Day Thirteen: Travel Day

We woke up early and enjoyed breakfast at the hotel before leaving Capitol Reef. We started our trip back to Colorado with a plan to stop in Vail, CO for the night. Vail is about 5.5 hours from Capitol Reef National Park. This trip felt longer than other days, most likely due to general exhaustion from a long road trip! Once we arrived in Vail, we camped at Camp Hale Memorial campground. This campground was stunning and so scenic and quiet. It truly was the perfect way to end our road trip. This campground was about $30 for the night and it was available to reserve in advance but when we arrived there were plenty of empty spots available as well.

πŸŒ› Camp Hale Memorial Campground

Day Fourteen: Travel Day

From Vail, CO we woke up around 4am to drive towards Des Moines, IA for our stopping point. We drove about 12 hours to get to a hotel for the night. We arrived around dinner time and ordered in food at a nearby restaurant and went to bed early to prepare for another long travel day!

πŸŒ› Hotel near Des Moines, IA

Day Fifteen: Travel Day

We left Des Moines bright and early and headed back towards Ohio which was about an 10 hour drive. We arrived home mid afternoon after a long two week road trip! This road trip gave me some of my best memories and it was definitely worth all the early mornings, days without service, heat exhaustion, and long days in the car.

Capitol Reef National Park, Utah

Capitol Reef was the last National Park we visited on our road trip last summer. After our time in Zion, we drove 3.5 hours to Capitol Reef. We spent about two days in Capitol Reef and in my opinion that was plenty of time. This is a small National Park that offers unique scenery and a more secluded environment. Here’s an outline of our time in Capitol Reef.

Things to Know About Capital Reef

  • It’s hot! Similar to many other National Parks in Utah during the summer, the heat is extreme. Many of the trails in Capitol Reef have little to no shade at all.
  • The park is the main attraction. Capitol Reef is nearby the small town of Torrey, UT. There are limited restaurants and shops in this area. We also discovered the restaurants in the town had limited hours and most were closed during the early days of the week.
  • There are different regions of Capitol Reef National Park, we spent our time in the most popular area of the park, the Fruita Historic district. Someday I’d love to explore other regions of this park but they are quite spaced out so more time would be necessary.
  • I would recommend having a park map with you while hiking or using an app like Alltrails. We noticed many hikes were not clearly marked and it was easy to become lost.

Day One

We started our time in Capitol Reef late in the afternoon after a drive from Zion. One of the first things we wanted to do was drive along the scenic drive in the park and check out some scenic overlooks. The scenic drive is called the Capitol Reef Scenic road and it leads all the way to the capitol gorge area.

After taking some time driving along the scenic drive, we decided to check into our hotel. We stayed at Capitol Reef Resort while visiting the park. This resort is more like a nicer motel but offers incredible views of the red rocks in the park. We stayed in one of the hotel rooms but they also offer cabins and other unique accommodations. For dinner we found a local place that was open, and had a relaxing night in after a long day.

Day Two

Our second and really full day in Capitol Reef was actually my birthday and I wanted to hike to Cassidy Arch. The hike to Cassidy Arch is 3 miles round trip and it provides some of the best views within Capitol Reef. The hike to get to Cassidy Arch is steep and pretty strenuous. It was also extremely hot even though we started fairly early in the morning, there was limited shade. This trail was marked more so towards the end of the hike as you become closer to the arch. The beginning of the hike is where we became turned around a few times and we were frequently referring to Alltrails app to find the way.

Once we reached Cassidy Arch we spent time at the top soaking in the view. When we reached the arch, there was only one other family there. One of the most surprising parts of visiting Capitol Reef was experiencing popular areas with no crowds, definitely a nice change compared to other parks we’ve visited. The best part of Cassidy Arch is you can actually walk across it! It’s a lot wider than it appears and is safe to walk across.

After Cassidy Arch, we made our way back towards the historic fruita district to explore. We stopped by Gifford Homestead for fresh pies. Gifford’s is famous for their fresh fruit and pies throughout the year. The pies did not disappoint, we bought two apple pies and they were incredible! Definitely a must see while visiting the park. The pies are baked fresh daily so it’s best to go early as they do sell out fast.

For the rest of the afternoon we spent time at the visitor’s center and exploring the grand wash trail. Unfortunately we did not hike the entire trail due to extreme heat temperatures. We decided to go back to our hotel and spend some time in the pool and cool down before dinner.

For my birthday dinner, we decided to eat at our hotel’s restaurant, The Pioneer Kitchen. I would highly recommend if you want a nice sit down dinner, it was very good!

View along scenic drive
Birthday morning from hotel balcony
Cassidy Arch
Picking out pies at Gifford Homestead
Pies secured
Grand Wash trail
Excited to start exploring
Hiking to Cassidy Arch
Pit stop along scenic drive
Sunset from hotel balcony

Zion National Park, Utah

One of my favorite National Parks is definitely Zion National Park. It offers incredible natural beauty and breath taking views. We were able to spend two full days exploring the park which was a nice introduction. I would recommend 3-4 days in the park to fully experience everything Zion has to offer. Here’s an outline of the hikes and activities we did within our two day trip.

Things to Know About Zion National Park

  • During peak season, the park requires use of their shuttle system. There are only certain areas of the park you are able to drive with your personal vehicle. For most of the hikes and activities, the shuttle is required. The shuttle is free and is easily accessible. There are nine stops within the park and the easiest place to get on the shuttle is the visitor’s center which is stop #1. On the park’s website, there is a list of all shuttle stops you can download. The park also provides this map to all visitors upon entering the park.
  • If you plan to hike Angels Landing, you’ll need to enter the lottery system. This is the park’s way of limiting traffic on this congested trail. Visit the park’s website to find out more information.
  • If you plan to hike the Narrows, I would highly recommend renting the gear which includes neoprene socks, boots, and a walking stick. In the summer months it’s about $32 to rent the gear for the day. We rented the gear from Zion Outfitters which is near the visitor’s center.
  • If you plan to hike to Observation Point, there’s a few things you’ll need to know. This hike used to be accessible through the East Rim Trail which started at the Weeping Rock shuttle stop. However, due to falling rocks a few years ago, the trail is closed until further notice. Luckily, there’s other ways to hike to Observation Point. We hiked to Observation Point via the East Mesa trail which is on the other side of the park, it’s actually outside of the entrance of Zion so you can hike it without even entering the park! The parking lot at East Mesa is very limited and the road to get there is rocky and rough. It’s advised that only cars with 4×4 drive should take a risk to access the parking lot. If that’s not possible for you, there is a shuttle that takes hikers which is accessible from Zion Ponderosa Resort. The shuttle is $7. Keep in mind, the shuttle takes you to the road above the parking lot not the trail head itself so you’ll have to walk a .5mi walk to the actual trailhead after being dropped off.
  • The heat at Zion, like many other parks in Utah during the summer, is extreme. We originally planned to car and tent camp but decided to find a lodge instead due to high temperatures even at night. Last minute, we found Gooseberry Lodges located in Apple Valley, UT which is about 45 minutes from the park. I can’t recommend Gooseberry enough! It was extremely comfortable and affordable.

Day One

We started our first day in the park, bright and early for a sunrise hike to Canyon Overlook. I always recommend starting hikes before sunrise while visiting any National Park, but especially if you’re planning to hike Canyon Overlook in Zion. The parking lot is very limited and this is one of the most popular hikes in Zion! It’s also one of the only hikes that does not require the shuttle to access. The parking lot is located right after you pass through the Mount Carmel tunnel and you have to walk across the street to begin the hike. This hike is a simple 1 mile hike and it provides one of the most stunning views in the park! We arrived to the top just before the sun rose and it was one of my favorite memories watching the sun come up over the canyon.

After our sunrise hike, we drove into the nearest town which is Springsdale, UT. We stopped by Deep Creek Coffee for some breakfast sandwiches and espresso which tasted so great after a hike!

Our next adventure involved hiking the Narrows! The Narrows hike is only accessible from the shuttle in the park during peak season. The hike begins at shuttle stop #9 which is called Temple of Sinawava. From the shuttle drop off, you have to walk a paved path (Riverside Walk) that’s at least a mile to get to the start of the Narrows. The Narrows is a popular hike within Zion National Park so be prepared for crowds, especially at the beginning of the hike. The beginning was the most populated but as you continue through, the crowds definitely thin out. We hiked a little past”Wall Street” and turned back which was about 6 miles total. The Narrows was an incredible hike and so unique, I’d highly recommend adding this to your Zion Itinerary.

Narrows Notes & Tips:

  • If you decide not to rent the gear, I would at least recommend buying or renting neoprene socks. The Narrows is a challenging hike for many reasons. One reason being the water temperature. Even with the summer heat, the water is typically cold and after spending hours in the water, your feet will be wet and cold!
  • You will get wet. The rented socks and boots do not prevent your feet from getting wet, but ensure your feet stay warm.
  • The walking stick provided with the rental is another pro of renting gear. Since there is so much traffic through the Narrows, the water when we went was a brown color and impossible to see through. The hike is entirely water and rocks so walking and balancing is challenging. The walking stick helped us navigate the rocky terrain.
  • Try and go during lunch hour. The park recommends waiting at least until noon to begin hiking the Narrows. That way, the sun will be above the Narrows and allow some sunlight in between the canyons. Otherwise, it may be a chilly hike since the water is already cold. If you decide to go early, wear layers if possible.
  • The park determines each morning if there is any flood risk and if the water is safe to hike through. It’s always a little unpredictable if you’ll be able to hike the Narrows so be prepared to be flexible.
  • Pack snacks! Similarly to any long hike, you’ll want plenty of snacks and water to have when you take breaks. This hike is particularly more challenging since it’s all through water. You’ll want to keep energy up!
  • There are restrooms when you arrive at the shuttle stop but no restrooms along the hike.
  • The water in the Narrows contains cyanobacteria, which means it’s not safe to consume the water or submerge your head beneath the water.

After a long day of hiking, we headed back into town and found ice cream before heading to camp. We originally planned to camp out at a free camp spot we found, however, due to extreme heat temperatures we decided to find a place to sleep with air conditioning. We booked a two night stay at Gooseberry Lodge and it was one of the best over night accommodations we experienced on our road trip! Gooseberry offers private small cabins with a kitchenette and outdoor area. These cabins are super affordable and perfect for a place to sleep after a long day of hiking. Gooseberry Lodges is located in Apple Valley, UT which is about 45 minutes from Zion National Park. Even though it was a drive to the park, we had so much fun exploring Apple Valley and experiencing another small town.

Day Two

During our second day in the park, our only plan was to hike to Observation Point. Many compare this hike’s view to the one you could have at the top of Angel’s Landing. Observation Point’s view is actually behind Angel’s landing so in my opinion, it’s an even grander view (plus much safer to the top!). This hike is about 6.7 miles round trip and not too challenging. The first half of the hike is through a forest like trail but the rest of the hike is pretty exposed so be prepared for strong heat if visiting during summer months. The view at Observation Point is stunning and definitely a must see while visiting Zion! We packed a lunch and spent hours at the top soaking in the view.

As I mentioned earlier, this hike is accessible a few different ways. We accessed the trail via East Mesa which is on the other side of the park. The road that leads to the trailhead is rocky and uneven and unless you have a 4×4 car, it’s not recommended you drive the road but instead take the shuttle which is located at Zion Ponderosa resort. Our vehicle was equipped for the road so we drove there ourselves. The parking lot is extremely small and there are several signs that state if you are unable to find a parking spot, you’ll have to drive back and take the shuttle so also keep that in mind. Luckily we found a parking spot but it was very limited.

After another long afternoon of hiking, we drove back into town and did some souvenir shopping. To end the night we drove along the Mt. Carmel highway which is the scenic drive offered in Zion National Park.

Observation Point

The Narrows
The Narrows
Ice cream stop in town
Film photo of Observation Point
Hiking through the Narrows
Sunrise at Canyon Overlook
Driving along Mt. Carmel highway
At the top of Observation Point