Quick Guide to Coastal Maine Towns: Portland, Kennebuckport, Ogunquit, & York

This past fall, Patrick and I went on a two week road trip through various areas of New England. The trip ended with some time in Maine where we first explored Acadia national park and then made our way down the coast to visit various coastal towns. The best part about this area of Maine is that these small coastal towns are all within a short drive from each other so it’s possible to pick a home base and make some day trips. Patrick and I fell in love with this area of Maine and enjoyed about three days exploring various little towns, eating amazing lobster, enjoying sunsets at gorgeous lighthouses, and to top off our time in Maine, we left engaged! Here’s a quick guide to a few of our favorite towns along the coast of Maine.

Portland, ME

Portland is a major stop when traveling through this area of Maine. We had a half day here and mostly strolled around the main areas of downtown going in and out of shops and enjoying some of the best lobster we’ve ever had! Some of our favorite stops:

Food

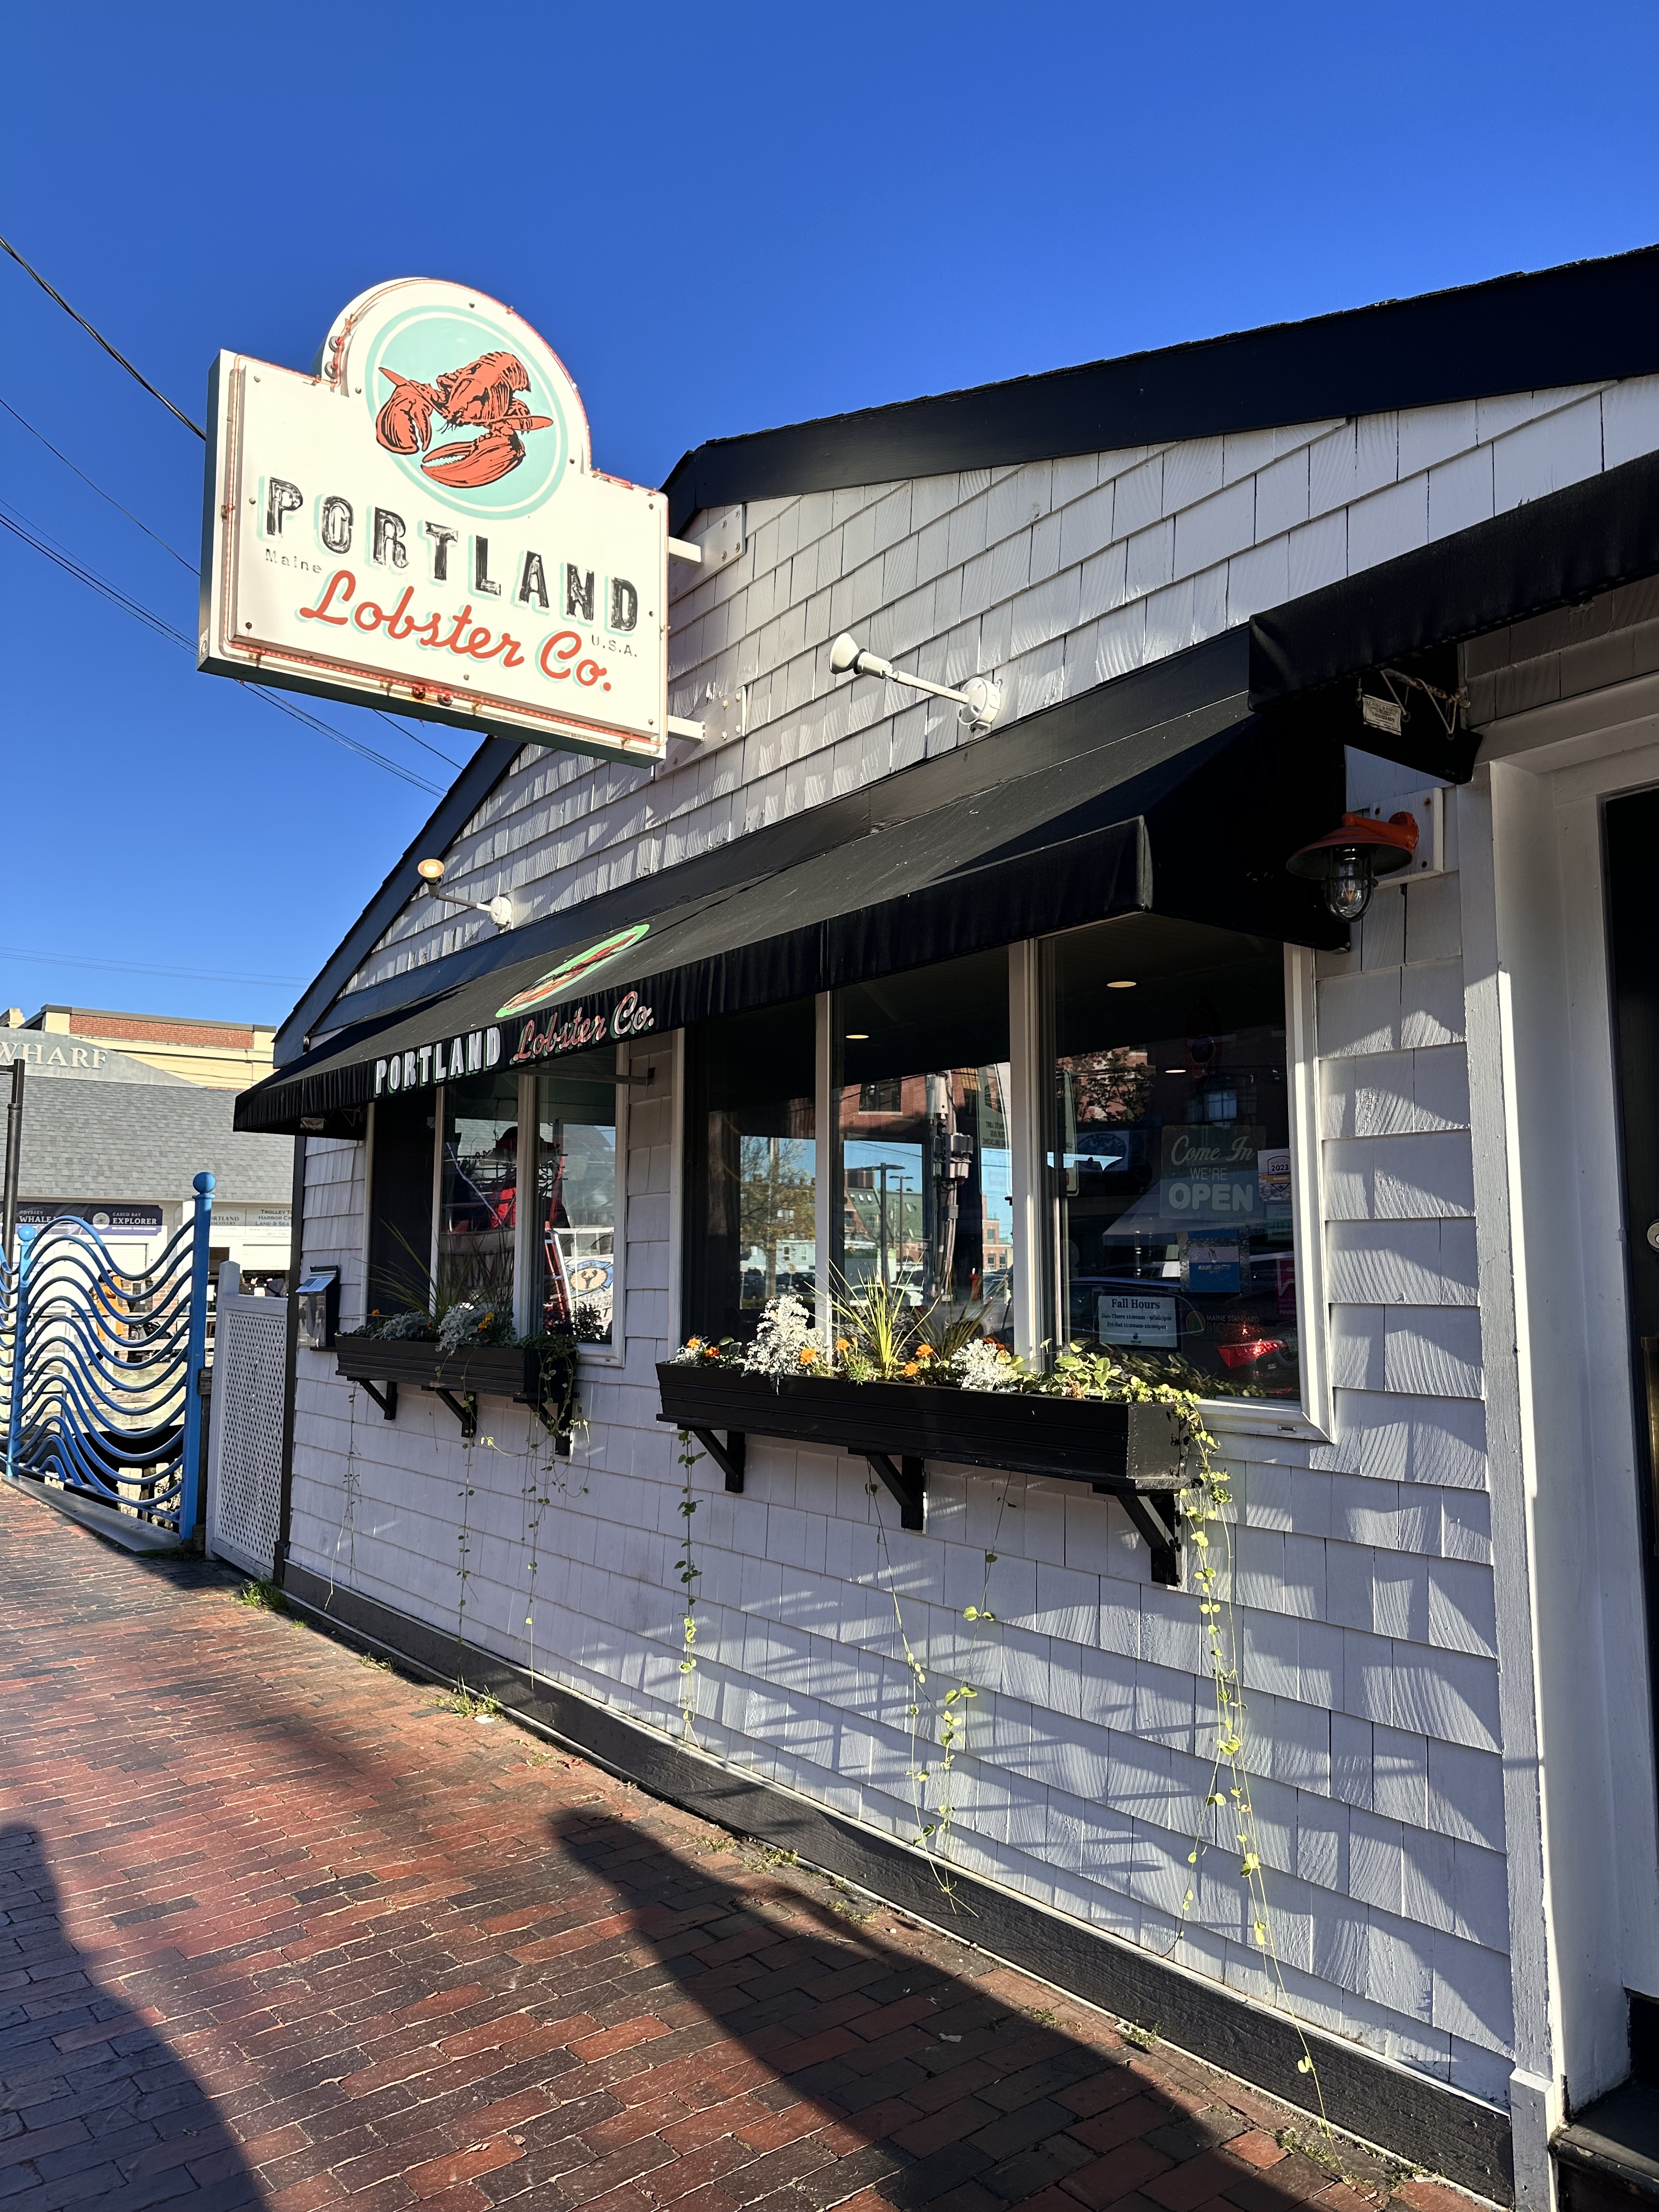
  • Portland Lobster Co. Hands down the best lobster roll we tried the entire trip! We liked it so much we went twice! If lobster isn’t your thing, they also have some other menu items but I’d recommend at least trying some of their lobster to say you did in Maine!
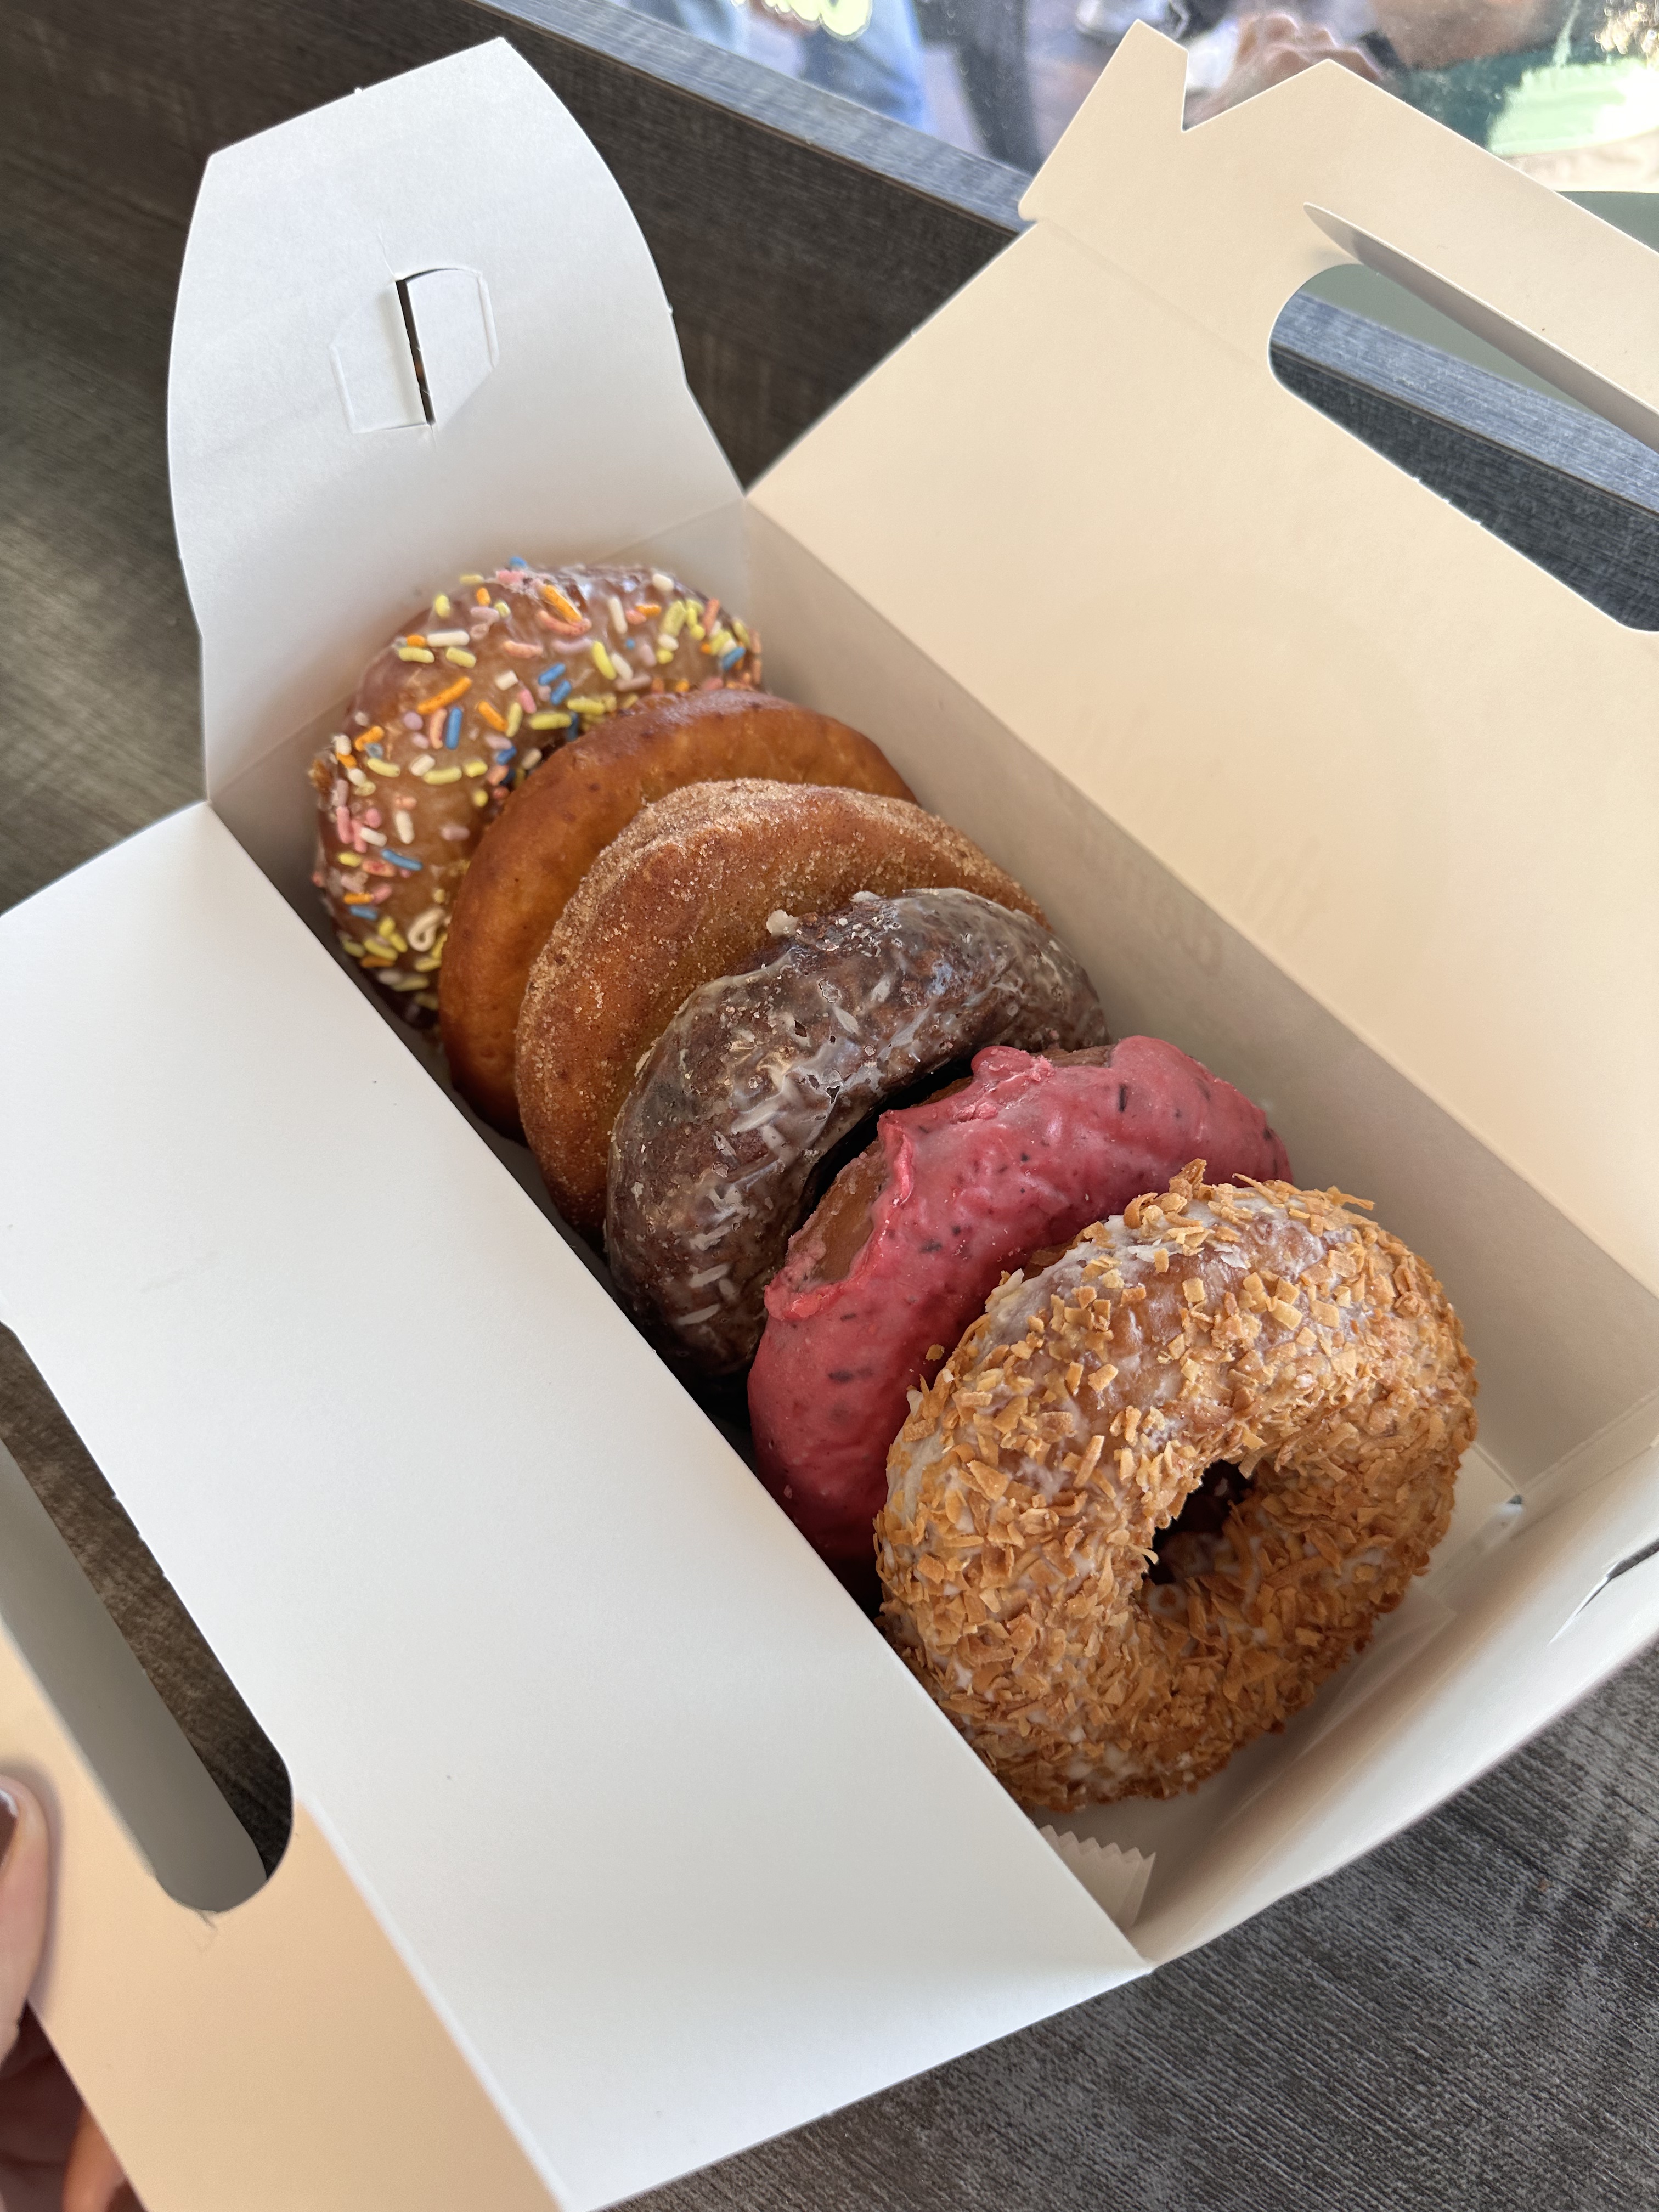
  • Holy Donut. This is an iconic spot in Portland! They are famous for their potato style donuts and typically have a line of people waiting throughout the day to try a donut. We were skeptical of a potato style donut but it was AMAZING! Definitely worth a stop! We went to the main location downtown on Commercial street but they have a couple locations scattered throughout the city. They close once donuts for the day are sold out so be sure to get there early if possible!

Shops

  • Soleil. This is a french inspired store with sweet decor and home gifts. Inside there’s also one of Portland’s “mini print vending machines” where you can put in some quarters and receive a small print created by a local artist.
  • There’s too many souvenir shops along commercial street in Portland but I’d recommend walking along and going in and out of some unique shops.

Activities

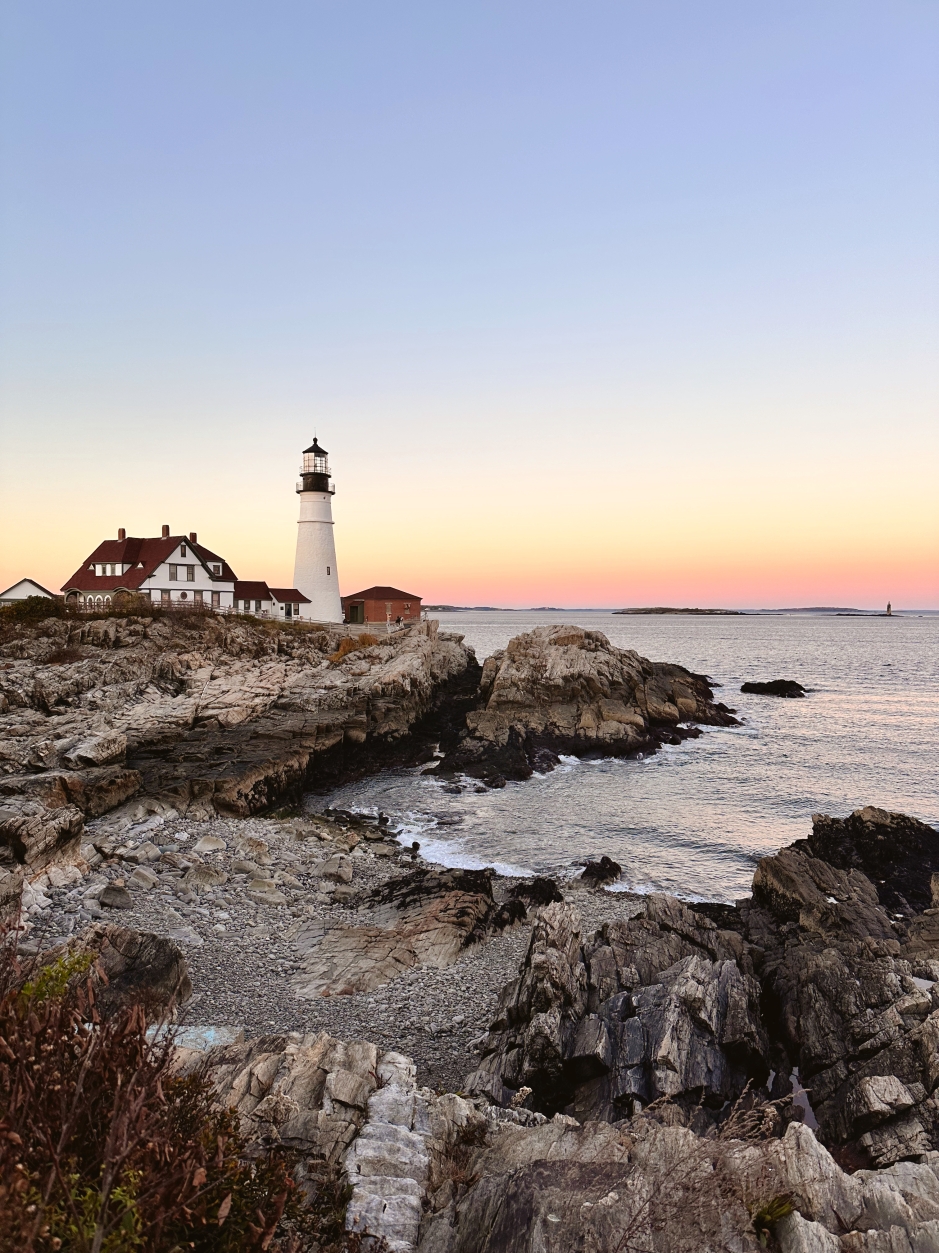
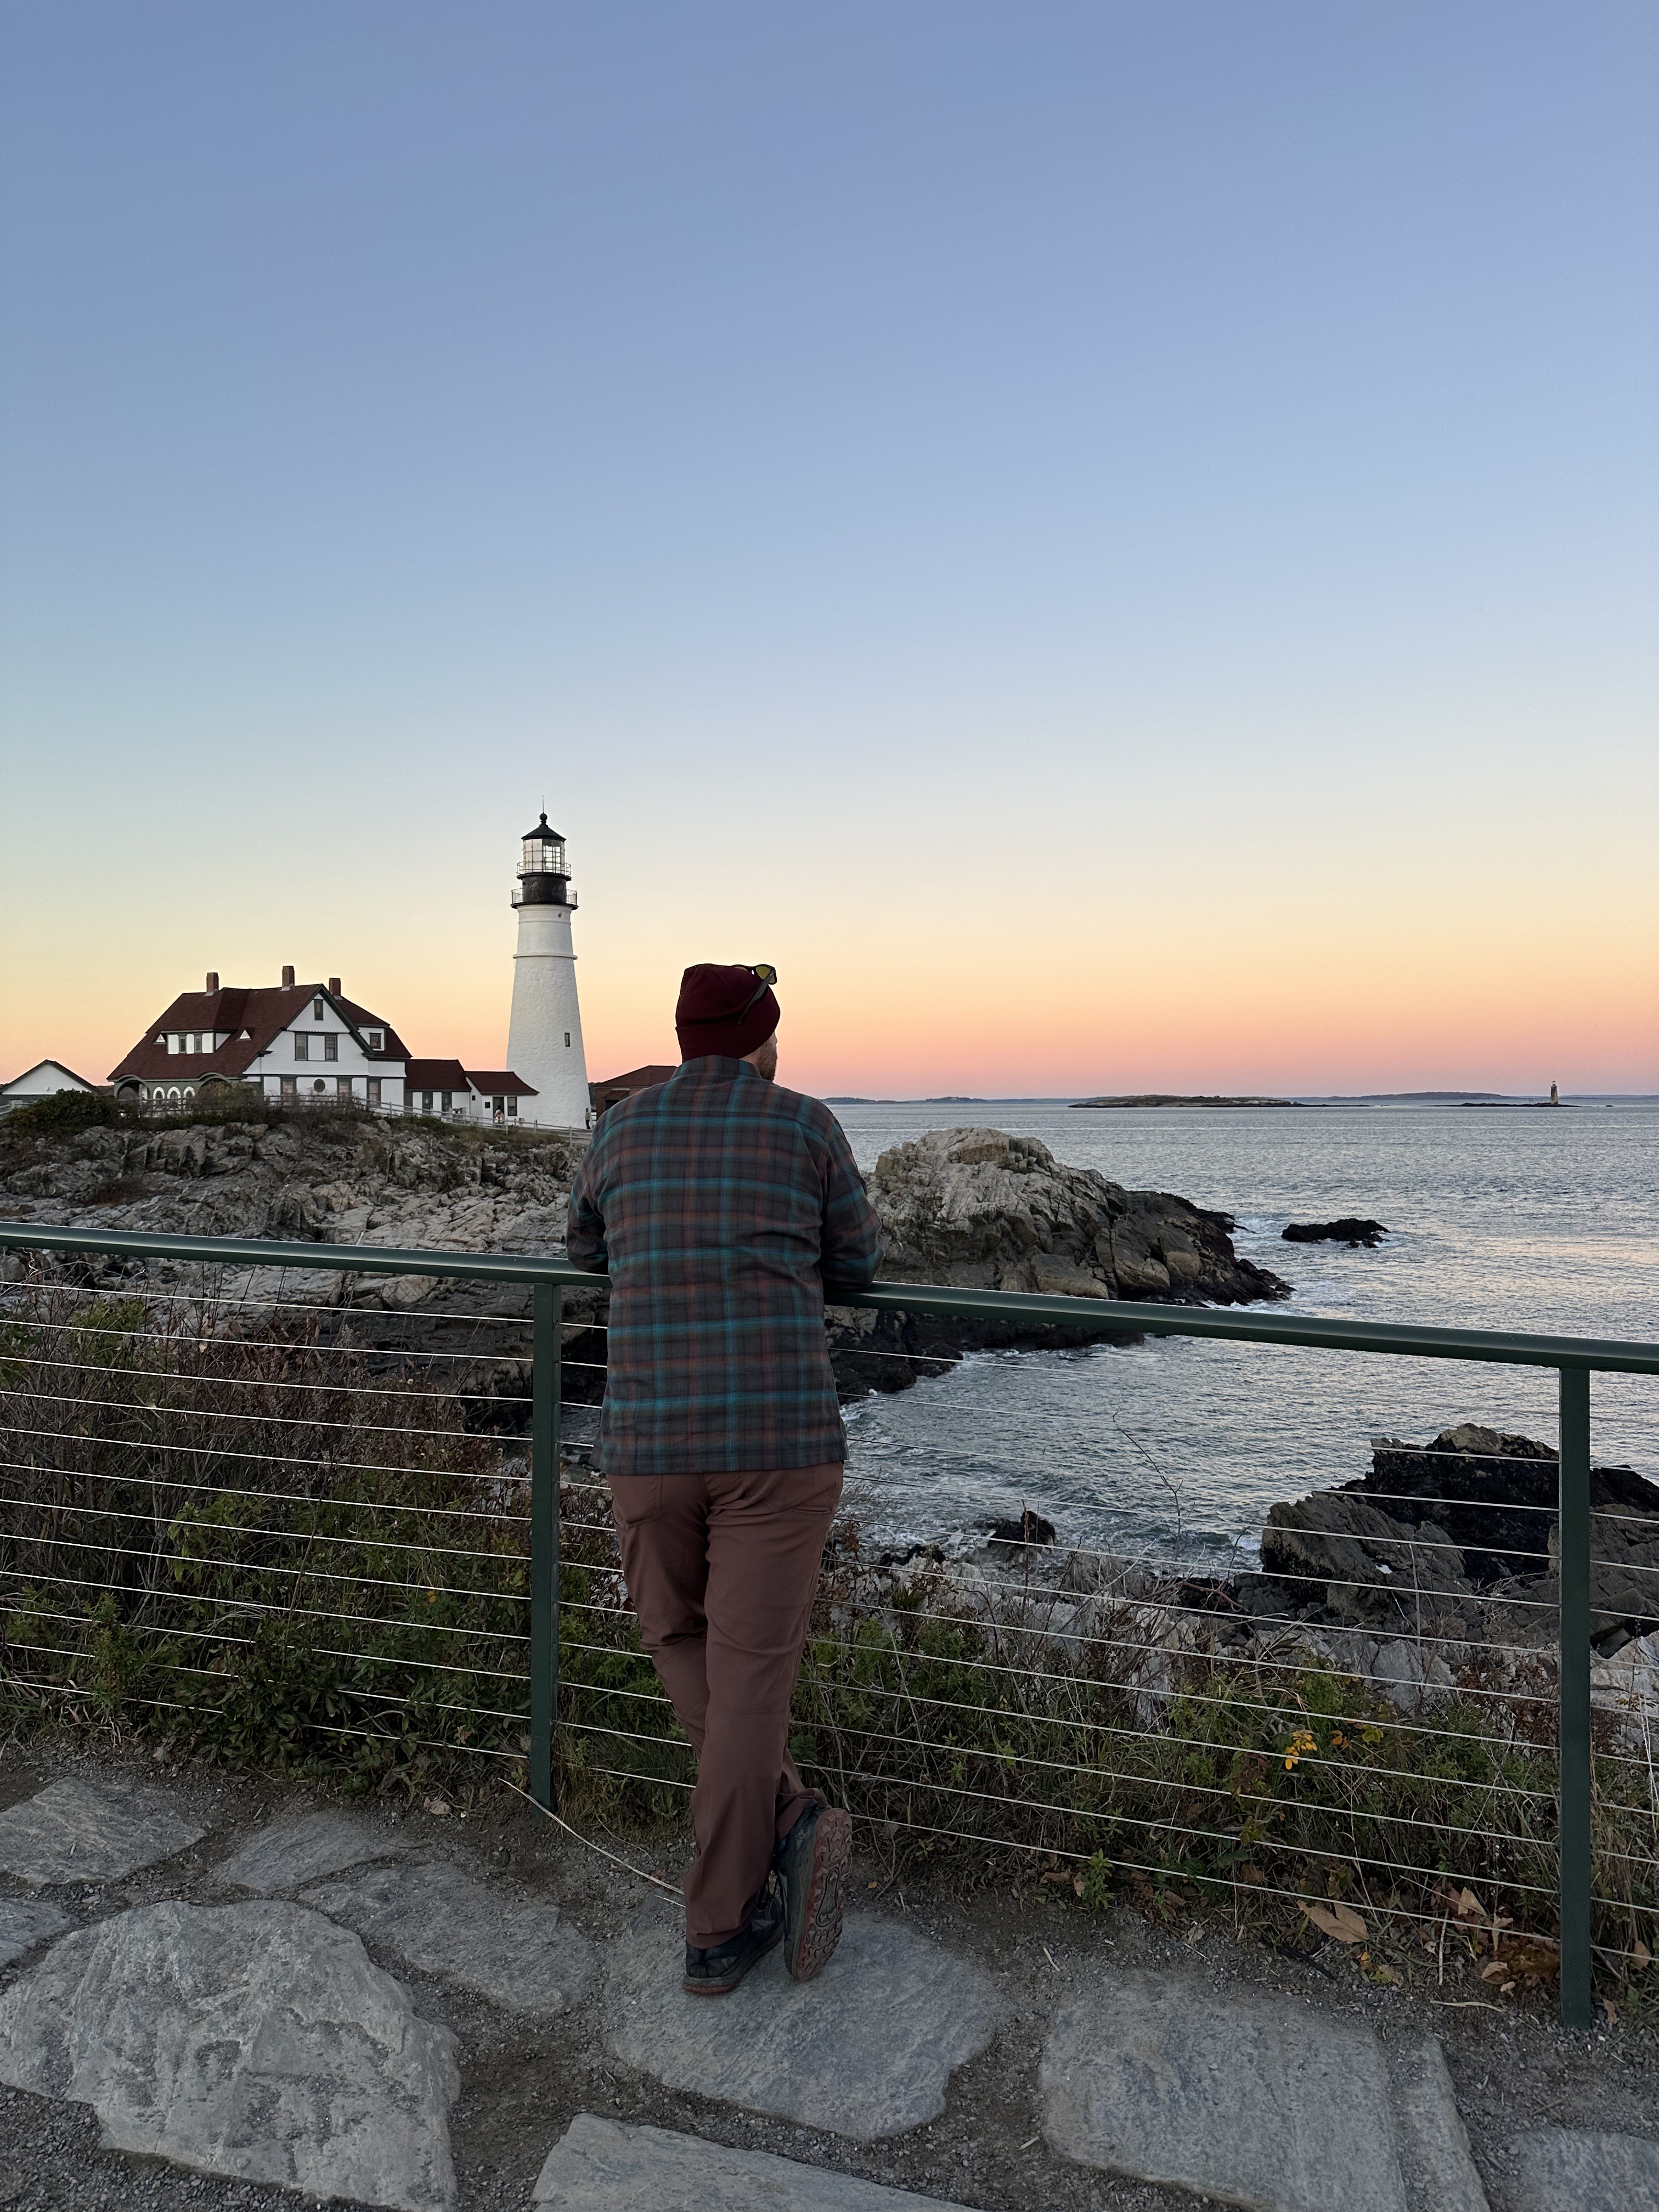
  • Portland Head lighthouse. A must see while visiting Portland! This is about 25-30 minutes outside of the downtown area but worth the drive, especially at sunset! This was definitely the most beautiful lighthouse we saw during the trip. Keep in mind, when we visited there was a gate in place that blocked access to the rocks around the lighthouse. While researching this spot, on social media it appeared that visitors could sit on the rocks and take photos with a closer view but this was not the case when we visited October 2024. This may be a temporary thing in the colder months but wanted to share.
  • Stroll around downtown! Portland seemed like a typical busy city with lots to do and see. We enjoyed walking down commercial and wharf street.
  • Take a walk down Wharf street. This is a popular street in the heart of downtown with lots of amazing restaurants. The street is well known for it’s cobblestone and moss covered buildings.
  • Take a boating tour. We didn’t do this, but we saw lots of signs about boating tours which may have been fun if we had more time.
Portland Head lighthouse
Holy donuts
Soleil
Lobster rolls at Portland Lobster co.
Sunset at Portland Head lighthouse
Portland lobster

Kennebuckport, ME

When we were planning this road trip, we weren’t planning to stay in Kennebuckport or pass through it. However, we had a last minute change to our itinerary because we decided we’d rather have an airbnb instead of camp the last few nights of the trip so I quickly found us a cute spot to stay and it ended up being in Kennebuckport. We were so happy this came to be! Kennebuckport is such a charming coastal town. It gives that small town feel where all the locals know each other, everyone walks to work, and there’s only small businesses in town. I’d definitely recommended stopping or staying in Kennebuckport if you’re driving down the coast. Some of our favorite stops:

Food

  • Dock Square coffee house. We started our morning here one day and loved the coffee! It’s also just a sweet little coffee shop right in the heart of town.
  • Mornings in Paris. This is another popular coffee shop in town, we didn’t stop here but our airbnb host left us some coffee to use from this shop and it was really good as well!
  • H.B. Provisions. This is a great stop for anything you may need while passing through. There’s food, groceries, drinks, souvenirs, etc. We stopped here one morning for a breakfast sandwich before exploring and it was great!
  • Roma Pizza. We picked up a pizza from here quickly after our drive in from Acadia and it was delicious!
  • Alisson’s restaurant. We had dinner here after getting engaged and it was so tasty! They have a little bit of everything on the menu.

Shops

  • Scalawags Pet Boutique. This was such a cute pet shop! We found so many great souvineers to bring home to our fur babies.
  • Too Cool t shirt store. A great place to find souvenirs for yourself or loved ones.
  • Mountain Tops. Another great souvenir shop.
  • Any shops along dock square or ocean ave are worth stopping by!
Dock square coffee
Downtown scenes in Kennebuckport
Downtown Kennebuckport
Inside shops within Kennebuckport
Downtown Kennebuckport
Shops near dock square

Ogunquit, ME

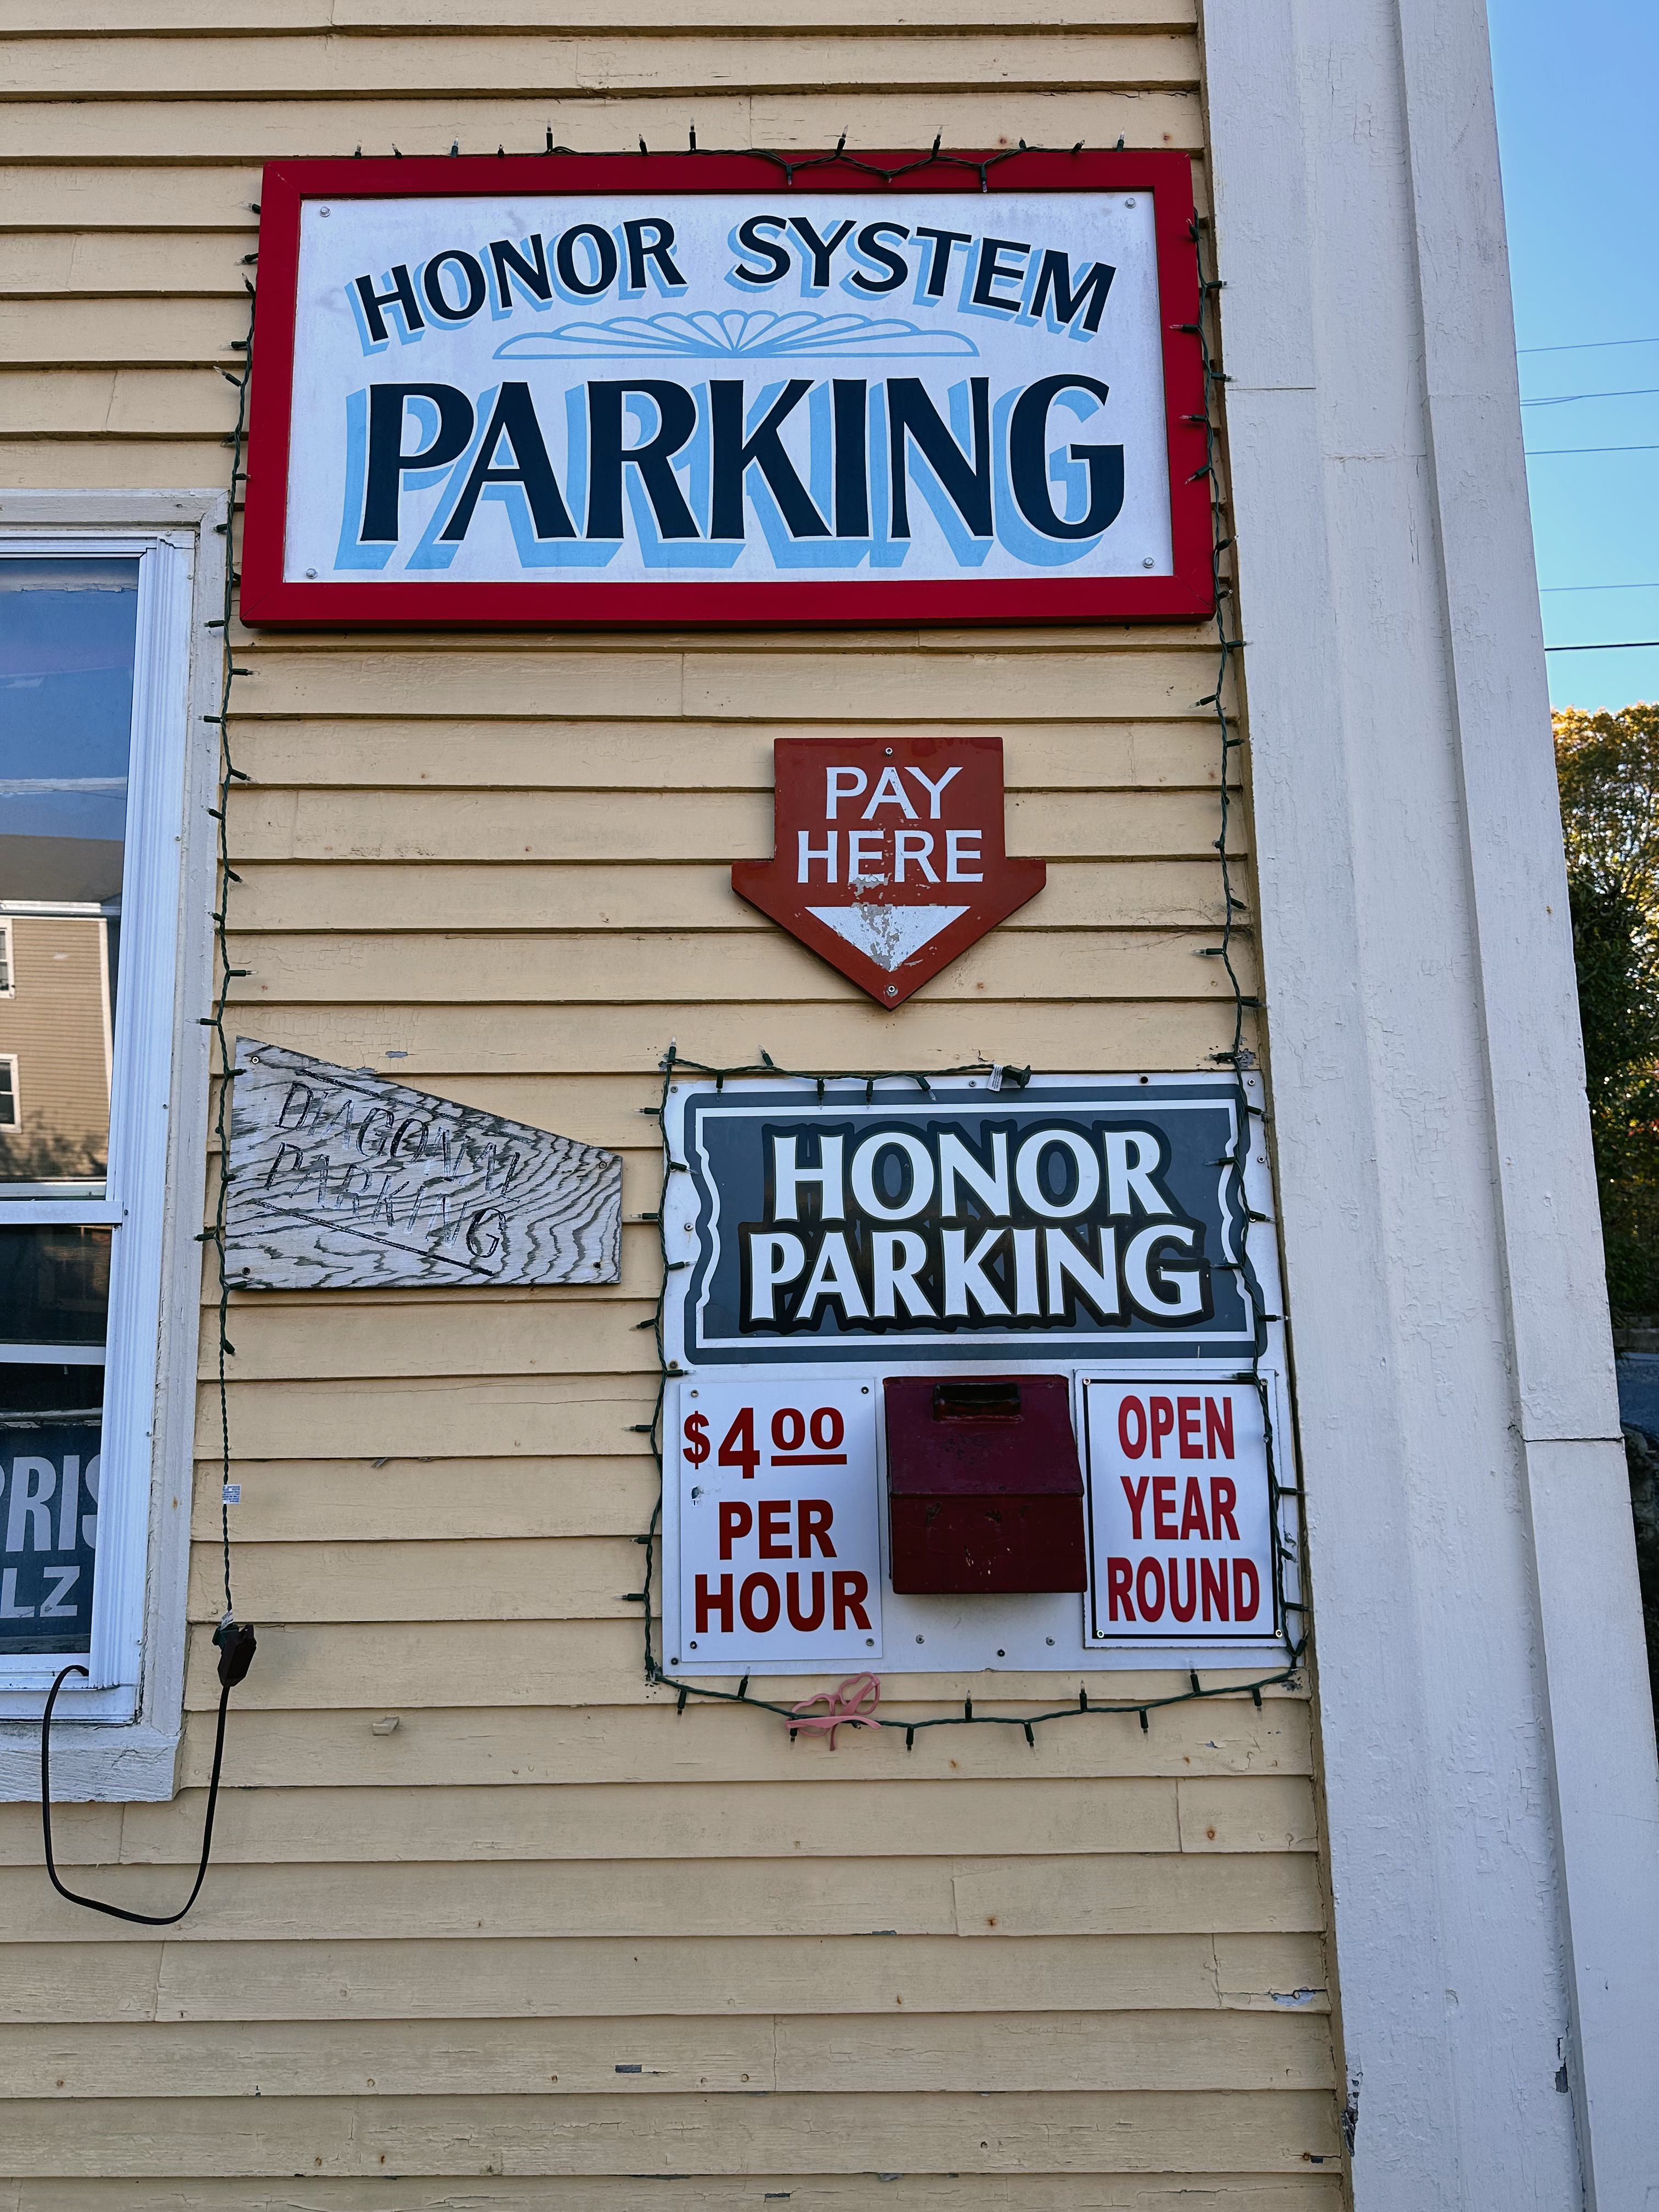
Ogunquit was a stop along the road trip I was excited about because I had seen some many other blog posts and photos highlighting the town’s beauty. It’s another charming coastal town with such a special feeling. We enjoyed spending an afternoon here walking around and soaking in more incredible Maine views. In the future, I’d love to visit this area again and stay overnight. If you’re visiting as a day trip like we did, keep in mind, parking can be a bit pricey. Our favorite stops:

Food

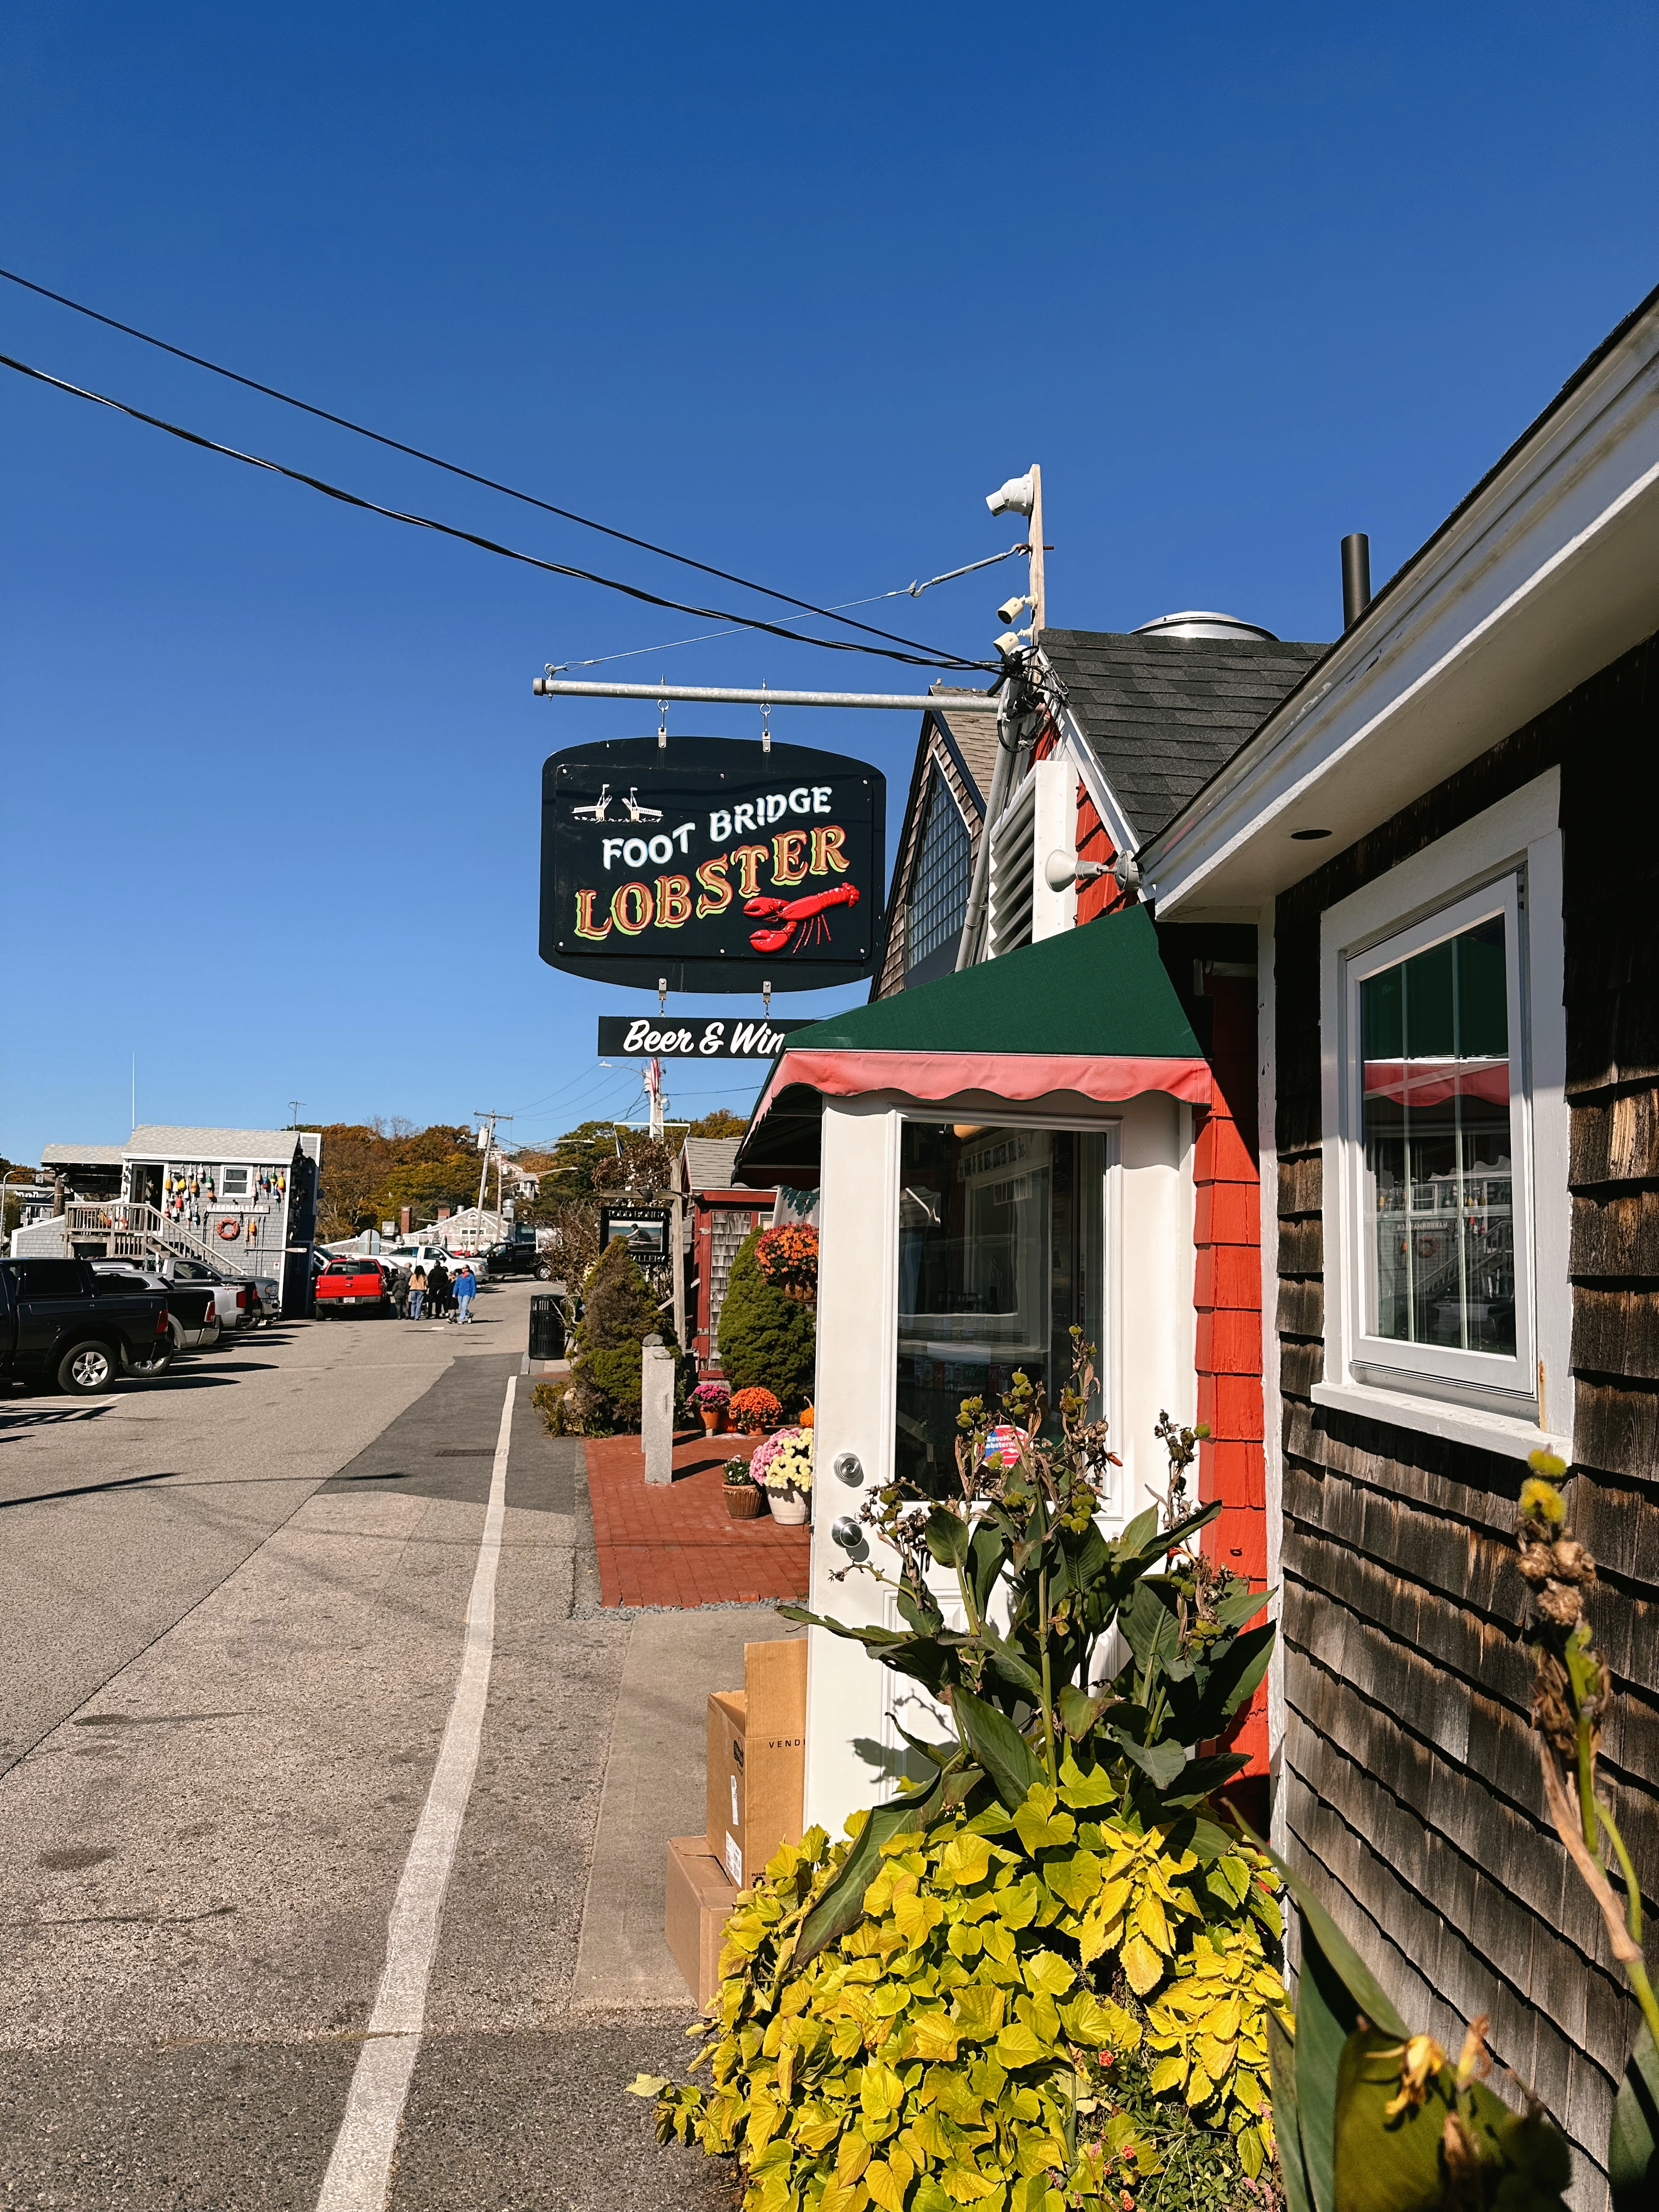
  • Foot Bridge Lobster. This was the only place we tried while visiting and we weren’t too impressed with their lobster rolls. There was several other little restaurants in town though so it seems like there are plenty of options!

Shops

  • Maine Originals. This was a cute souvenir and apparel store!
  • Nothing Better than Doing Nothing. Another great souvenir shop.
  • Dock Square Clothiers. A nice place to find a t-shirt or sweatshirt souvenir to bring home.
  • Perkins Cove Pottery shop. This was a sweet shop with handmade pottery done by a local artist.

Activities

  • Marginal Way. This is one of the top things to do in Ogunquit! Marginal way is a paved trail that goes along the coast line providing stunning views of the ocean and town.
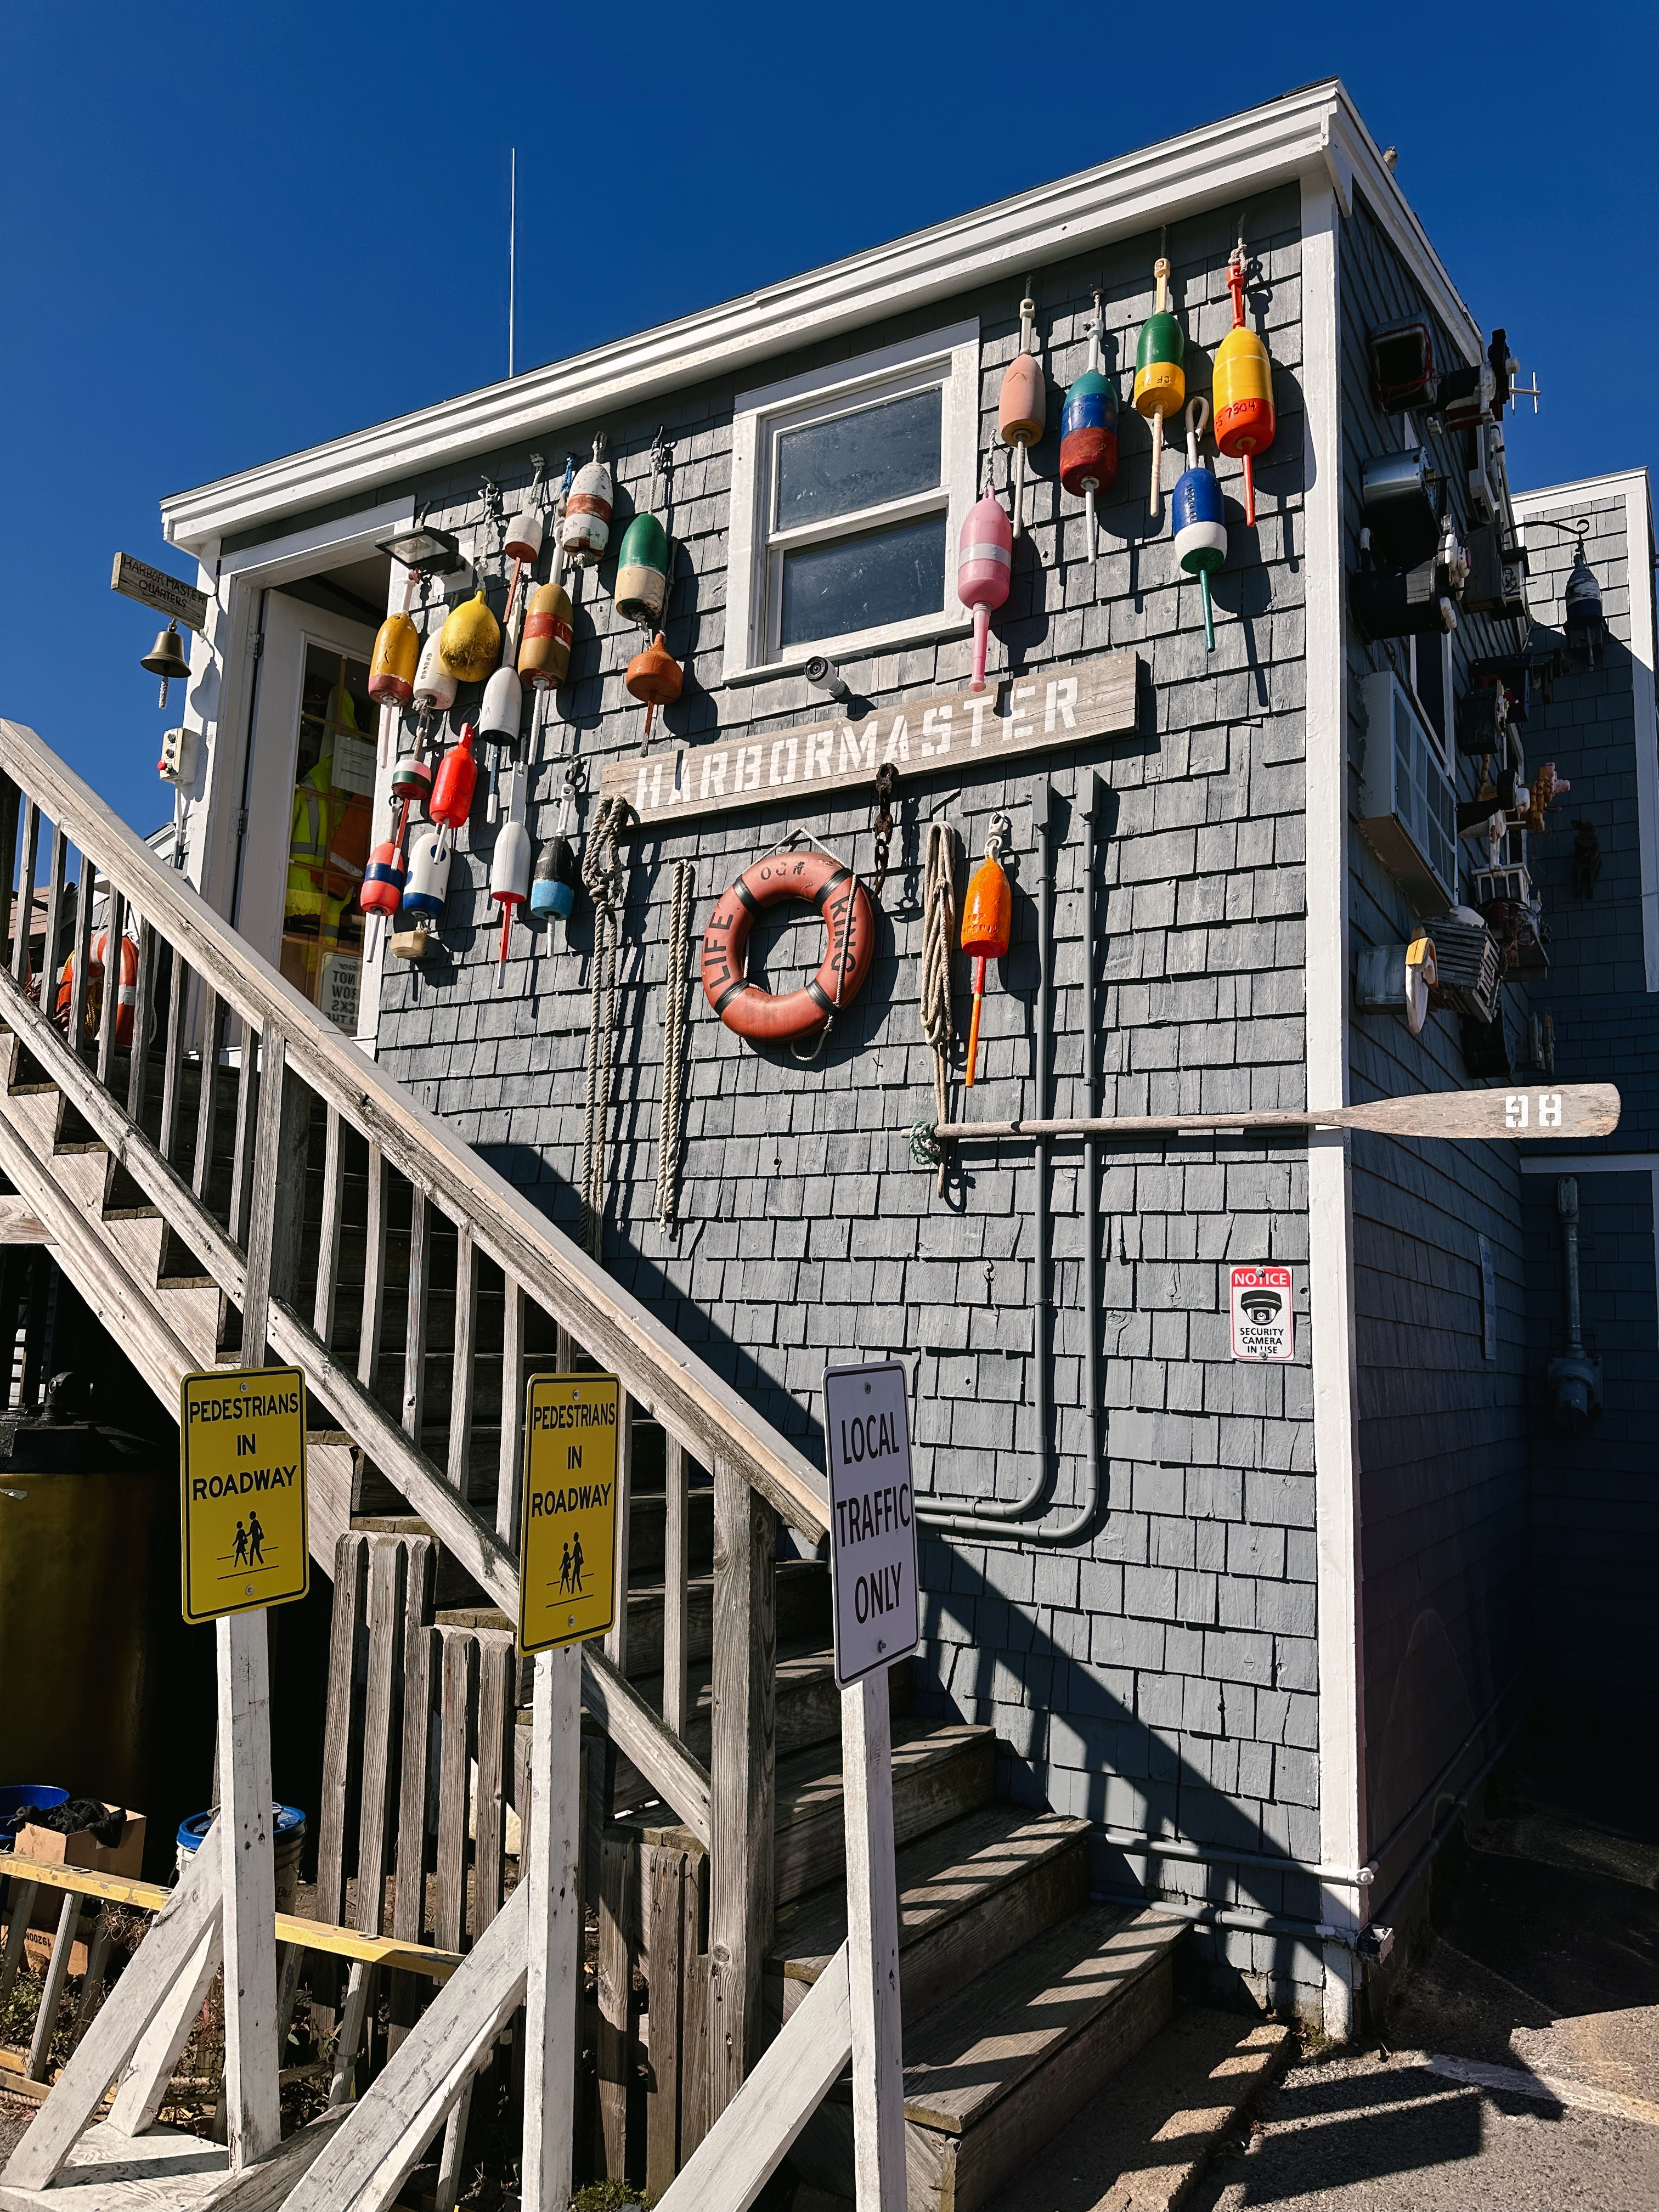
  • Perkins Cove. This is a charming area in Ogunquit where most stores are located. It’s also a very picturesque area in town. You are able to drive through here but it seems mostly for foot traffic.
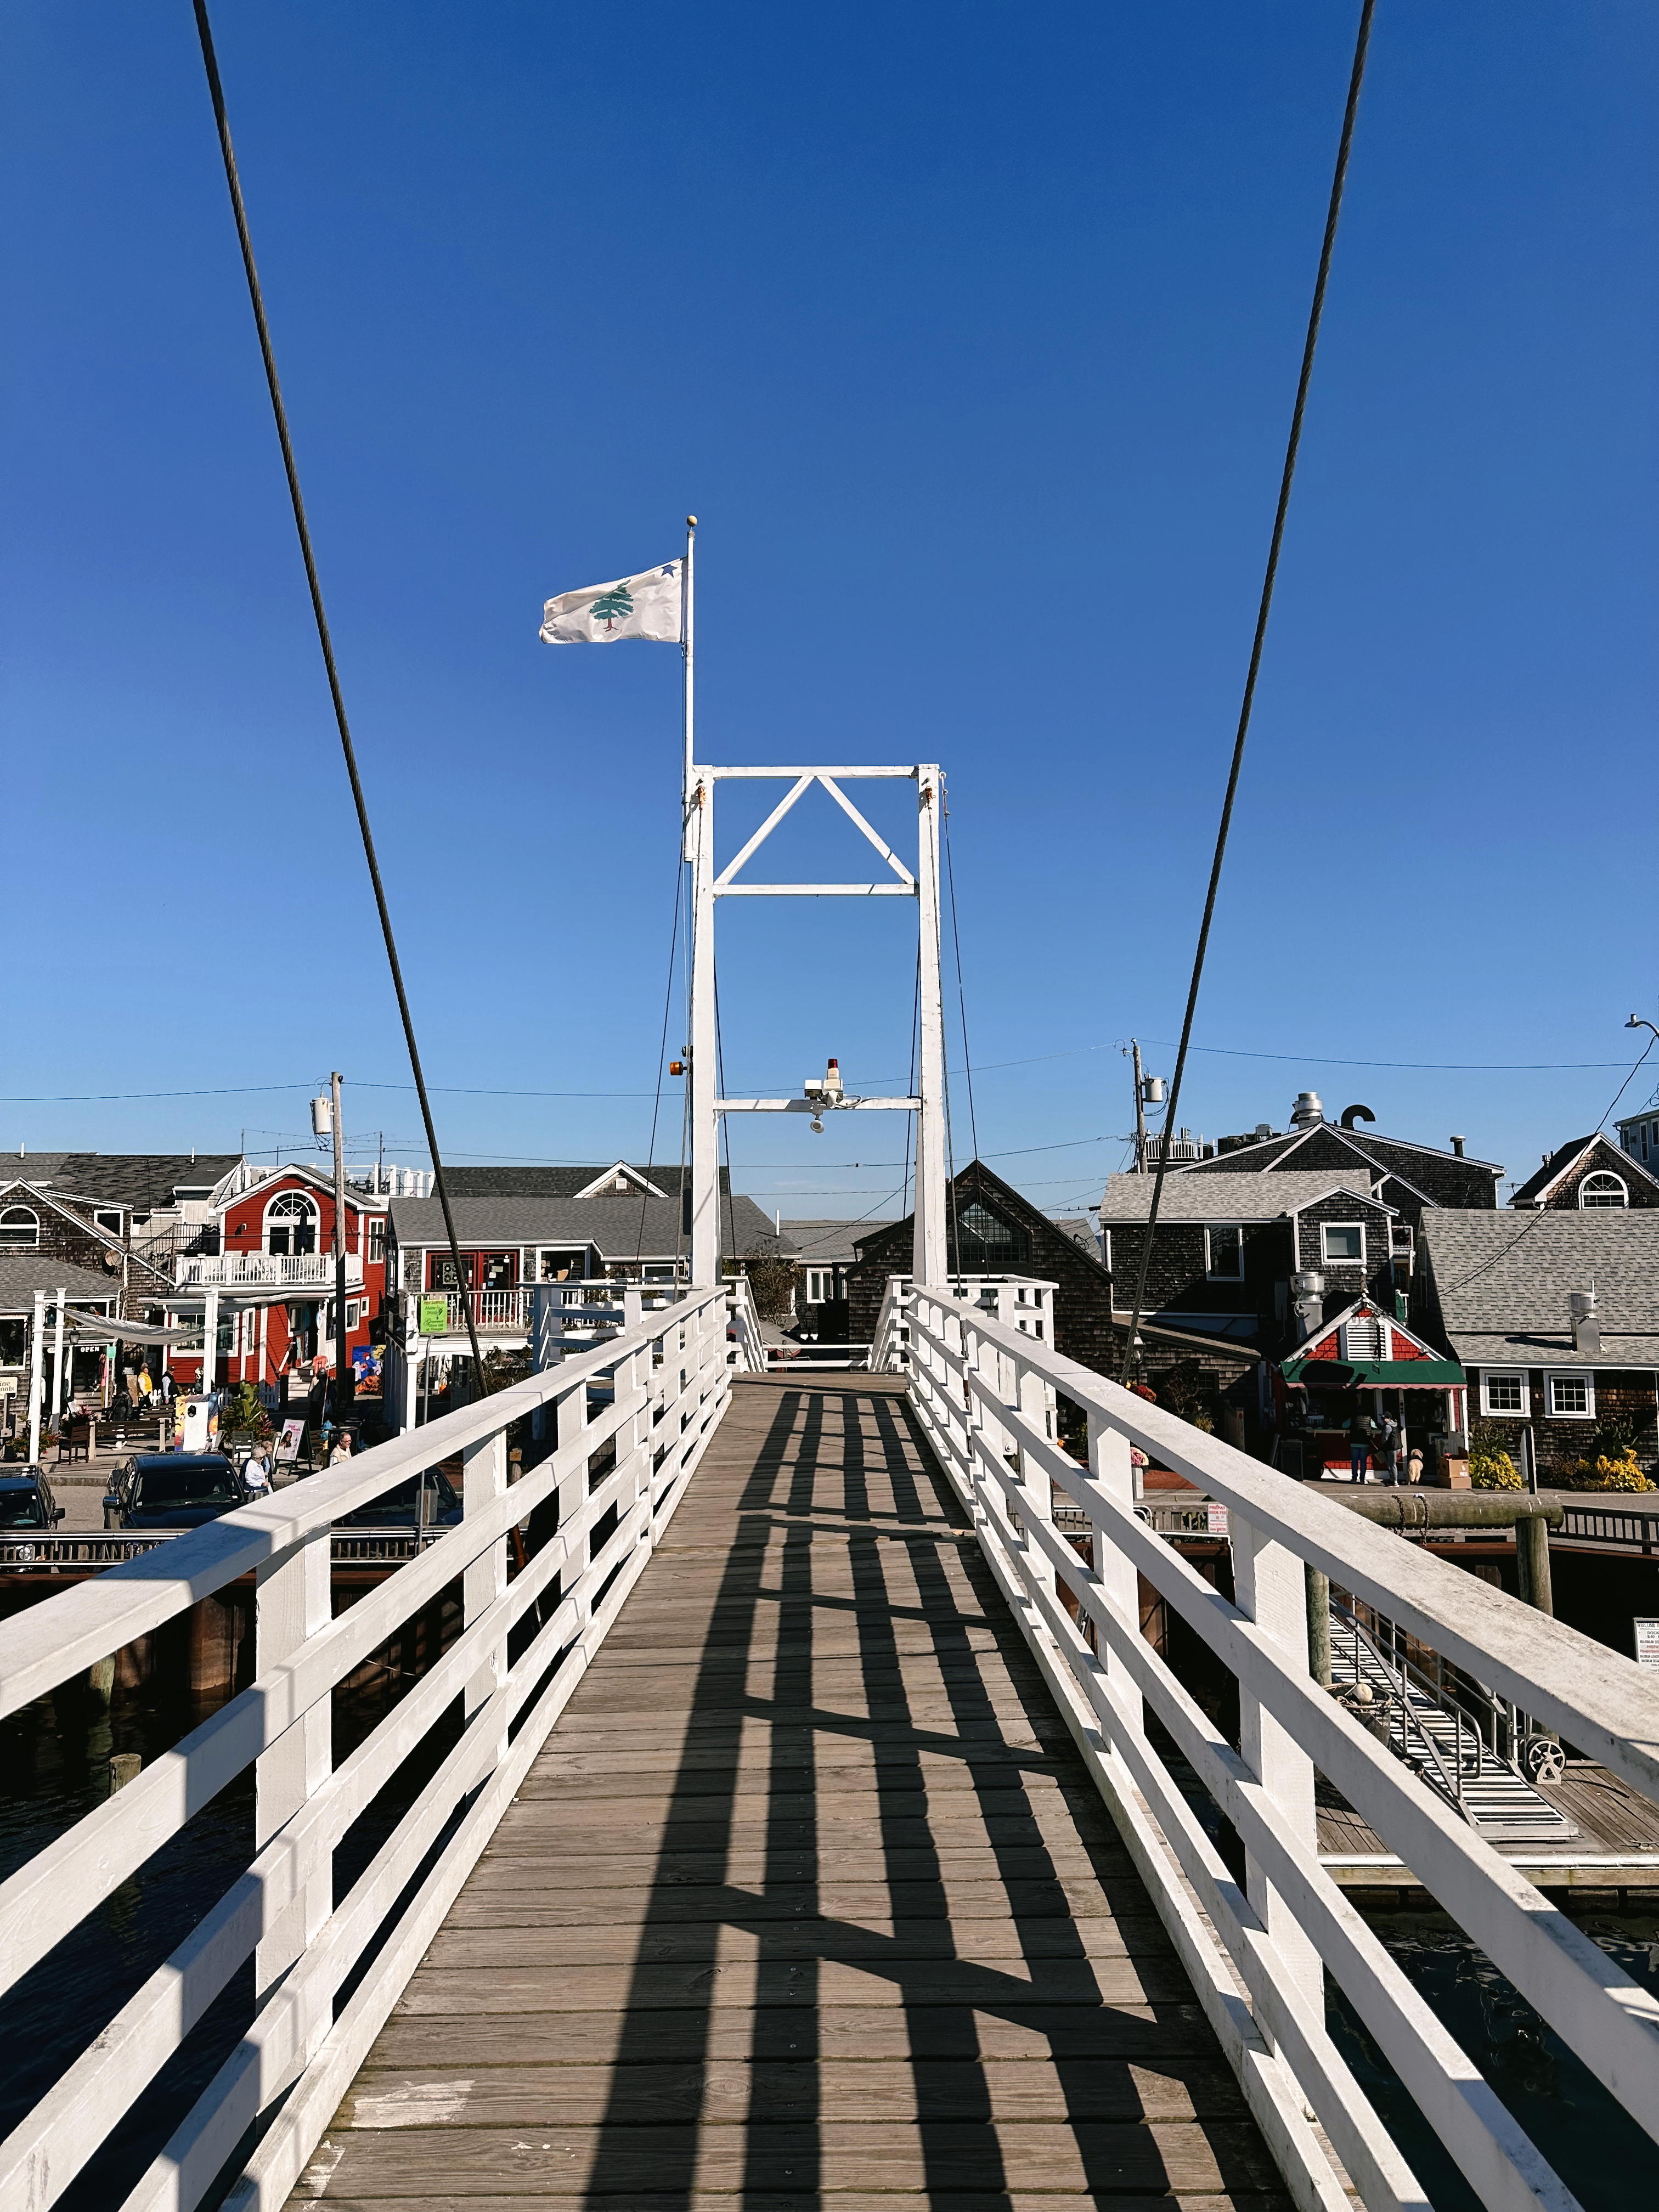
  • Walk along the Perkins Cove drawbridge. This is right near Perkins cove and visitors can actually push a button to open the bridge for taller boats to pass through.
Views along marginal way
Perkins cove views
Marginal way
Perkins cove
Perkin’s cove drawbridge
Views from the drawbridge
Foot bridge lobster

York, ME

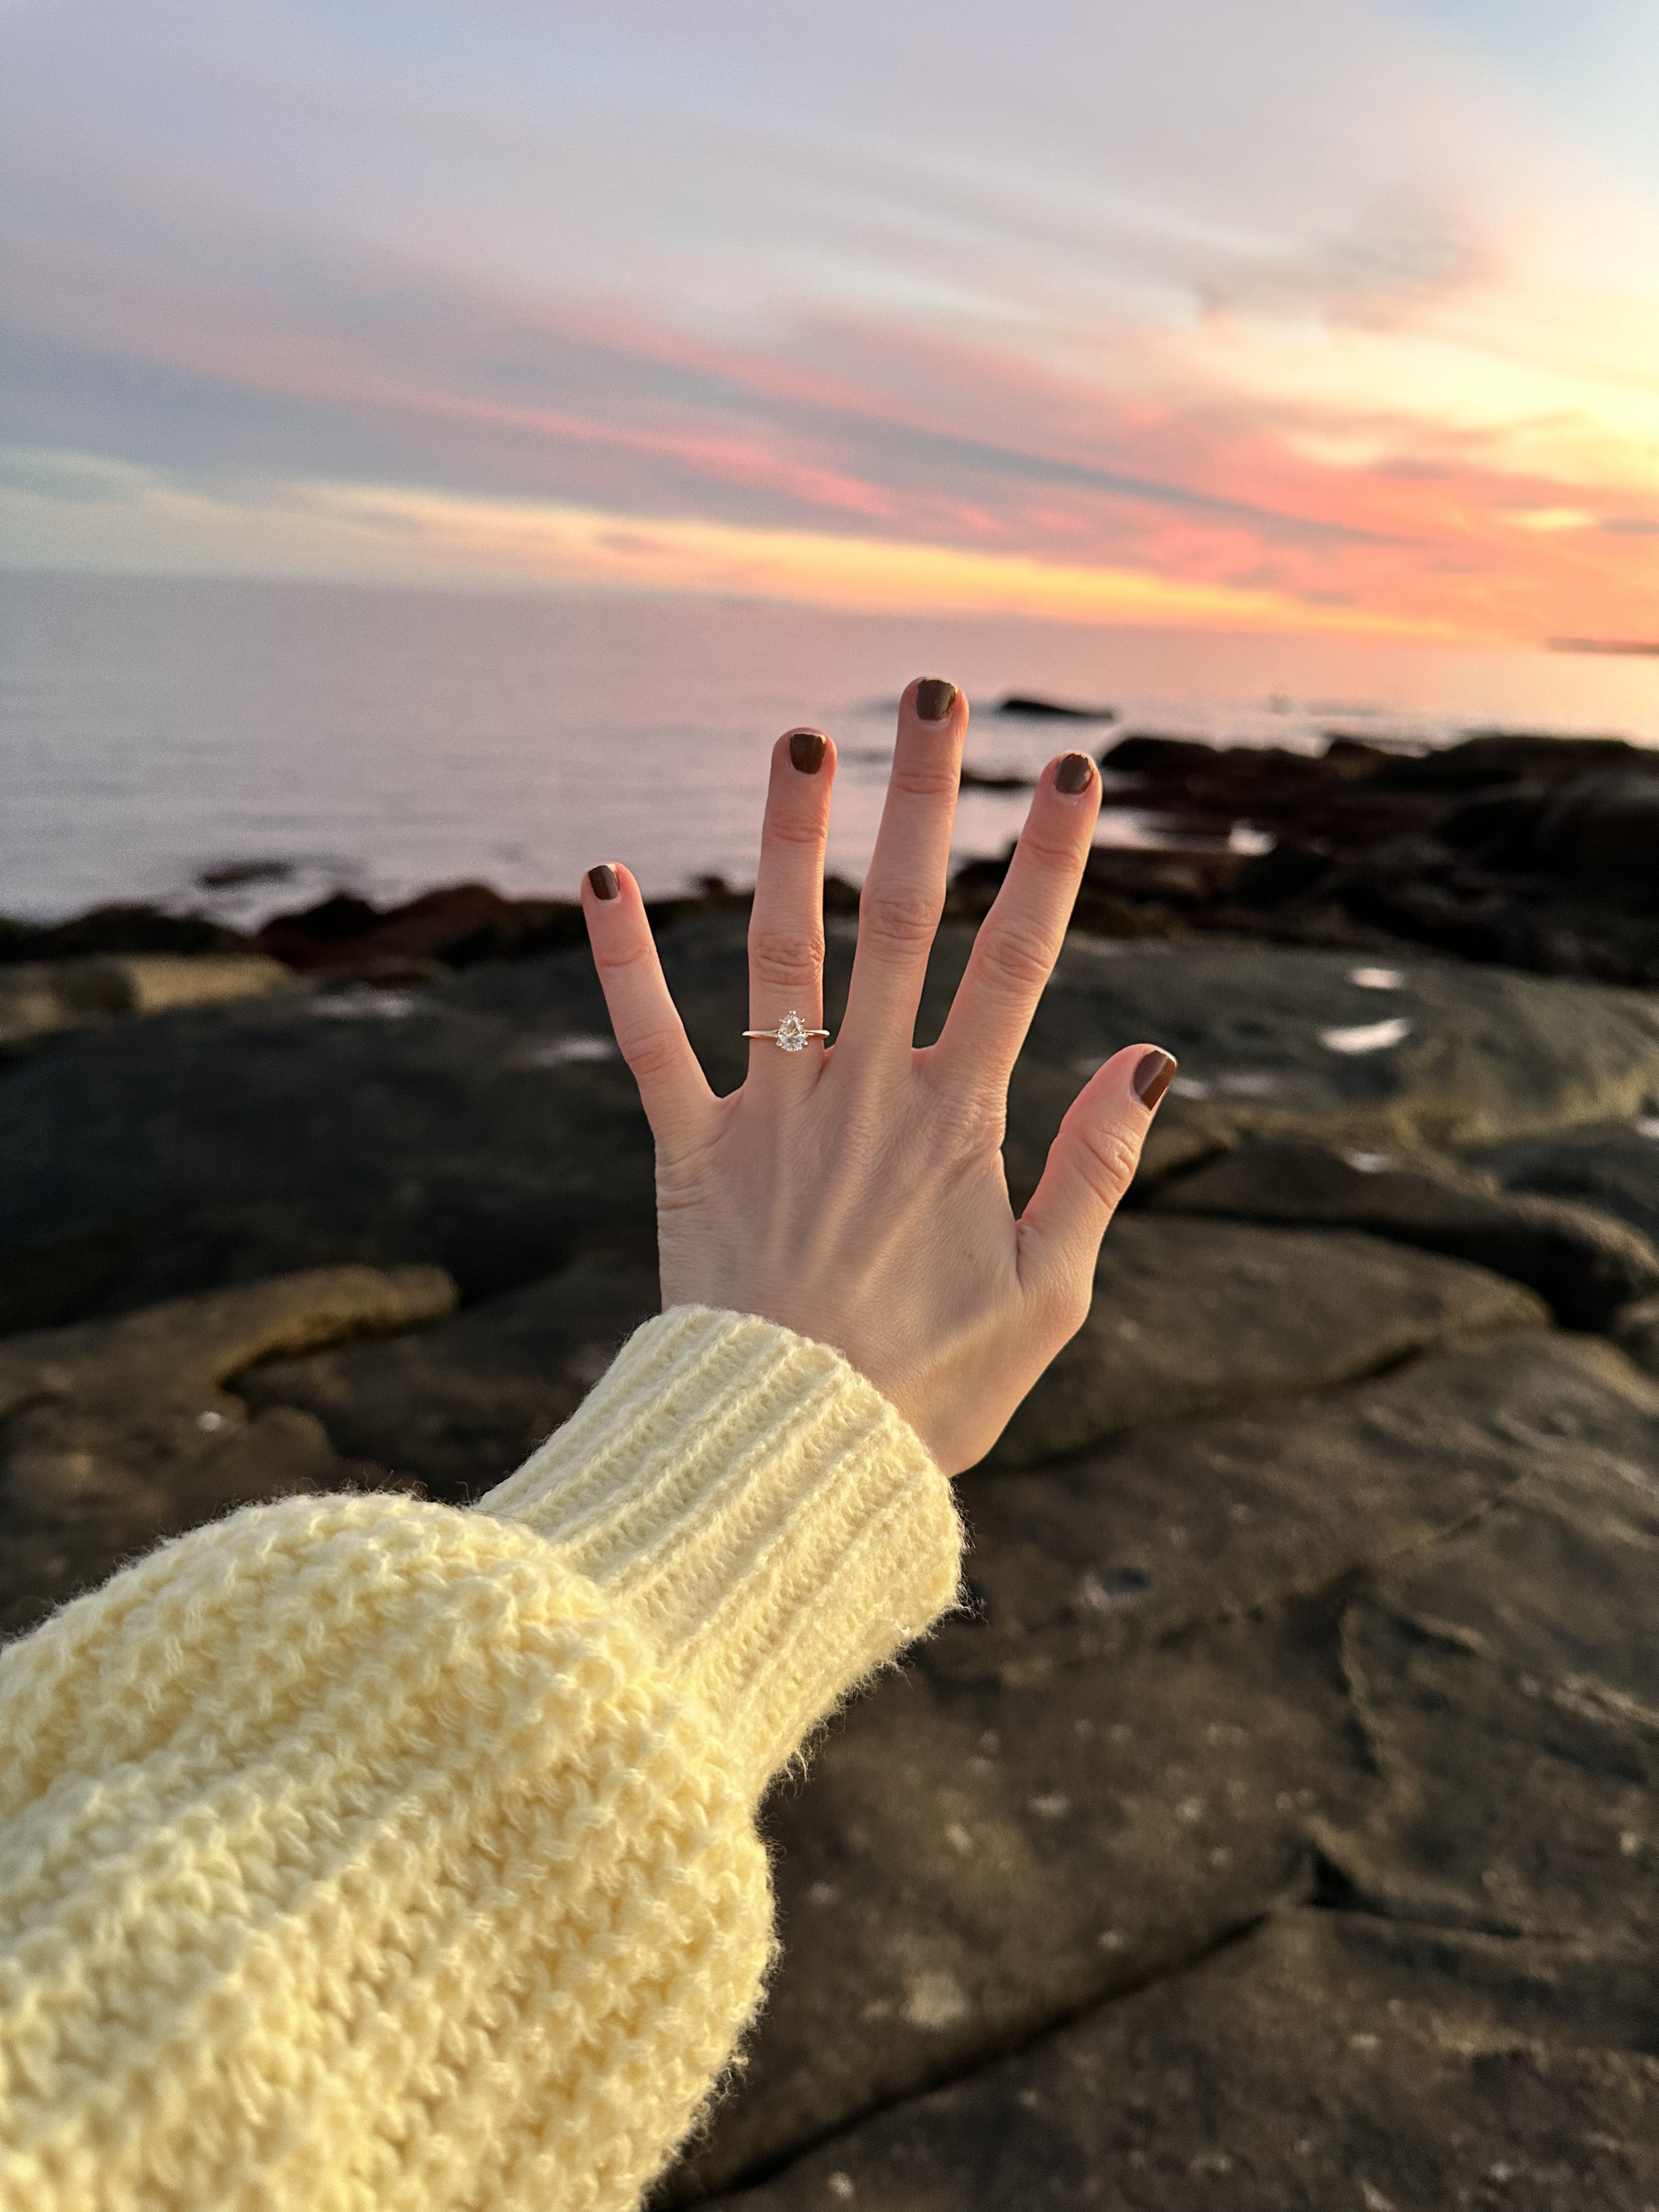
York was another last minute stop. We had some down time and we saw York was only 20 minutes away from Ogunquit and we decided to make the drive there for sunset. York ended up being one of my favorite stops because of the memories made here. One of the main things do to in York in visit Nubble lighthouse, it’s the heart of the town. We decided to spend sunset here and it was one of the most beautiful sunsets I’d ever seen. As the sun was setting, Patrick and I set up our tripod to take some videos and photos together, as we always do when traveling together, and to my surprise Patrick ended up proposing! It was such a beautiful moment and I couldn’t have asked for a better sunset and evening. York is a place I’ll cherish forever because of this incredible moment.

Since we were only in York for a couple of hours, the only thing I can really recommend is going to Nubble lighthouse for sunset! There is a sweet gift shop right near the lighthouse with bathrooms, souvenirs, and information about the town. While driving through the town, it seems like a sweet area with lots of activities especially available during the warmer months of the year.

Activities

  • Watch sunset at Nubble light house. Since we were only here for a brief amount of time, this is my only recommendation! It was a stunning place to view the sun setting.
Getting engaged at Nubble lighthouse
Surprise proposal

Acadia National Park Guide

Acadia national park is one of the most magical national parks I’ve been to yet. I had the opportunity to visit during the fall time and the fall foliage enhanced the beauty of the park. Acadia is located nearby Bar Harbor, Maine and it provides stunning mountain, coastal, lake views and scenery. Here’s a guide to things I’d recommend doing on a trip to Acadia.

Things to Know About Acadia

🎟 The park requires a park fee. It’s $35 for a 7 day period. I’d highly recommend purchasing the America the Beautiful pass if you plan to visit multiple national parks at once. The annual pass is $80 and gets you into national parks around the country for a year!

🦞 The closest town to the park is Bar Harbor and when I say close, I mean very close! Bar Harbor is about 15 minutes away (or less) from popular spots in the national park. The proximity is so convenient and it was so nice having lodging and eating options close by.

πŸ• There are four established campgrounds within the park. I’d suggest making a reservation well in advance if you plan to camp, typically reservations open 6 months before your trip date, however, Acadia’s reservation period opens 2 months before your trip dates. We stayed at Blackwoods campground which is the most conveniently located campground in the park if you plan to visit major spots inside the park and Bar Harbor. Be sure to research on where in the park you’d like to be, the campgrounds are spread across the entire park. There are also no showers within the campgrounds so be prepared to find a way to shower elsewhere if needed. While we were staying at Blackwoods campground, there was a nearby shower house that is open 24 hours to the public. It’s located at 14 Otter Creek Drive.

Aside from campgrounds, there are plenty of hotels and lodging options inside Bar Harbor. It seems like a popular area, so I’d also recommend booking accommodations in advance if possible, especially if you plan to visit during the summer or fall time.

🌊 The park loop road is the scenic road that connects major highlights and viewing points of the park. Keep in mind, there is an area on the road that’s one way only so if you miss your stop, you’ll have to go around the loop again.

Best Things to Do in Acadia

Go on a Hiking Adventure

Acadia has so many incredible hikes! They are known for three hikes that require use of a ladder or iron rods to complete the hike. Although this may seem a little intimidating, it added such a fun element to a hike we’ve never experienced before. Here are some hikes I’d recommend adding to your list:

  • Jordan Pond path. This is an easy 3 mile loop trail near the Jordan Pond restaurant. This trail offers beautiful views of the “bubble” rocks from a distance as you walk along the perimeter of Jordan pond.
  • South Bubble trail. This was our favorite hike in the park! It’s a fairly easy to moderate 1.4 mile hike that brings you to the top of the south bubble rock. There are a few ways to complete this hike, we started at the bubbles parking lot and followed signs for the south bubble rock.
  • Beehive trail. The beehive is one of Acadia’s three iron rod/ladder trails. The beehive is considered the second most challenging as most of the hike requires use of the iron rods to hike to the top of the beehive summit. This trail is short and steep, only 1.4 miles to the top of the summit. If you are scared of heights, I’d reconsider completing this hike. Luckily, you can still hike to the summit by taking the Bowl trail which avoids the iron rods but still brings you to the top view point. If you do hike with the rods, I’d recommend going down the Bowl trail to make it a loop so you don’t have to use the rods on the way down. We really enjoyed this hike because it gave us such a different experience. Keep in mind, this is the park’s most popular hike so plan to hike early if visiting during busy season. We started around 7:00am on a weekday and by the time we were finished, there were so many people!
  • Beech Cliff Ladders trail. This is the third hike included in the ladder/iron rods collection and the least challenging. This is a 1.8 mile hike that is another short and steep trail with four ladders. This was such an enjoyable hike and it was on the quieter side of the park so we were one of the only couples there. The top view point gives you an incredible view of echo lake. For this trail, we parked at the echo lake parking lot. On the hike down, we took the Canada Cliffs trail to make this a loop and it was also easier to hike down without ladders.
  • Ocean Path trail. This isn’t technically a hike but this trail is along the park loop road and it provides stunning views of the ocean and the mountains of Acadia. I’d recommend walking along parts of it to experience a different perspective of the park.

Drive to Cadillac Mountain

This is a must do while visiting the park. Cadillac mountain is the highest point in the park and there’s 360 views of the park, Bar Harbor, and other coastal parts of Maine. Keep in mind, during peak seasons, the park requires reservation tickets to limit the amount of crowds at a time. I’d recommend making a reservation for sunrise because during certain seasons, Cadillac mountain is the first point on the eastern coast that sees the sunrise. We were planning to visit during sunrise one day during our trip but unfortunately it rained so we rescheduled for a different day in the morning which was still beautiful!

Explore Bar Harbor

As I’ve mentioned, Bar Harbor is an amazing Maine town! I’d take some time exploring the streets, shops, and restaurants. We spent several afternoons here shopping around for souvenirs and trying different restaurants. If you’re a camper like us, we were also able to do laundry in town which was helpful. Here are a few of my favorite spots in town I’d recommend:

  • Acadia Perk coffee β˜•οΈ
  • Cafe This Way (such great breakfast!)
  • Mount Desert Island ice cream 🫐 (be sure to try blueberry ice cream, a Maine must have)
  • Side Street Cafe πŸ₯ž
  • Cool As A Moose store (great place for shirt souvenirs)
  • Bark Harbor pet supply
  • In The Woods store 🌲
  • Christmas Vacation Shop (a great spot to find an ornament souvenir)
  • The Acadia Country Store
  • Frenchman Bay Lobster Rolls 🦞

Drive the Park Loop Road

As I’ve mentioned, this a beautiful scenic road! There’s a lot of trails and spots along the road so you’ll likely drive along this at some point. I’d recommend spending time at Otter cliffs, Thunder Hole, and Sand Beach which are all located off the scenic road.

Spend Time at Bass Harbor Head Lighthouse

This beautiful lighthouse is located in the Southwest harbor area of the park, about 20 minutes from the Bar Harbor area. This lighthouse is a must see while visiting the park. I’d recommend walking down to the rocks to get a great photo and view point of the lighthouse.

Visit the Jordan Pond Resturant

An iconic activity in the park is to have lunch at the Jordan Pond house restaurant and to try their famous popovers. This was on our bucket list while visiting, however, we didn’t have a reservation so the wait time was too long for us the day we tried. If you’re serious about trying a popover, I would recommend making a reservation or being prepared to wait for a while. The restaurant is beautiful and it’s surrounded by gorgeous Acadia views.

Acadia Tips

  • Be sure to make reservations for any necessary areas of the park. Right now, it seems like Cadillac mountain is the only requirement during busy season.
  • Book overnight accommodations as far in advance as possible to ensure you have a place to sleep. Acadia is a popular national park that draws a lot of attention so it’s helpful to book in advance when possible.
Entering the park, photo taken at the hulls cove visitor’s center sign
Bass Harbor lighthouse
Exploring otter cliffs
Views from south bubble rock
Thunder hole
Beech ladder cliffs trail
Beech cliff ladders trail
Top of south bubble rock
Exploring downtown Bar Harbor
Shops in downtown Bar Harbor
Beech cliff ladders trail
Views along Jordan Pond path
Beehive trail iron rods
Views from the top of Beehive trail
Cadillac mountain views
A foggy afternoon on the south bubble rock

A Weekend Guide To The Great Smoky Mountains National Park

Patrick and I recently spent a long weekend in the Great Smoky Mountains national park. This was our second time visiting the park and it was just as magical as we remembered it being three years ago. This trip was special because it’s the first time we’ve gotten to revisit a national park we’ve already been to and we were celebrating my birthday. This trip, we were able to do and see a lot more compared to our first trip in the park. Here’s a weekend guide to the park based on some things we did:

Things to Know About the Smoky Mountains

  • It is FREE to enter the Great Smoky Mountains national park, which is such a plus for visitors!
  • As of last year, the park requires a parking pass if you plan to park your car anywhere inside the park for longer than 15 minutes. There are a few parking pass options you can select. For a one day pass it’s $5, for a weekly pass it’s $15. There are kiosks in several areas of the park where you can purchase a parking pass which takes card only. It’s also possible to purchase a pass online before visiting the park.
  • If you plan to stay inside the park overnight, there are a few campground options. There are 10 campgrounds located within the park:
    • Smokemount
    • Cades Cove (we stayed here one night this trip)
    • Elkmount
    • Cosby
    • Abrams Creek
    • Big Creek
    • Cataloochee
    • Deep Creek
    • Balsam Mountain
    • Look Rock
  • Keep in mind, the campgrounds are located in various areas of the park (the Smokies are huge!) so it’s important to pick a campground central to the area you’ll be exploring. The campgrounds don’t offer showers so also be prepared for this as well. We stayed at Cades Cove for one night this trip and enjoyed how central the location was to the cades cove scenic loop area.
  • If you’d rather sleep in a hotel, cabin, or another accommodation, it would be best to look in the towns surrounding the park; Gatlinburg, Pigeon Forge, Sevierville, and Townsend. We ended up finding a cabin just outside of Gatlinburg for the remainder of our stay and it was great!

Things to do in the Smoky Mountains

Cades Cove loop. This is the top activity I’d recommend doing while visiting the park. Cades Cove offers a scenic 11 mile one way that you can drive along. There are so many pull off spots you can use to soak in the stunning views. You will definitely see wildlife here while driving through, this past trip we saw black bears from a distance but three years ago, we saw a family of black bears pretty close to the road which was incredible! This area does get crowded since it’s so accessible, so be prepared for lots of crowds and people driving slow to soak in the views and capture photos. There’s also an option to bike the loop and you can rent bikes at the convenience store before starting the loop. The Cades Cove visitor’s center is located along the loop, there are bathrooms there and a store you can stop by as well.

Newfound Gap Road. Another scenic road I’d recommend driving along is the Newfound Gap, it’s extremely scenic and also offers plenty of pull off spots. This road also takes you to popular hikes like the chimney tops trail and the alum cave trail.

Drive parts of the Blue Ridge highway. We had this on our list for the weekend, but weren’t able to fit it. The south end of the Blue Ridge highway is located close to the North Carolina part of the Smoky Mountains. It’s a long highway but worth driving along parts to soak in more mountain views!

Visit popular towns nearby. As I mentioned, the park is located around so many towns that offer lodging, restaurants, and souvenir shops. We spent some time exploring Gatlinburg and Pigeon Forge. I’d recommended exploring or checking out a restaurant in town. These towns are definitely overcrowded, especially in the summer time but still worth driving through.

Hike! Of course when visiting any national park, there will likely be some great hikes to try. This trip we planned for two popular hikes and I’m so glad we had the opportunity to hike these trails. Keep in mind, during the summer months, the parking lots for the trails fill up extremely quickly! We weren’t able to get to either hiking trail early in the day so we had to circle around a few times to find a parking spot. Some hikes I’d recommended adding to your list:

  • Laurel Falls. This is one of the most popular trails in the park and likely because it’s fairly easy to complete. Hiking to the falls is about 2.5 miles round trip. Once you get to the falls, there’s an upper and a lower area to explore. Accessing the lower falls is a bit risky so we decided to stay near the upper falls.
  • Alum Cave. This was our favorite hike we completed this trip! There are a few options to complete this hike. You can hike to the Arch Rock only which is about 1.4 miles one way, or you can continue and hike to the Alum Cave Bluffs which is about 2.3 miles one way. We decided to hike all the way to the bluffs and in total the hike was close to 5 miles round trip. Hiking to the bluffs was a bit challenging, and most of the hike was uphill but the views at the top made it all worth it! Another option is to continue hiking from the Bluffs all the way to Mt. LeConte, which would make the hike a total of 10 miles round trip. I’ve heard continuing on to the LeConte is stunning but very challenging.
  • Rainbow Falls. We completed this hike on our last visit to the park and it was stunning! I’d recommend also trying this hike if you only have time for one trail.
  • Abrams Falls. We wanted to hike this trail last time we visited but it was closed due to construction. It’s located within Cades Cove and also seems like an incredible hike that we want to try on our next trip!

Go Fishing. If you like to fly fish, the park has some great rivers that are easily accessible. One thing to keep in mind is you do need a Tennessee or North Carolina fishing license if you plan to fish inside the national park. Fishing licenses can be purchased online, they are not sold at any store in the park.

Views along Laurel Falls
Entering the park from Gatlinburg
Morning coffee at camp
Patrick along the Alum Cave trail
Celebrating my birthday at camp
Horses in Cades Cove!
Laurel Falls
Celebrating my birthday at camp
Views along Alum Cave trail
Arch Rock in Alum Cave trail
Birthday celebrations at camp
Bridge views along Alum Cave
Hiking along Alum Cave
Top of Bluffs along Alum Cave trail

Camping Essentials for Beginners

I still consider myself new to the camping world. Before I met Patrick, I could count on one hand the amount of times I had camped. Camping became more frequent in my life when Patrick and I started traveling to national parks and forests and wanted a budget friendly way to sleep. Although it was an adjustment at first, I can now say, it’s one of my favorite ways to travel.

Since I’ve learned a lot from experience the last few years, I thought I’d share some camping essentials I’d recommend if you’re just starting out or if you’d like to camp more.

Camping Essentials

πŸ• Tent: Having a tent is an obvious essential while camping! Although we’ve done our fair share of car camping, tent camping is more spacious and there’s better air ventilation. We recently invested in a new tent, REI base camp 4 and I’m so excited to test it out on our next camping trip.Before we were using the marmot limelight and loved it! Either are perfect options for first time campers. I’d recommend doing some research when picking a tent, it’s important to find a tent that will be durable and hold up during weather conditions.

🧊 Cooler for food storage : Having a cooler for your food is a must especially if you’re planning to camp. I’d recommend a basic cooler like this one for a weekend camping trip.

🍳 Cooking Prep: The convenience of cooking your own food while camping is so important! We love our Eureka stove, it’s perfect for cooking any meal and storing it easy! Having your own stove is also ideal if a campsite doesn’t have a stove top over the fire pit. We also use a pots and pan set from stanley and have enjoyed the easy set up of this equipment.

πŸ› Sleep Prep: If you want something more than a sleeping bag while tent camping, I’d recommend a mattress! While camping we’ve tried an air mattress, a trifold mattress, and sleeping bags. For the last three years, we’ve been consistently using a full sized trifold mattress that fits well in our tent and car. We’ve learned throughout the years how essential proper sleep gear is while camping and it’s definitely worth the extra money! I’d recommend doing some research to determine what would be most comfortable for you.

πŸ›‹ Lounging: While camping, it’s also important to consider the gear you’ll use outside of your tent for relaxing. We love our camp chairs from Woods, they are so big and cozy, perfect for relaxing by a camp fire!

πŸ’§Water Jug: It’s important to have plenty of water while camping. We like to carry a water jug, especially during our longer trips. Most campgrounds and national parks also have water fill up spots which comes in handy if you have a big jug to fill up.

πŸ”¦ Lighting: Lighting is essential while camping, especially if you are camping during the fall and winter months when the sun goes down sooner. We like to have head lights, a lantern, and sometimes string lights to maximize our lighting if needed.

🩹 First aid kit: It’s always a good idea to have a first aid kit to prepared for any accidents.

Extra Things to Consider

These items are more of an investment and I’d recommend if you plan to camp often or for long periods of time. Although camping is meant to be minimalistic, I believe it’s still important to have some items that bring comfort and enhance the experience.

☎️ Satellite Phone: We always carry our garmin in reach mini while camping and hiking in more secluded areas. Typically most campgrounds have little to no service and it’s nice to have some security of reaching out for assistance if needed in an emergency or to reach out to people at home if needed.

🚽 Travel Toilet + Biodegradable waste bags: We invested in a travel toilet a couple years ago and it is amazing! It definitely comes in handy if the campground toilet is far away from our site or when we camp in primitive areas that don’t have any bathroom facilities. This travel toilet set up is so easy and you can purchase biodegradable waste bags and waste gel to ensure you are disposing properly. We also use a privacy tent at times if the campground is less secluded and we need to use the travel toilet.

🧊 Travel refrigerator: This cooler is great when traveling long distances or camping for long periods of time. No ice required and it has a refrigerator and freezer side. It does have to be plugged in but if you have the right equipment, it’s a nice investment piece to ensure proper food storage and care while camping.

🚰 Jet boil: This is convenient for quick food prep. The jet boil is able to boil water very quickly and definitely worth the extra money.

🚿 Rinse Kit: The rinse kit is great for showers if needed or for rinsing off dishes. Sometimes campgrounds have showers and dish stations, and sometimes not so we like having this as a backup solution for both.

πŸ”Œ Jackery: Another investment piece that may be necessary if traveling and camping long distances. This device charges our electronics and cooler throughout our entire trip. The battery lasts a decent amount but does have to charged up when running low. It can be recharged through a typical outlet or through solar panels which you can purchase on their website.

πŸ”‹ Jump start battery: This was a new purchase for us, for a long time we had been borrowing it from my sister, and although it’s an investment item, I consider it a necessity. There were a few times, our car battery died on us when camping out west and this was a relief to have this for a quick charge!

A Weekend Away

This past weekend, Patrick and I booked a cottage to have a relaxing weekend away and to continue celebrating our anniversary. The cottage was located on a large country side farm with horses and cows surrounding the property. It was the most magical and serene environment to relax and have some time together unplugged.

While we were there, we spent time with the horses and named all seven. They were so friendly and would come up to the fence when they would see us. The property also had a pond that we were able to fish. Patrick is a passionate fly fisherman and he taught me how to cast a fly rod and I ended up catching four fish! I’m so thankful for this weekend, it was a much needed break from the usual routine. Hoping this inspires you to also take a relaxing weekend away.

One of the horses at the cottage
The beautiful yellow front porch
Rolling hills all around

Morning coffee on the porch
Learning how to fly fish
Cozy breakfast
Cottage Kitchen
Sunset from the porch
Morning coffee
Cottage living space
Morning pancake prep
Dining space

How To Take a Road Trip on a Budget

Throughout the last three years, taking a road trip has become Patrick and I’s favorite way to vacation. We’ve seen some incredible places throughout the country and we do so all from our own car, driving across several states. There’s something about long car rides that I love and that make the trip even more memorable because of the journey involved to get to the destination. One of the main reasons we started driving everywhere on our trips was primarily to save money. The expenses on any trip will inevitably add up so it’s helpful to find some ways to reduce cost if that’s your goal! In this guide, I’ll be sharing my tips on how to save and budget money for a road trip.

Budget Tips

Camp

Camping can either be free or much less expensive than other accommodations. I was never a big camper until we started road tripping to various national parks and forests, but now it’s usually all we book when traveling. We found that campgrounds typically charge anywhere from $25-$50 per night which is much cheaper than nightly costs of hotels or airbnb’s! Free camping is also possible too, we’ve had luck finding free campsites by using apps or other online resources. Keep in mind, free camping is definitely different than an established campground, mostly because there aren’t any amenities and it’s all first come first serve. For finding campgrounds or free spots I’d recommended:

Make a Packing List to Follow

For the last three years, we’ve planned a big road trip and one thing that has made the whole experience less stressful was following a packing list. Writing out everything needed for a big road trip from clothes, food, camping equipment, and other necessities made the packing and planning process so much smoother! When following a list, you’re more likely to pack everything you need and not have to buy things along the way. Another plus is you can pack more when driving compared to flying.

Select Budget Friendly Activities

Depending on where you are road tripping to, there will likely be activities you are looking forward to. I’d recommended finding as many free or less expensive activities as possible to save money. If you like national park travel, like me, one of the main things I enjoy are the hikes (which are usually free!). However, depending on where you’re going, there may be activities on your bucket list that do cost something and that’s okay! It’s all about balancing and prioritizing what you want to do and spend money on.

Plan to Make Most Meals

One of the luxuries of road tripping vs. flying is you can pack as many snacks and food items as you want! Making your own meals while road tripping will be a huge cost saver! If you’re planning to stay at hotels, take advantage of free breakfast if offered too. Of course we love to eat out but we usually plan to make majority of our meals + coffee while traveling.

Plan Road Trip Route in Advance

Planning your route in advance will not only save money but also time. It’s a big relief to know the route you’ll be taking, if there are tolls, how many hours til your destination, where you’ll be stopping to sleep, etc. Planning out stops in advance, will make it more likely for you to budget expenses for each spot which can really save money! Another helpful tip is to use navigation (i.e., apple or google maps) to find the fastest route, a route without tolls, if there will be any traffic delays, etc.

Save On Gas

The biggest expense while road tripping is gas. If possible, in the planning process you can consider how many miles per gallon you need to fill up or when you’ll likely have to stop. We’ve used the app gasbuddy too to try and find cheap gas in the areas we’re in. While saving money and budgeting for your trip, keep in mind, gas is something that will add up and that you’ll have to stop for the most while road tripping.

Amazing Things To Do in Grand Teton National Park

Grand Teton national park is one of my favorite parks I’ve visited yet. The park has such a magical feeling from the Teton mountain range, incredible wildlife, lakes, and the nearby town, Jackson Hole. The park offers so much to do and has several different options depending on interest level. Here is a quick guide on some amazing things to do in GTNP!

Things to Know about Grand Teton National Park

🎟 The park requires an entrance fee. It’s $35 for a 7 day period. I’d highly recommend purchasing theΒ America the Beautiful passΒ if you plan to visit multiple national parks at once (like combining the Tetons and Yellowstone into one trip). The annual pass is $80 and gets you into any national park for a year!

🐴 Grand Teton’s closet town is Jackson Hole, Wyoming. I would recommend spending time in Jackson Hole, it’s about 30-40 minutes outside of the park, depending on the area you’re staying in. There’s plenty of restaurants, stores, and accommodations if you’re unable to stay inside the park or if you’d prefer a hotel stay.

πŸ• There are six established campgrounds within the GTNP which are all conveniently located throughout the park. As always, I’d suggest making a reservation well in advance if you plan to camp, typically reservations open 6 months before your trip date. We stayed at Jenny Lake campground which is tent only and this was a very central location. Be sure to research on where in the park you’d like to be, the campgrounds are spread across the entire park.

Other than campgrounds, there were a decent amount of free camp spots which was a nice surprise! We stayed at a free spot for three nights before moving to our campground. These free camp spots were definitely more crowded then others we’ve stayed at but it was nice to have a free sleep! Keep in mind, free camp spots are always primitive so no amenities (water, bathrooms, guaranteed spot, etc).

🚐 Grand Teton is a relatively small national park and there’s two sides to it, one is highway 191 (outer road) and the other is the scenic drive (inner road) which includes many beautiful look out points and access to popular trails. Interestingly, if you stay on the side of highway 191, you don’t have to pay an entrance fee even though you’re technically in the park! Highway 191 also takes you into Jackson Hole.

Things to do in GTNP

Watch the Sunrise

This was my favorite thing to do in the park! The sunrise within the Grand Teton national park, is truly one of the most spectacular experiences you’ll have. Watching the Teton mountains change to pink and purple as the sun comes up is breath taking. Anywhere you watch the sunrise within the park will be beautiful, but I’d recommend Schwabacher landing or Mormon Row.

Sunrise at Schwabacher landing

Go on a Hiking Adventure

Grand Teton national park has so many incredible hikes to do. Throughout my visit, some of my favorites were:

  • Hike to Hidden falls and Inspiration point. There’s a boat shuttle available you can take from Jenny Lake that drops you right near the trail head to hike up to hidden falls. If you feel up for a longer hike, continue on past Inspiration point and hike towards Cascade Canyon. This is a long hike but it’s worth doing parts of it!
  • Cascade Canyon.Β This is a long hike but we were able to hike parts of it and combined it with the Jenny lake loop so we could also see hidden falls and inspiration point like I mentioned above.
  • Delta lake. This is a stunning but strenuous and steep hike that takes you to delta lake. We attempted to hike this trail but had to turn around after a few miles in due to Patrick getting elevation sickness. Make sure you go prepared with plenty of water and snacks as well as giving yourself time to adjust to the elevation in the area.
  • Taggart Lake.Β This is a fairly easy to moderate 4 mile hike that takes you to Taggart Lake. The views along this trail were beautiful and gives you another lake to spend time at within the park.
Hiking towards Cascade Canyon

Visit Jackson Hole

Jackson Hole, Wyoming is one of the coolest towns I’ve ever been to! It has such a western classic feel to it, with amazing shops and restaurants. The energy from the Tetons truly carries into Jackson Hole making the perfect mountain town for this national park. Some favorite spots I’d recommend:

  • Hand Fire Pizza
  • Lee’s Tee’s (for souvenirs)
  • Cowboy Coffee
  • Snake River Brewing
  • Million Dollar Cowboy Bar
Downtown Jackson Hole, Wyoming

Drive Along the Scenic Drive

Take a drive on the scenic roads within the park. Grand Teton offers two scenic routes, the outer road, also known as Highway 191 and the inner road, also known as the Teton Park road. See the map below for reference.

Inner road pull off spots to see:

  • Windy point turnout
  • Teton Glacier turnout
  • Jenny Lake overlook
  • Cascade Canyon turnout
  • Mountain View turnout
  • Mount Moran turnout
  • Potholes turnout
  • Oxbow Bend turnout

Outer road pull off spots to see:

  • Elk ranch flats turnout
  • Snake river overlook
  • Teton point turnout
  • Schwabacher landing road
  • Glacier view turnout

Go Fishing

If you like to fish, the park offers amazing spots. Last summer, my boyfriend Patrick loved fishing along iconic spots like the snake river in the Tetons. The park’s visitor center can provide information on spots to fish within the park and certain regulations. You will need a fishing license as well which can be purchased at any fish shop in Jackson Hole!

Kayak or Swim in Jackson Lake

This is something we didn’t get to do during our visit, but looks so fun! Jackson Lake is stunning and kayaking and swimming are options for visitors to enjoy the lake from a different perspective. If kayaking or swimming aren’t your thing, I’d still recommend spending time at Jackson Lake to enjoy the view.

Spend Time at Jenny Lake

Jenny Lake is one of the most beautiful lakes in the park and the area offers a visitor’s center with souvenir shops, and there’s also a campground here. Be sure to check out Jenny Lake lookout area for a stunning view of the lake with mountain views. You can also drive the Jenny Lake scenic drive for a special view and area of the lake that’s usually less crowded.

Views along Jenny Lake scenic drive

Visit Mormon Row

Mormon row is a historical site within the park. Here you’ll find barns that were built in the early 1900s by the mormon community that settled here. The most iconic barn is the moulton barn because of it’s position with the Teton mountain range in the background. This is a popular photography spot within the park and it’s best viewed at sunrise or sunset to capture the Teton mountains changing colors in the background of the barn. This was one of my favorite mornings watching the sun rise and it is a must see while visiting the park!

Moulton Barn at Mormon Row

A Weekend in Shenandoah National Park

Last weekend, Patrick and I visited another national park on the east coast, Shenandoah! We had a weekend to explore the park and made the most out of our time there. We really enjoyed soaking in views along the Skyline drive, hiking to view the stunning Shenandoah mountain range, and much more. Here’s a quick weekend guide to Shenandoah national park and things I’d recommend you do too if you’re planning a visit.

Things to Know About Shenandoah National Park

  • Shenandoah requires a park entrance fee of $30 per vehicle which can be purchased when you arrive or in advance here.
  • There are a few lodging and overnight options within the park. If you like to camp, there are five campgrounds located within the park:
    • Mathews Arm
    • Big Meadows (this is the campground we stayed at during our visit, and really enjoyed it!)
    • Lewis Mountain
    • Loft Mountain
    • Dundo group
  • If you’d prefer other lodging options within the park, Shenandoah offers a few cabin and hotel like experiences:
    • Skyland lodge
    • Big Meadows lodge
    • Lewis Mountain cabins
  • The skyline drive goes through the park and has several marked pull off areas that offer stunning views of the park.

Things to Do in Shenandoah

Stop at the overlooks along the skyline drive. I’d recommend pulling off whenever you can! My favorite overlooks were:

  • Range view overlook
  • Hog back overlook
  • Mary’s rock tunnel
  • Buck hollow
  • Hazel mountain
  • Thorofare mountain (highlight overlook on the skyline drive)
  • Crescent rock
  • The point
  • Brown mountain overlook
buck hollow overlook

Go for a hike! Shenandoah offers some incredible hikes. Since our time was limited while visiting, we didn’t get to explore many hikes but the ones we did that I’d recommend:

  • Little Stony Man trail (1.5mi). This trail was pretty easy and gives you stunning views on the shenandoah mountain range!
  • Hawksbill mountain trail (1.6mi). This trail was steep and challenging at the beginning but the views at the top make it worth it!
  • Bearfence viewpoint trail (1.4mi). Another great smaller trail that gives stunning views at the top!

Some hikes we also considered that look amazing:

  • Mary’s rock summit (3.1mi)
  • Compton peak trail (2.3mi)
  • Rose river falls (3.8mi)
  • Dark hollow falls (1.4mi)
views along the little stony man trail

Stop by Skyland lodge. Even if you aren’t planning to stay at Skyland, I’d recommend stopping to check out the views, souvenirs shops, and grab some food at the cafe. There’s also a Starbucks located inside if you need a good cup of coffee!

Stop by a nearby town. Shenandoah is nestled between some quaint Virginian towns that are worth exploring! On our way home, we had fun stopping in Sperryville, VA for some coffee and window shopping.

Views along Skyline drive
Camping at Big Meadows
Stopping along overlooks
Coffee stop at Skyland lodge
Hazel mountain overlook
Big meadows campground
Stopping at overlooks along the skyline drive
Overlook stop for pictures!

Tips on How to Plan a Trip

Planning a trip can be overwhelming and stressful at times, especially larger trips. The planning process can take time depending on where you’re planning to go. I always recommended planning early if possible to relieve stress and give yourself plenty of time to make reservations and develop a plan for your trip. If planning in advance isn’t a strength of yours, I’m hoping this guide gives you some ideas to make it a little less stressful!

Where to Start When Planning a Trip

πŸ“Pick your desired destination, the fun part! Sometimes this is easy but if you aren’t sure where you’d like to go, consider what types of activities you’d like to do, if you’d rather relax or adventure, and how far you’re willing to fly or drive to reach your destination.

⏰ Determine timeframe. I like to start the planning process with a general idea of when I’ll be going on a trip. This may be depend on the area you’re visiting and whether there’s a better time to visit or it may be based on your availability. I usually gravitate towards traveling in the summer or fall months, the weather is usually better and there’s more opportunity for activities.

🚐 Decide whether driving or flying makes the most sense. Driving can take more time but it saves you the hassle of having to find a rental car or other means of transportation at your destination. Plus, there’s no limit to what you can bring, if you’re an over packer like me!

🎟 If you have/want to fly, I’d book flight tickets pretty soon after deciding on dates. Similarly, if you decide to drive, plan out any reservations you’ll need for accommodations or tickets needed for various activities.

How to Develop an Itinerary

  • Once you have a general timeframe decided, know where you’ll be going, and choosen whether to drive or fly, it’s time to start forming an itinerary.
  • I typically create my itineraries in Notion but any word doc, excel sheet, or even hand written will work fine!
  • An itinerary can be as detailed as you want it to be! If you feel more confident with a detailed plan of activities and sites to see while on a trip, a list of several things may be better for you. Or, if you’d rather go with the flow on your trip but still resort to a list of ideas of what to do some days, a lighter itinerary may work better. Reflect and be realistic with what will work for you! It is vacation after all so nothing with an itinerary has to be set in stone, it’s really just to have something to guide you, especially if it’s a new destination you’ll be visiting.
  • I like to list out all the days I know I’ll be on a trip and include:
    • Where we are sleeping that day
    • Any “must sees” if it’s a specific area
    • How much drive time is required between sites
    • Resturants to try
    • A collection of hikes, sites, or other attractions I want to visit that given day
  • On the itinerary, I also include reminders for myself if I need to reserve tickets for an activity or if I should check the weather before committing to a particular activity on a given day, etc.

How to Find Things to Do

  • I usually always start by browsing on Pinterest to find blog posts or other online sources that others have shared from visiting the area. I love hearing about other’s experiences and gaining a visual of what the area I’ll be visiting looks like. It really inspires me and excites me while planning a trip!
  • Social media will be your friend. Similarly to Pinterest, I’ll browse instagram, youtube or TikTok to gain video sources of what others did in the area I’ll be visiting to give me ideas.
  • I also recommend making a list of what you find through research. This will help you keep organized on things you’d like to do and see throughout your trip and then add to the itinerary later.

Tips

  • Be flexible with plans! Things can change so easily while traveling so even with an itinerary, it’s important to have an expectation that things may not go according to plan and that’s ok! Whenever I’ve gone on a larger trip, there are always changes to plans that happen just depending on weather, crowds, fatigue, etc. In my experience, because I had a list of so many places and activities I wanted to see for a trip, I would sometimes switch days or plans around if needed while on the trip which worked so well and gave me alternate ideas if I needed to be flexible.
  • I always recommended planning at least 3-6 months in advance, more for ease of mind that things are booked and there’s a plan in place.
  • Start a check list of packing necessities you’ll need to bring, especially if it’s a big trip. This is so helpful to ensure you don’t forget anything!
  • If you’re a visual person, I’d recommend adding photos of certain spots you’re excited to see on the trip to your itinerary or planner. I do this and it always helps to see what I’lll be doing and makes me even more excited for the trip to come!