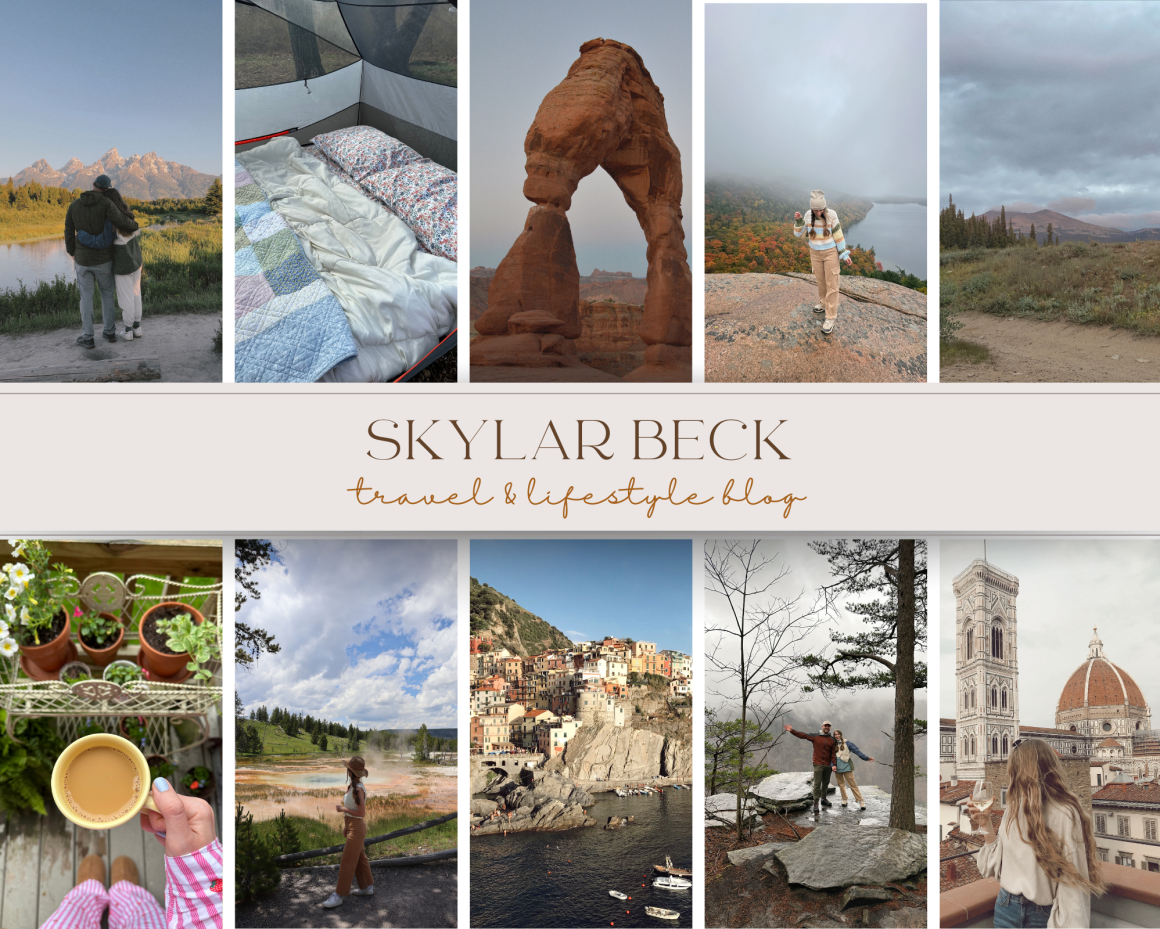
Lately, my new hobby has been creating digital scrapbook pages, mostly of my road trip adventures. These are some of my favorite memories and I’m very excited to have them all captured in one place. I’m big fan of traditional scrapbooking as well but digital also gives so much creative freedom and can easily be kept. If anyone is interested in creating a similar scrapbook, I created all of my pages in Canva. Stay tuned for more pages to come!
Fall in New England is a magical time of year that feels like it should only exist in a hallmark movie. Last year, Patrick and I planned a ten day road trip traveling through some of the most beautiful places throughout Vermont, New Hampshire, and Maine. I wanted to create a post based on the itinerary we used last fall that will highlight our trip throughout this region of New England. I would highly recommended visiting this part of the country in the fall if you’re able!
Things to Know About Planning a Trip in New England
🍁 The foliage varies year to year, but typically the first two weeks of October are a safe bet on when to plan your trip. I’d recommend using and regularly checking a fall foliage tracker, this surprisingly gives an accurate prediction on when the leaves are expected to change.
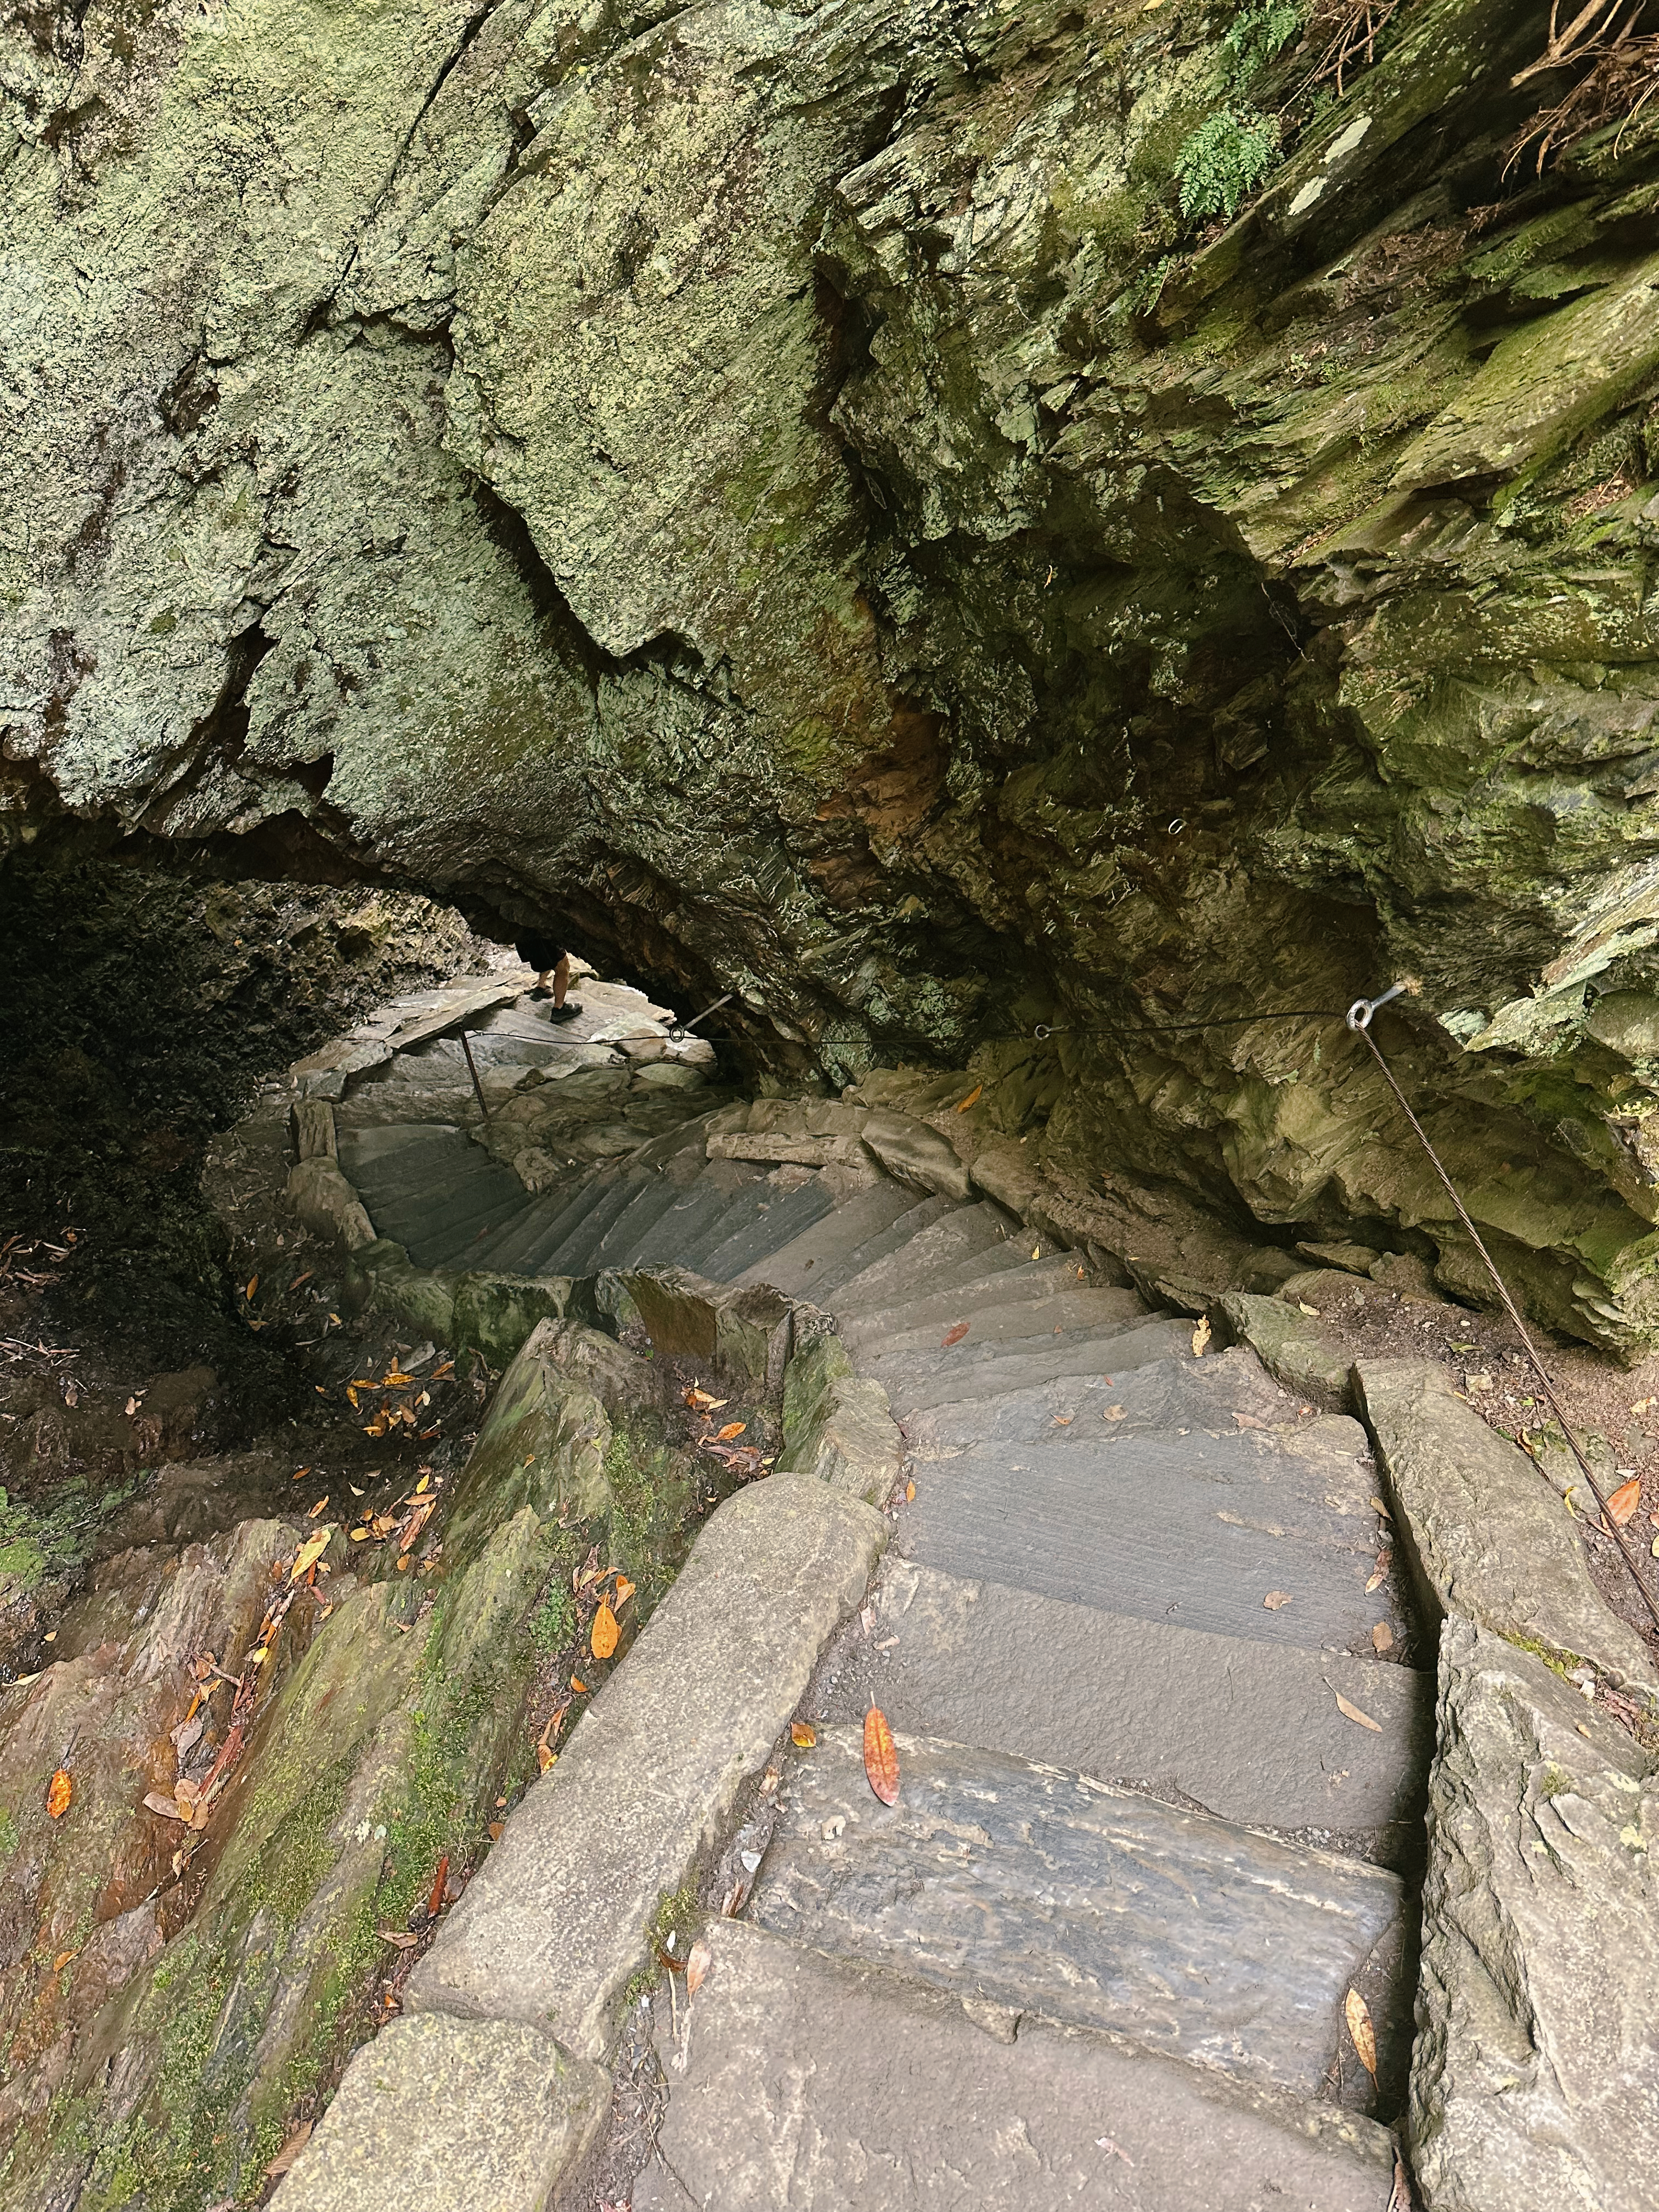
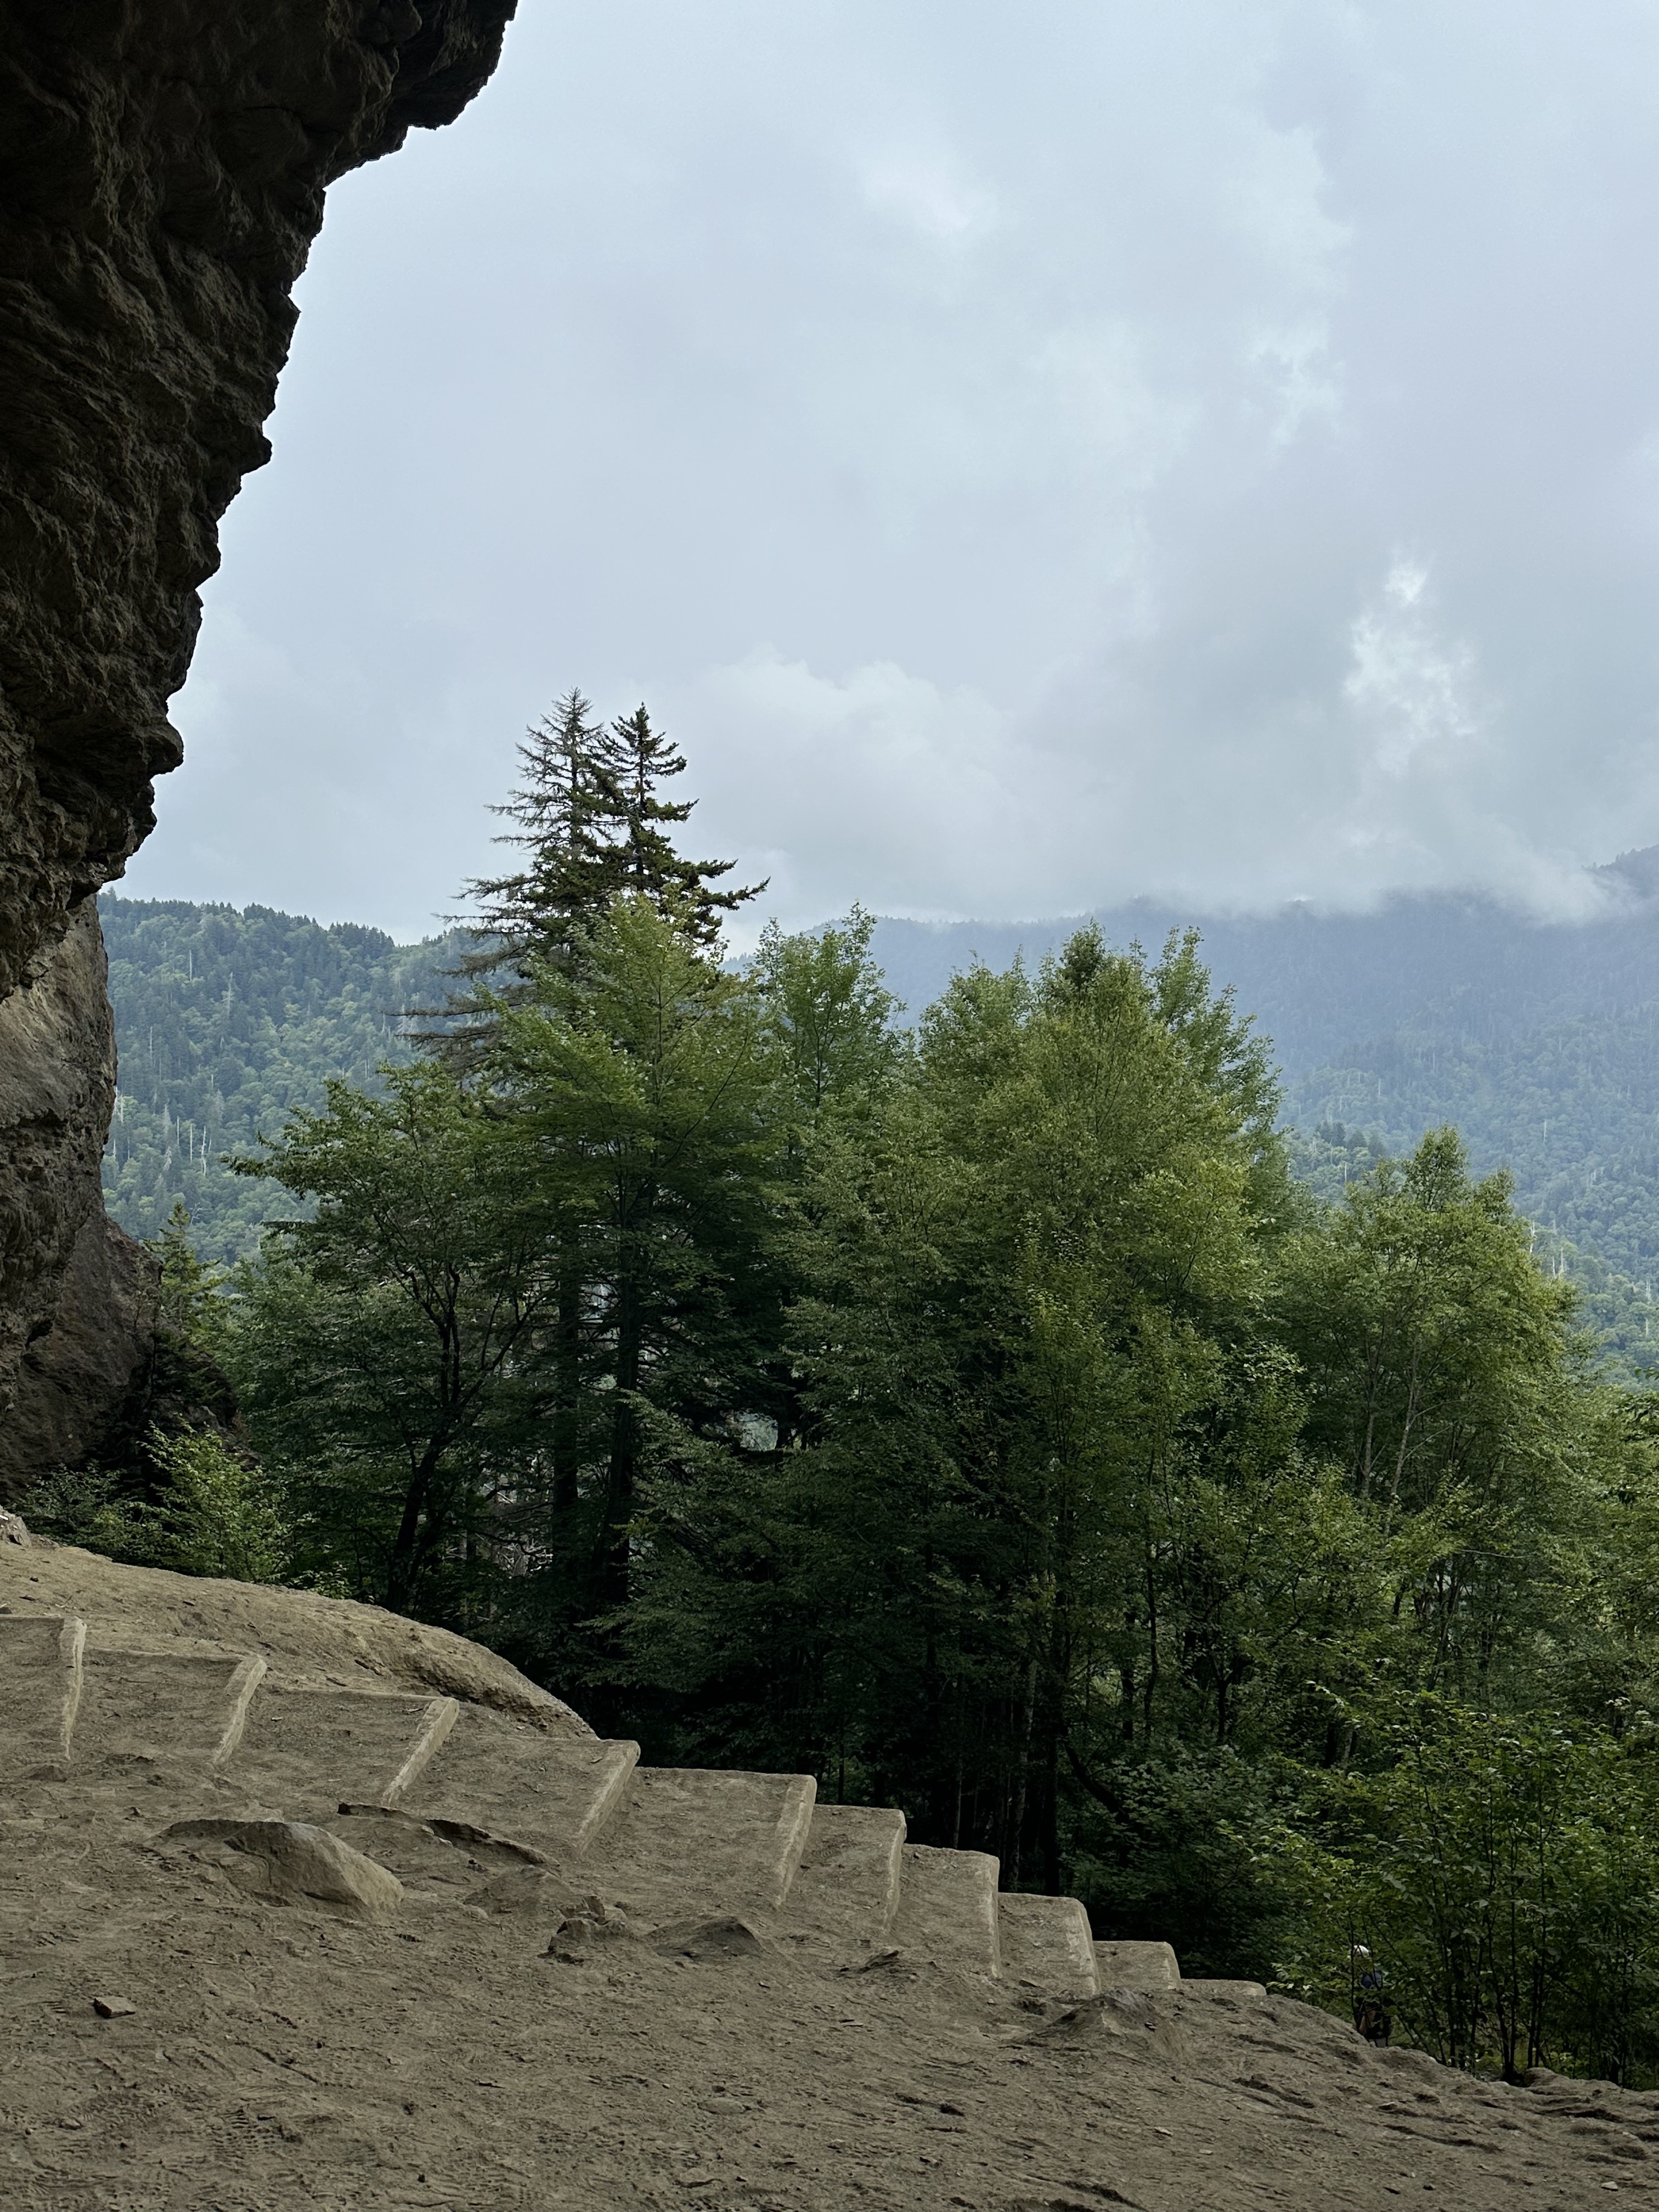
🎫 Some areas I’ll mention in this post will require additional reservations (i.e., the Flume Gorge in New Hampshire & entrance fees in Acadia national park). It’s always best to purchase tickets and reservations as soon as possible.
🎃 This region of the country is extremely popular during the fall season, for very good reason! I would recommend booking accommodations as soon as you’re able because things do fill up quickly. Also, keep in mind, this area will be busy and crowded, especially in popular sites and tourist attractions.
📆 Although this is a busy and popular time of year to visit, be sure to look up hours of availability of things you’d like to do as it will vary in the fall season. We learned, a lot of places start to slow down and prepare to close up for the winter by mid October, so be sure you check timing of things. We almost missed a chance to tour a maple syrup farm because we didn’t realize they were closed certain days of the week in the fall!
When To Go
Like I mentioned, it’s hard to recommend a specific time to book and arrange your fall trip since the fall foliage varies each year. However, it seems like the first two weeks of October are pretty consistent and a great time to visit. We also made sure to start our trip in Vermont and end it in Maine since it seemed like the leaves in Vermont were predicted to change sooner.
What To Pack
During the fall, it’s typically cooler temperatures and rainy days so layers are a must! Here’s a basic list to base your packing needs off of:
Rain jacket
Umbrella
Sweaters and cardigans
Layered bottoms (leggings, pants, etc).
Hiking shoes
Beanies and gloves for extra warmth
A warm jacket or a winter coat
Hard warmers (these were amazing to have on the early cold mornings!)
Warm socks
Where to Stay
Throughout most of our road trips, we typically stay at campgrounds because it’s enjoyable and less expensive. For this trip however, it was a little different. We had difficulties finding campgrounds nearby the spots in Vermont we were trying to visit so we only stayed at airbnb’s during that part of our trip. If you’re hoping for convenient locations in each spot, hotels are probably the best option. Keep in mind, because this is a popular time of year for visitors, hotel prices can be expensive and rooms book up quickly. Similarly for airbnb’s, I booked most of ours 6-8 months in advance just to ensure we could find places nearby within our budget.
Some well known hotels in the areas on this itinerary:
Von Trapp Family Lodge (Stowe, VT)
Stone Hill Inn (Stowe, VT)
Woodstock Inn (Woodstock, VT)
Bar Harbor Grand Hotel (Bar Harbor, ME)
The Bayview Hotel (Bar Harbor, ME)
Itinerary Outline
Starting the trip will depend on where you are coming from. Since we were driving from Ohio, we started our trip in Vermont. If you fly in, you can decide which location you’d rather start at (you can’t go wrong either!). Most people seem to fly into either Boston or NYC to start their journey into the New England area. There doesn’t seem to be a convenient airport closer to Vermont or New Hampshire. For this itinerary, I’ll be sharing things to do in the Woodstock and Stowe areas of Vermont, the White Mountains national forest in New Hampshire, and Acadia national park and parts of coastal Maine.
Vermont
We started our trip exploring parts of Vermont. We spent 3 full days here splitting our time between Stowe and Woodstock. After our experience in both, Stowe seemed to have more options for restaurants, activities, and shops compared to Woodstock so keep that in mind! If you’re interested in more details, be sure to check out my Woodstock, VT blog post.
Stowe, VT
Day one
Wake up early to visit cold hollow cider. Take time to explore inside and have breakfast at their cafe.
Head back into downtown Stowe and explore shops along main street.
Take a drive through the smuggler’s notch area.
Find dinner in town before heading to airbnb for the night.
🌛Airbnb nearby
Hot apple cider from Cold Hollow
Day two
Start the morning with coffee and breakfast at Woodland Baking and Coffee.
Drive over to the Stowe mountain resort to take a gondola ride at mtn mansfield (tickets can be purchased in advance or on site).
Drive by the Von Trapp family lodge and grab a drink at the brewery!
Stop by Stowe maple products to stock up on maple souvenirs.
Have dinner in town.
Stop at original ben and jerry’s for an ice cream before heading back to airbnb.
🌛Airbnb nearby
Gondola ride
Day three
Woodstock, VT
Start the day with breakfast at Mon Vert Cafe .
Take time to explore the shops downtown and collect souvenirs
Yankee bookshop
Vermont flannel
Woody’s Mercantile
Walk over to the Woodstock covered bridge.
Walk around the grounds of Woodstock Inn and resort.
Find the iconic pumpkin lined house on Pleasant street.
Grab ice cream at Woodstock Scoops and try a maple cremee!
🌛Airbnb nearby
Exploring downtown Woodstock
New Hampshire
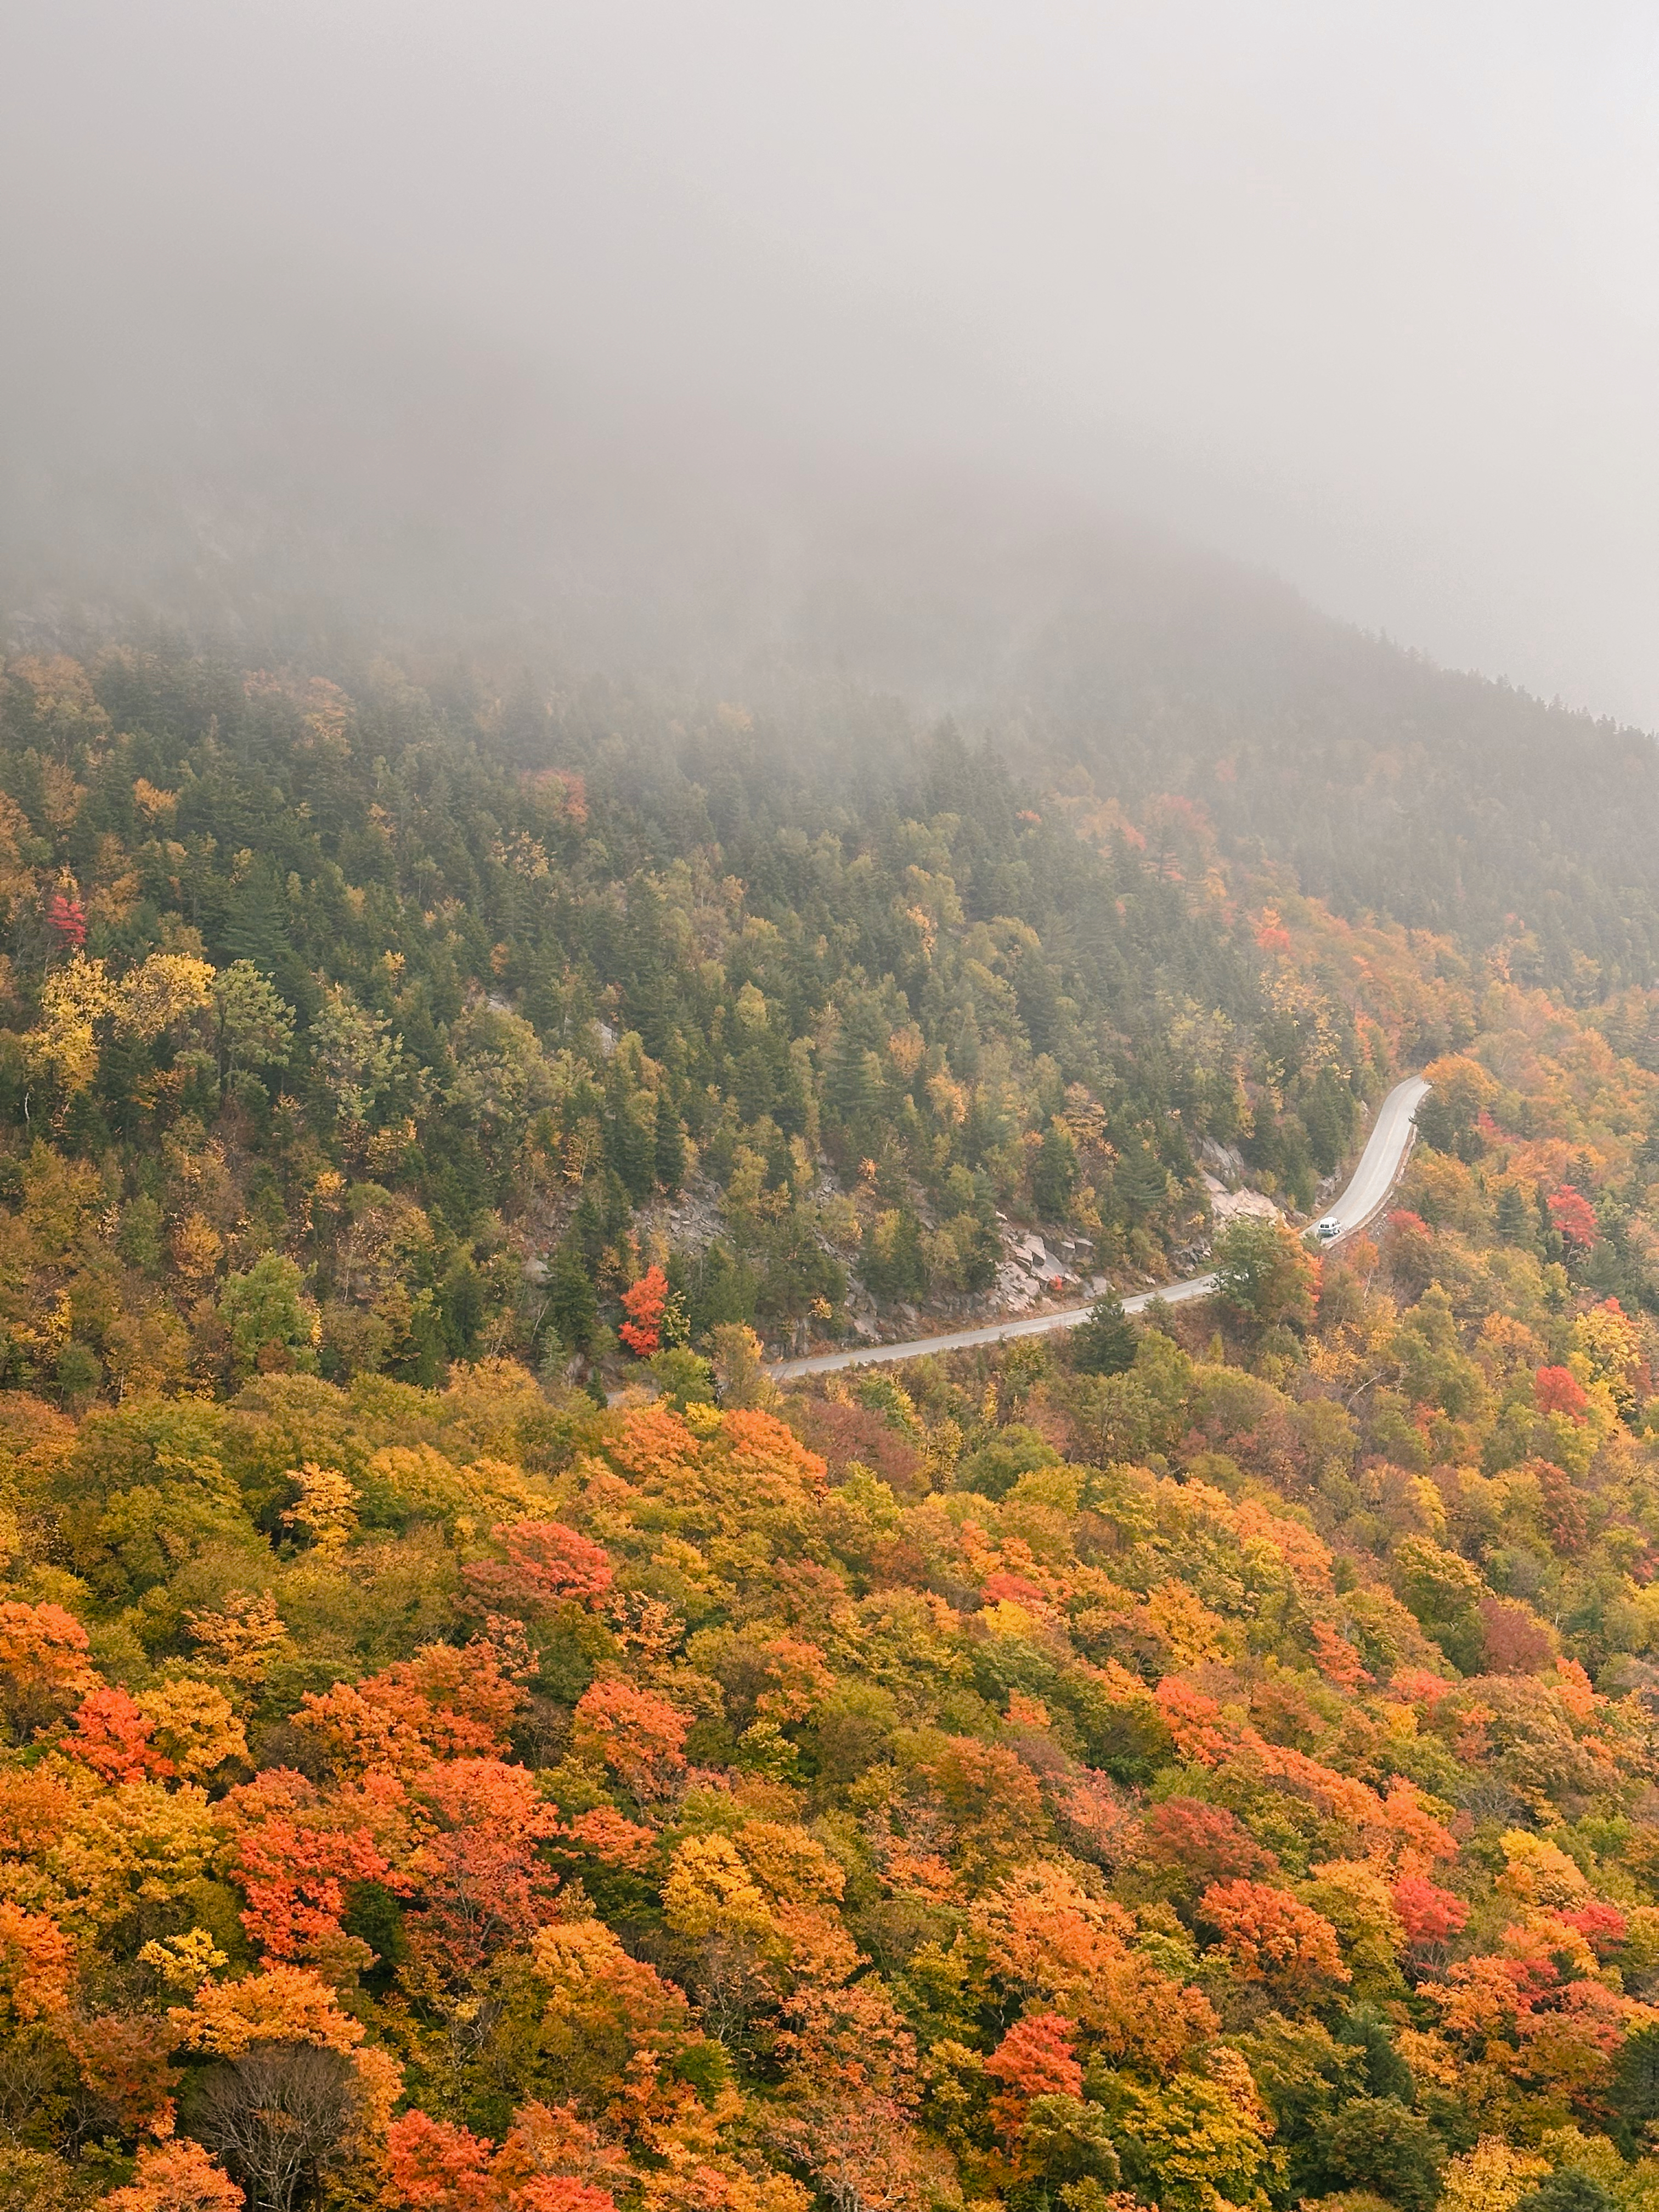
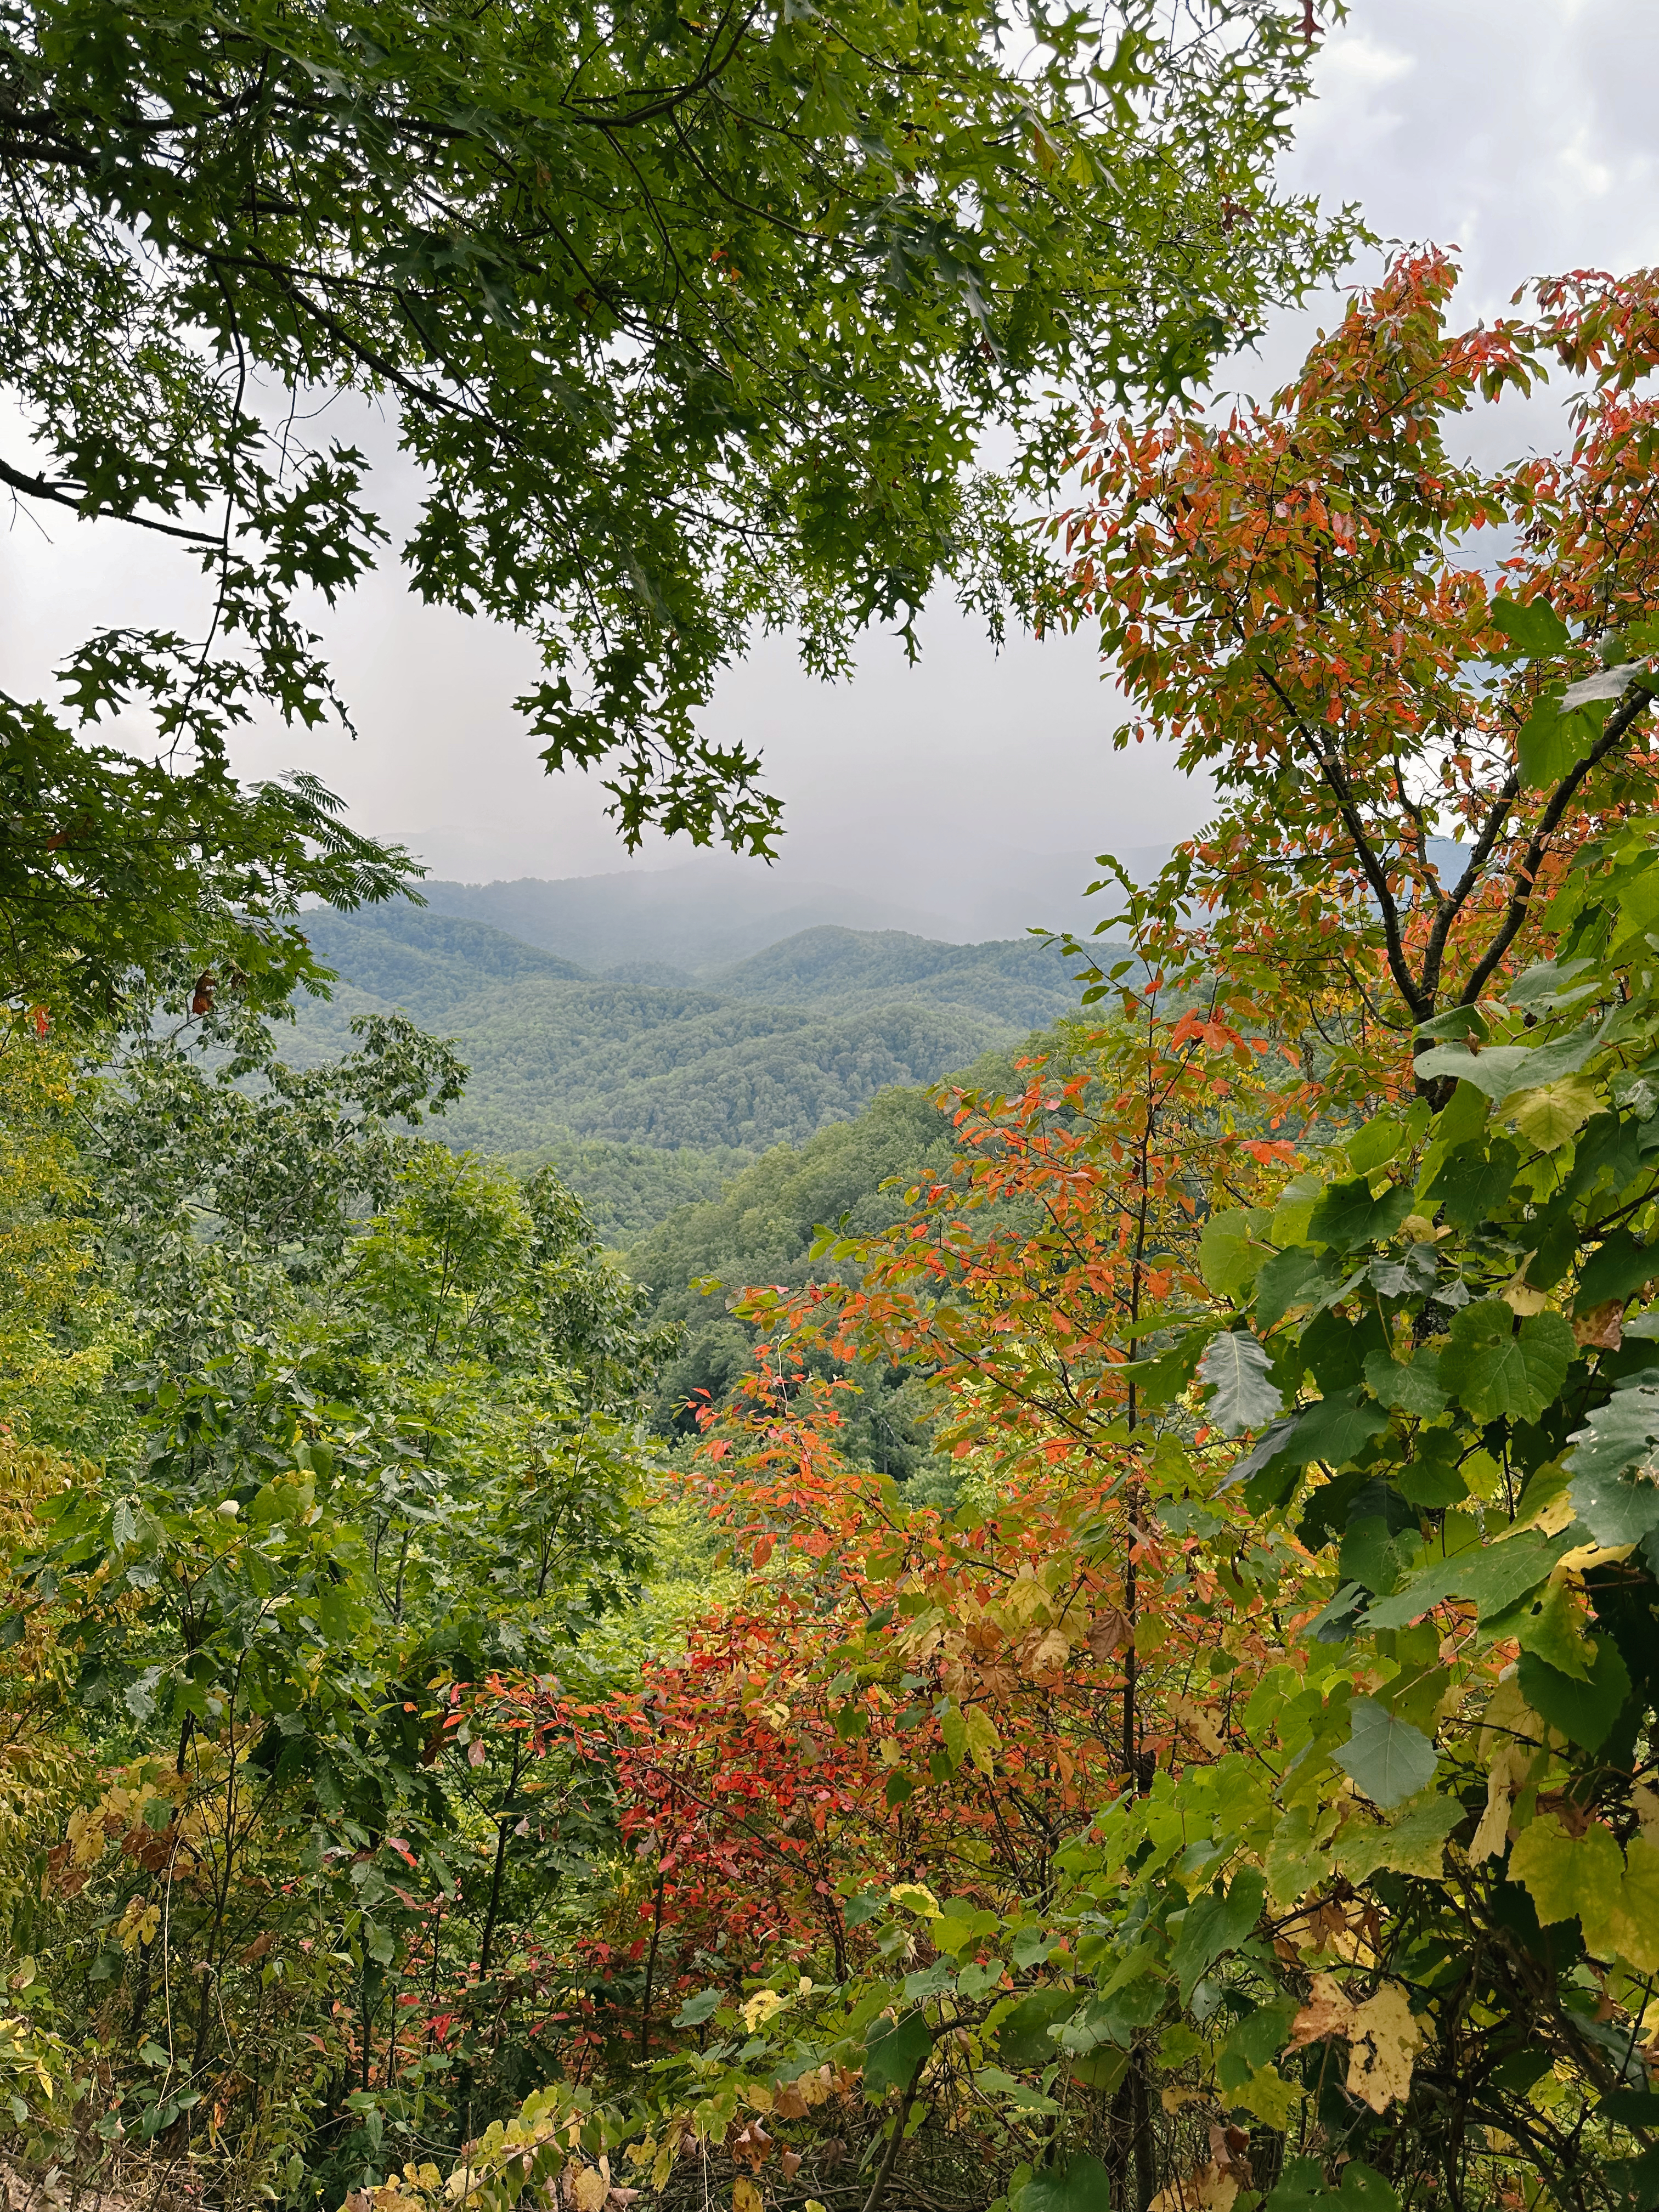
Our time in New Hampshire was short and sweet but the fall foliage was incredible! We focused our time here in the White Mountains area exploring the kancamagus highway and the Franconia state park. This was a heavily crowded and congested area so be prepared for lots of wait times.
Day Four
Start drive to New Hampshire (1.5 hour drive from the Woodstock area).
Stop for breakfast on the way at Polly Pancake Parlor (get there early to beat the crowds!).
Wake up early and head to Artist’s Bluff trail for a morning hike (get there early to beat crowds).
Continue exploring highway and making stops at pull offs.
Drive all the way to Conway, NH along the highway.
Spend downtime relaxing back at camp/accommodations.
🌛Hancock campground
Albany bridge
Maine
We took this trip nearly a year ago and I’m still thinking about Maine. It’s truly a magical and dreamy place, that has it all; lakes, ocean, and mountains! This section of our trip was one of my favorites and I cannot wait to return someday. Over the years, Patrick and I have visited several national parks and Acadia is definitely in our top five, it’s such an amazing park. I have a separate blog post with more details about our time in Acadia, you can read here.
Day six
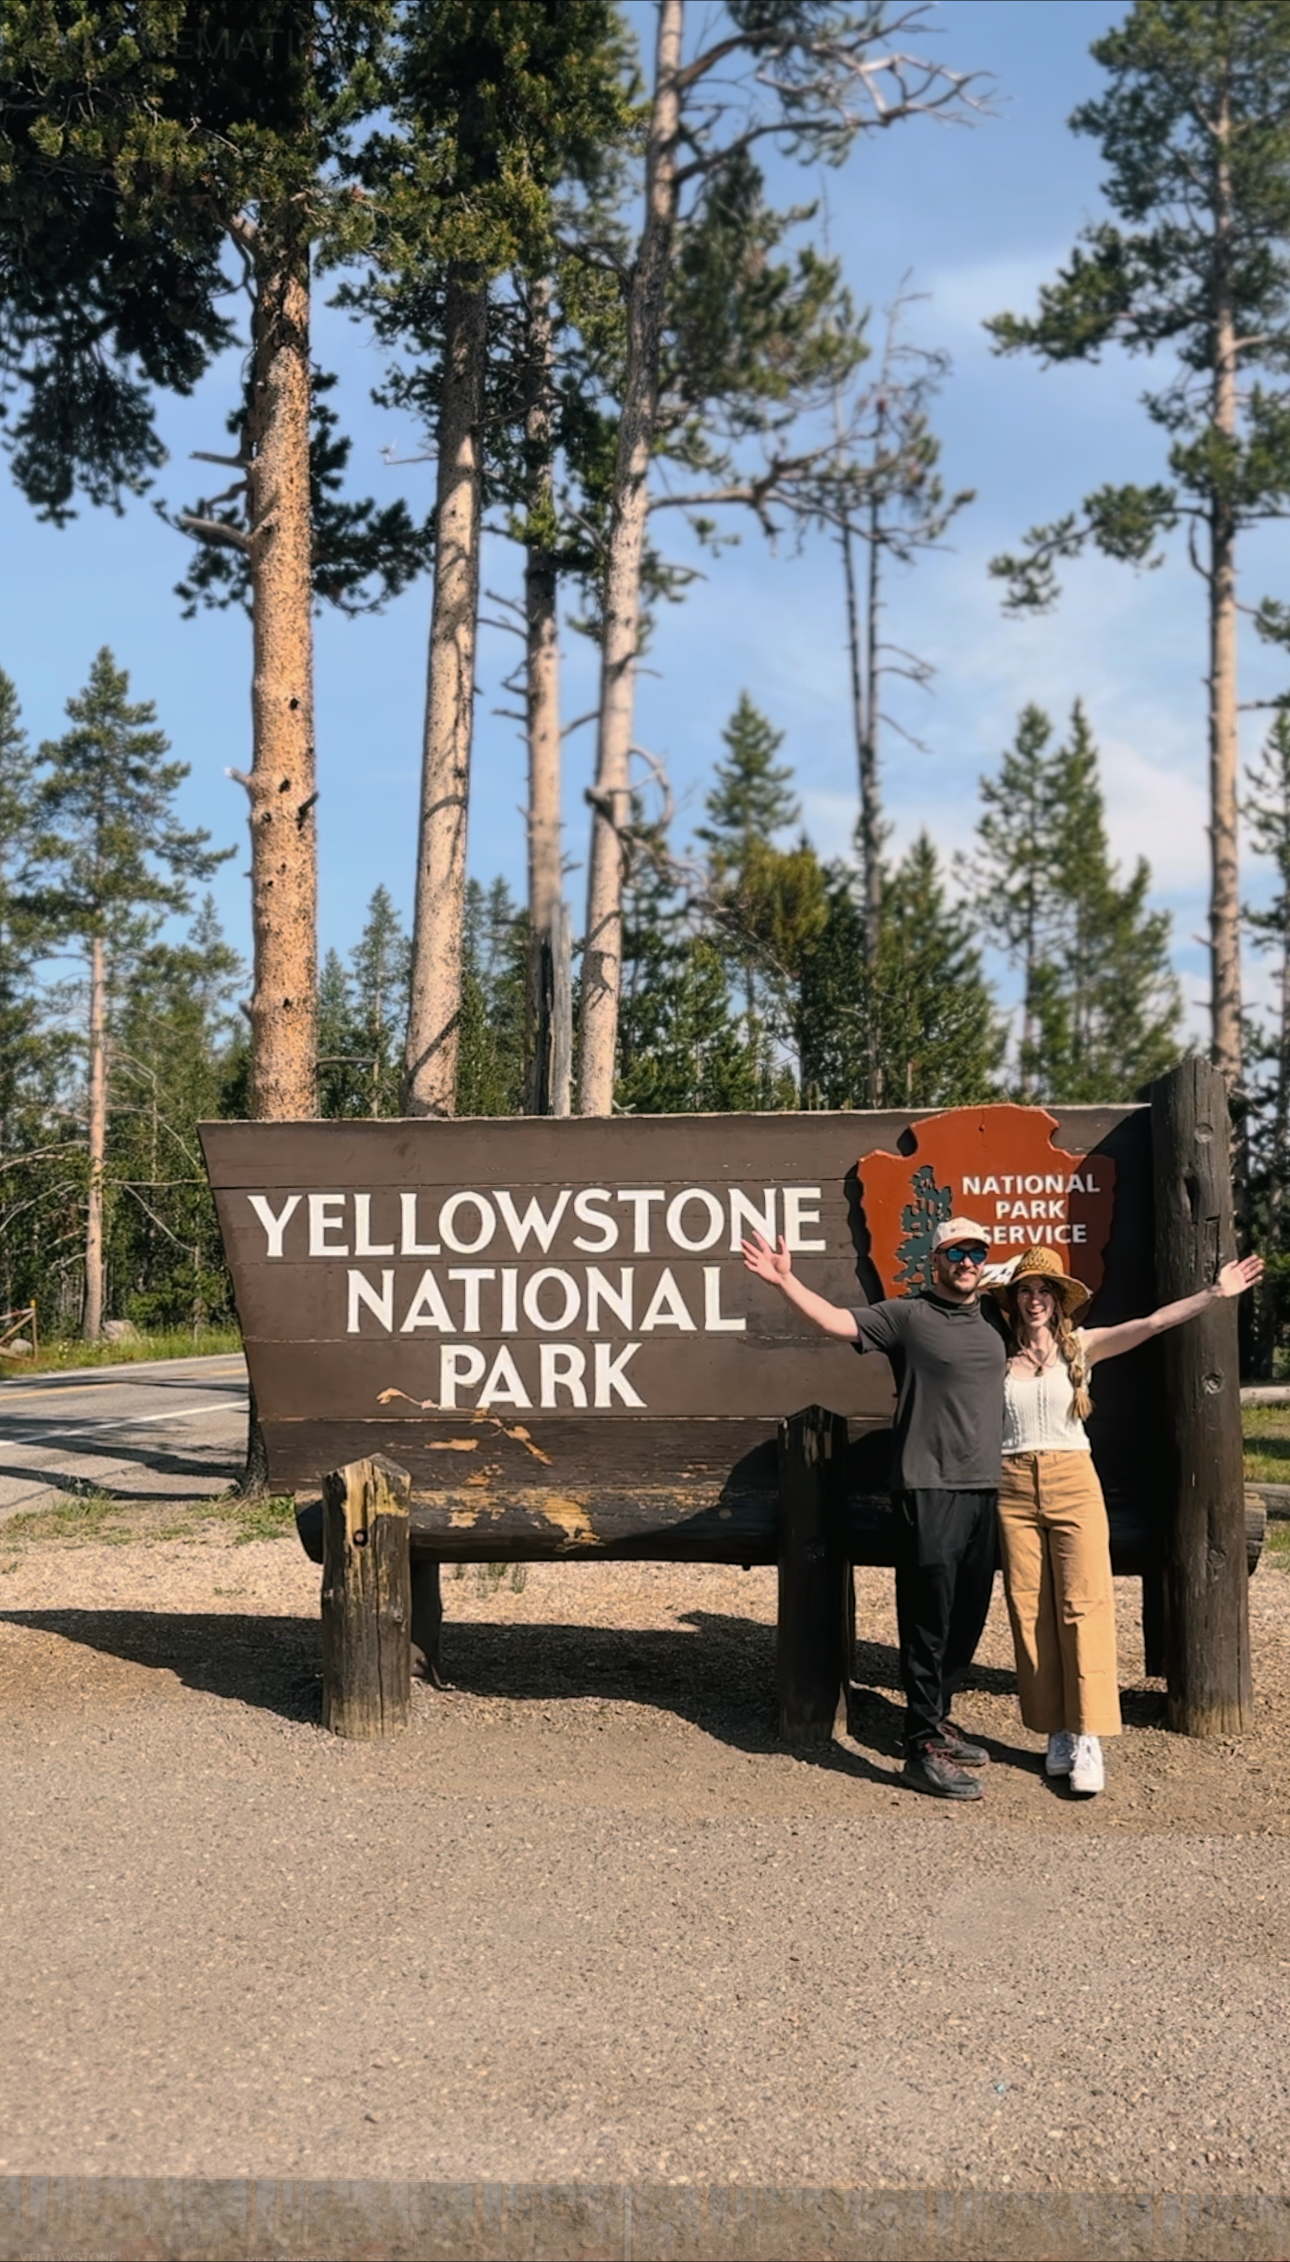
Drive to Acadia national park (4.5 hours from NH).
Take a photo at the national park entrance sign.
Stop by the Hull’s Cove visitor’s center and purchase park pass.
Head into bar harbor to explore the shops and grab dinner.
Head to camp to set up and settle in for the evening.
🌛Blackwoods campground
Arriving to Acadia!
Day Seven
Watch the sunrise at Cadillac Mountain (timed reservation tickets required, see park’s website for info).
Have breakfast at Cafe This Way.
Stroll around Bar Harbor to collect more souvenirs.
Head into the park and begin first hike at the South Bubble trail .
Drive along the park loop road and stop by ‘Thunder Hole.’
Head back into Bar Harbor for dinner. Some of our favorite restaurants:
Bar Harbor Lobster Co.
Side Street Cafe
Dog and Pony Tavern
Frenchman Bay Lobster
Mount Desert Island ice cream
Head back to camp for the night.
🌛Blackwoods campground
South Bubble trail
Day Eight
Start with an early hike at the Beehive trail (this parking lot + hiking trail get busy fast so arrive early).
Head into Bar Harbor to grab coffee at Acadia Perk.
Drive over to the southwest harbor side of the park and hike the Beech Cliff Ladders trail.
Make a stop at the Bass Harbor Head lighthouse. I’d recommend walking down to the rocks to see the lighthouse from a further angle.
Drive back along the park loop road and spend some time stopping at the ‘Otter Cliff’ lookout.
Head back to camp for dinner and relaxation.
🌛Blackwoods campground
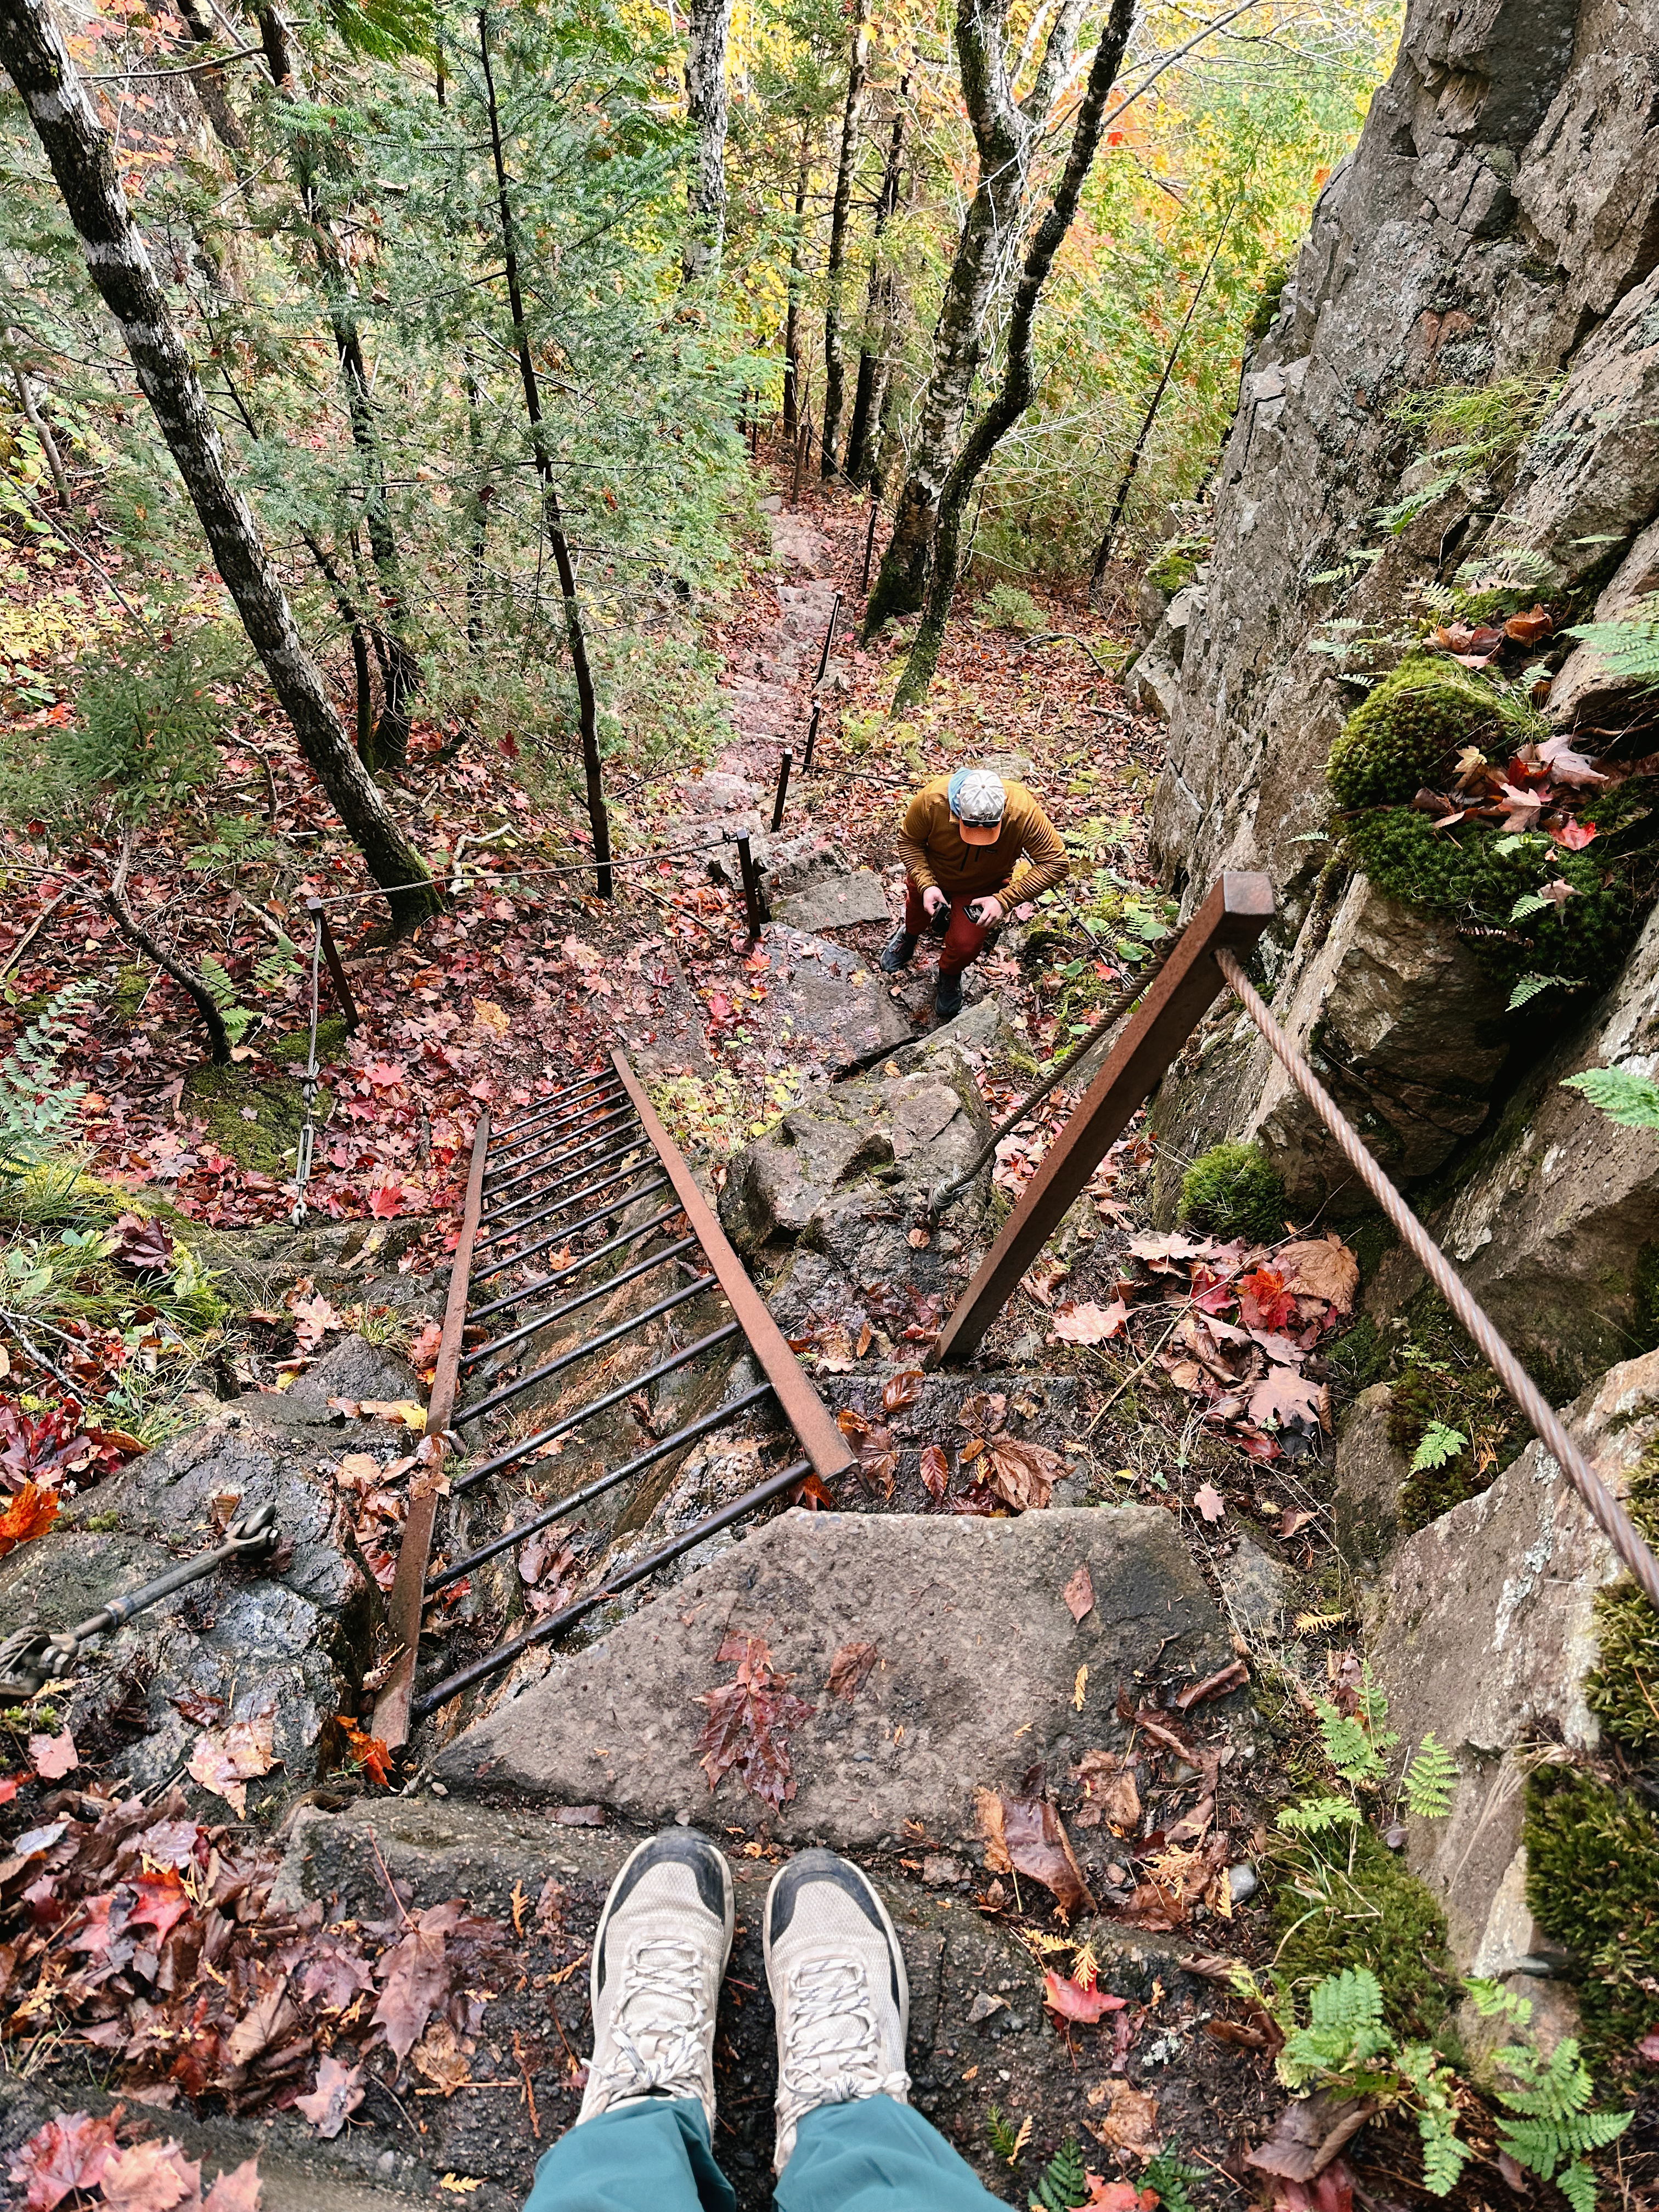
Beech Cliff ladders trail
Coastal Maine
This part of the trip, we devoted time to exploring small towns along the coast of Maine. I wish we could’ve had more time here so I’d recommend spending some extra time in these towns if you’re looking for the slow, small town feel. If you’re interested in learning more, check out my coastal Maine blog post here for more details.
Day Nine
Pack up camp and head into Bar Harbor for one last breakfast and time to walk around.
Stop by the Jordan Pond house to try and have an early lunch (I recommend making reservations in advance, we didn’t think to do this so the wait was too long). Be sure to order a popover!
Explore the Jordan Pond path afterwards.
Start driving to Portland, Maine area (3 hr drive).
Stop by Holy Donuts for a sweet treat once you arrive!
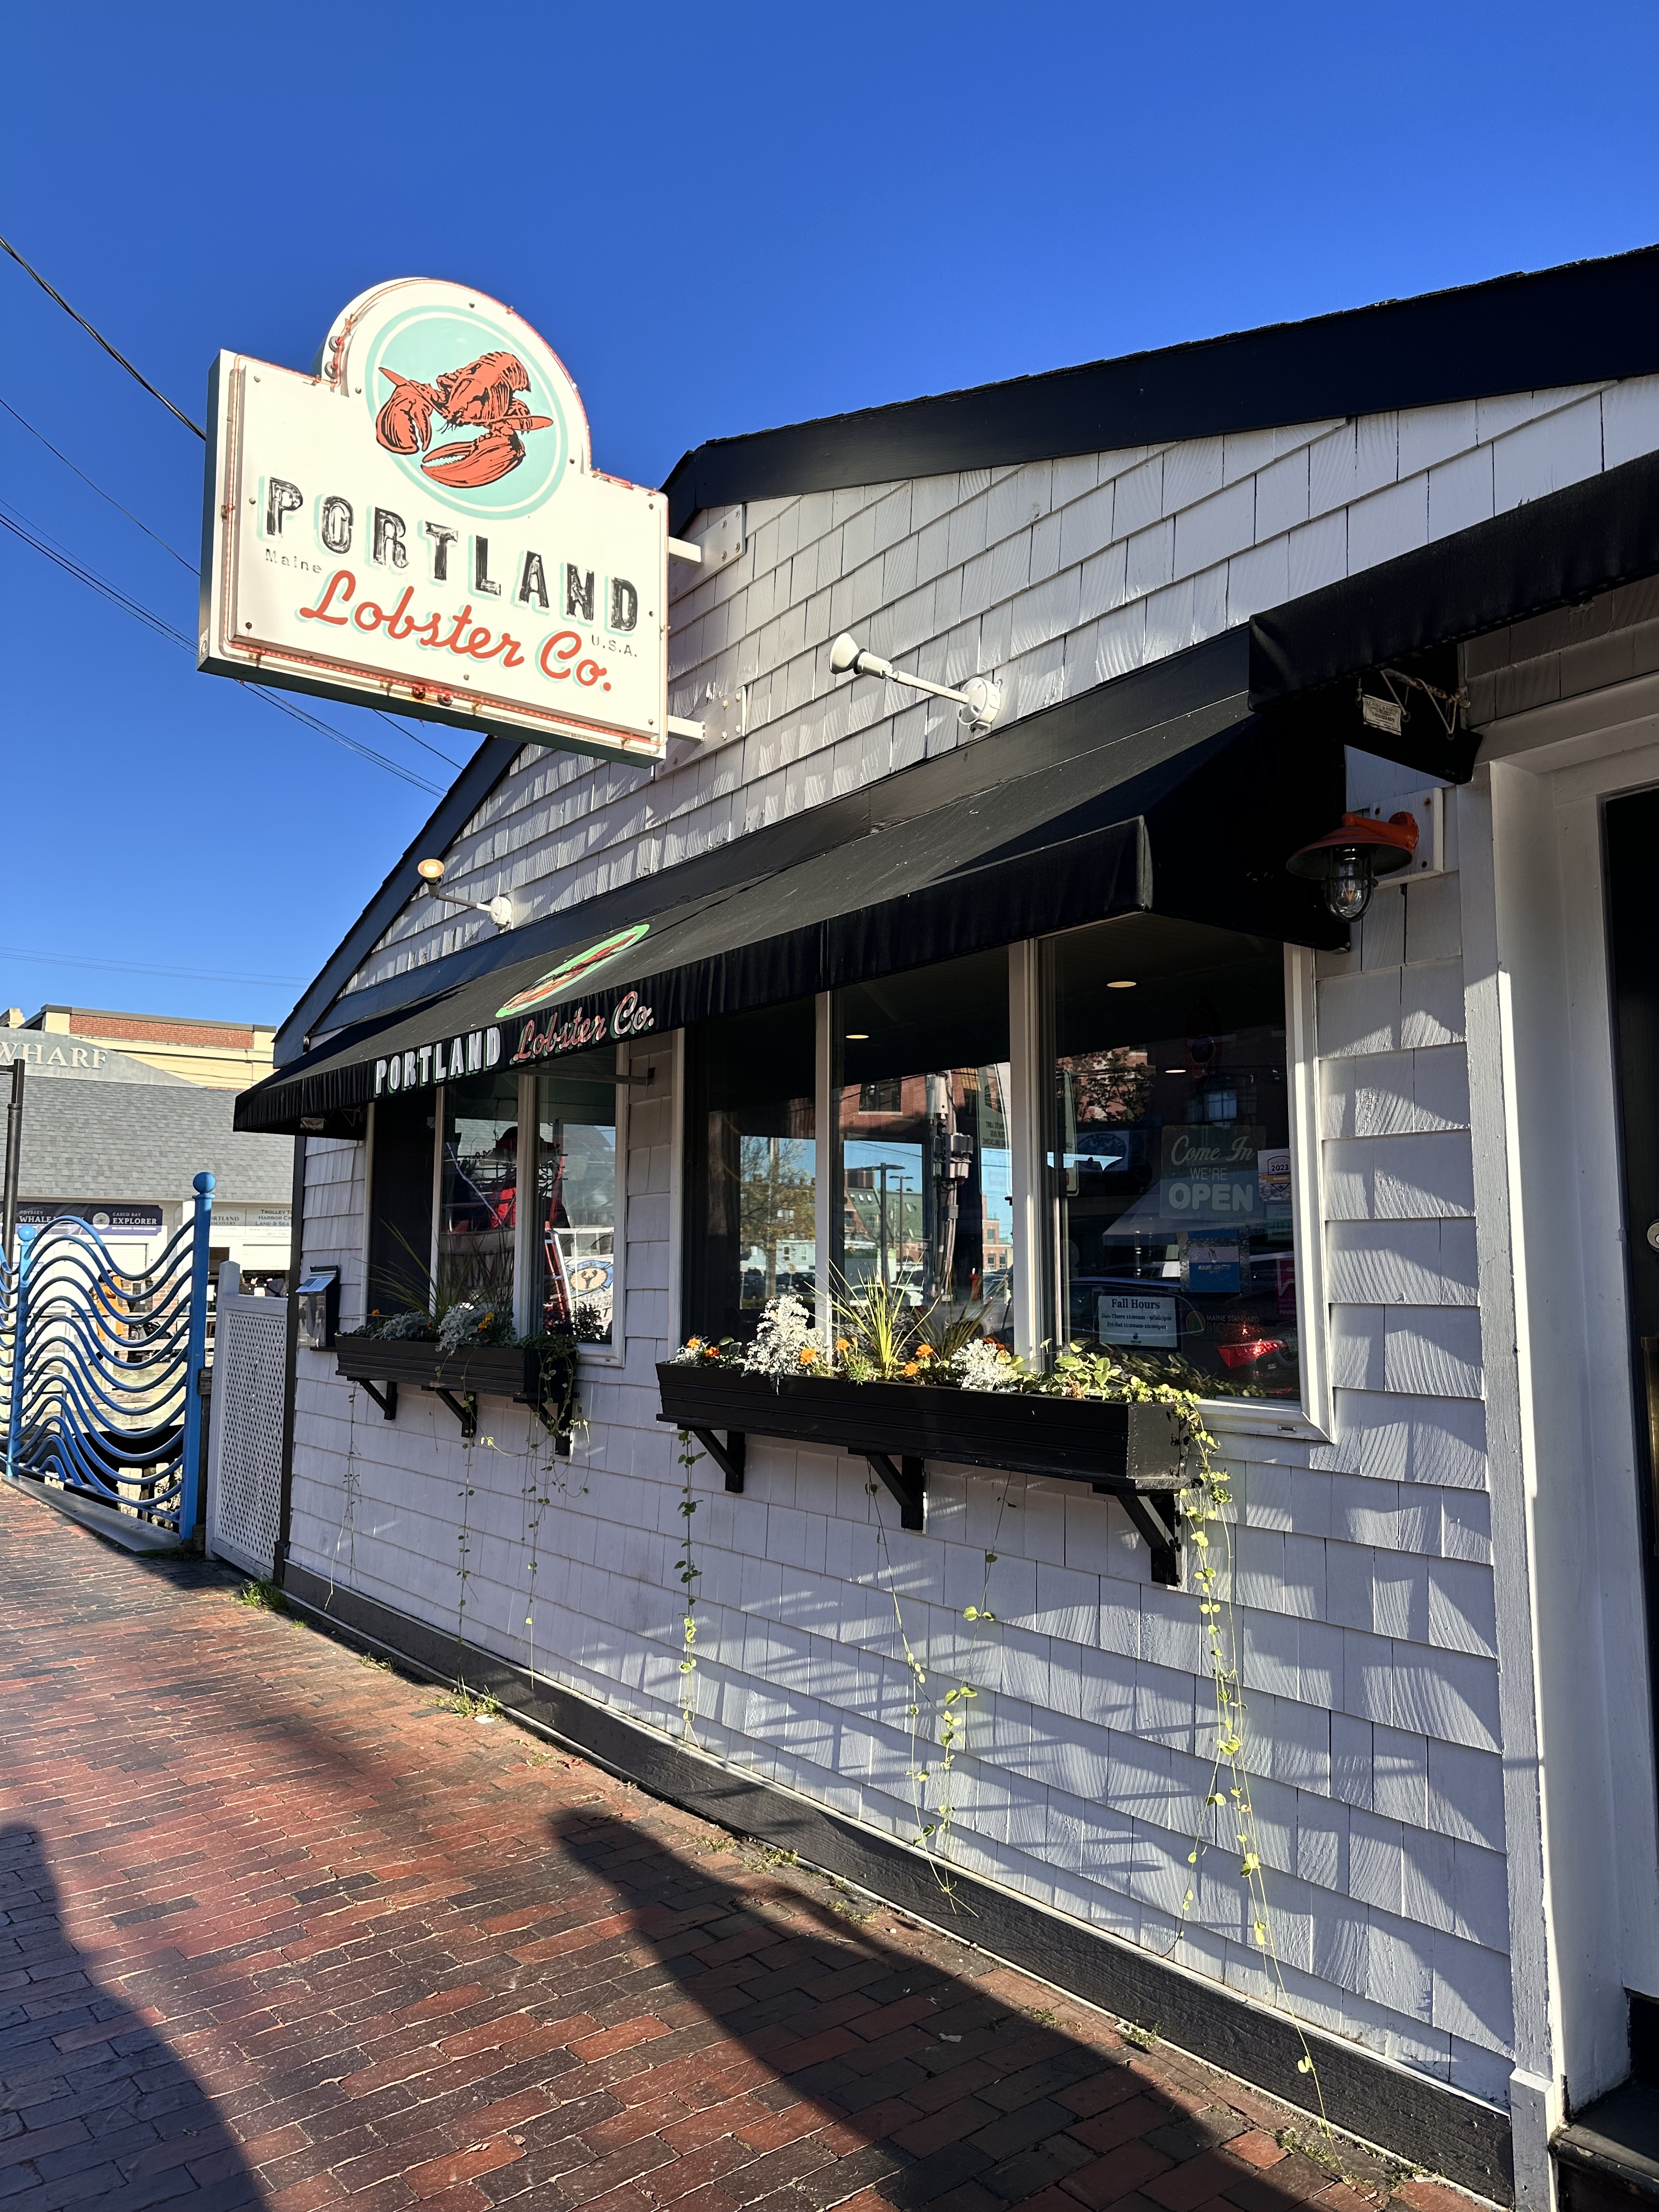
Explore downtown Portland and grab lunch or an early dinner at Portland Lobster Co.
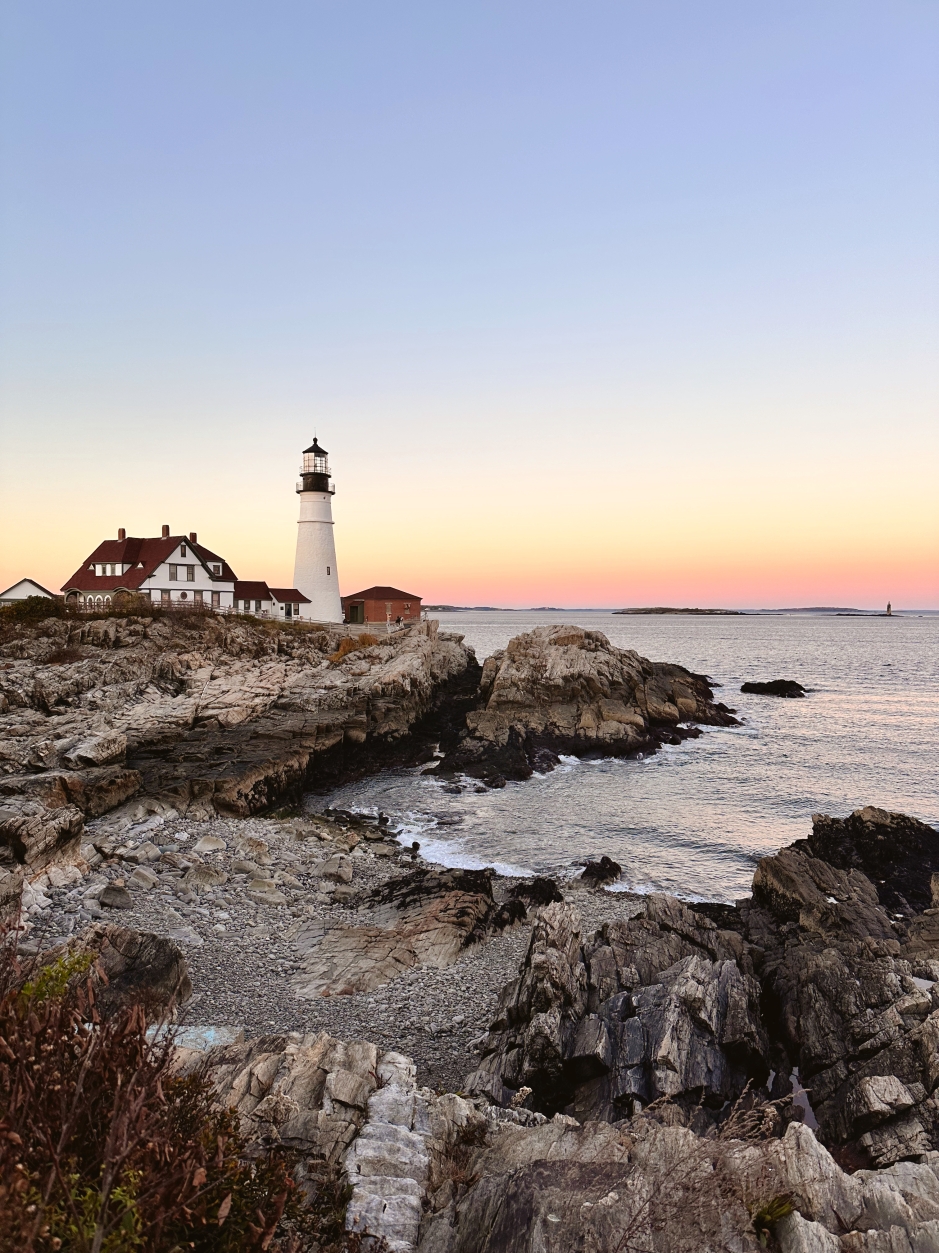
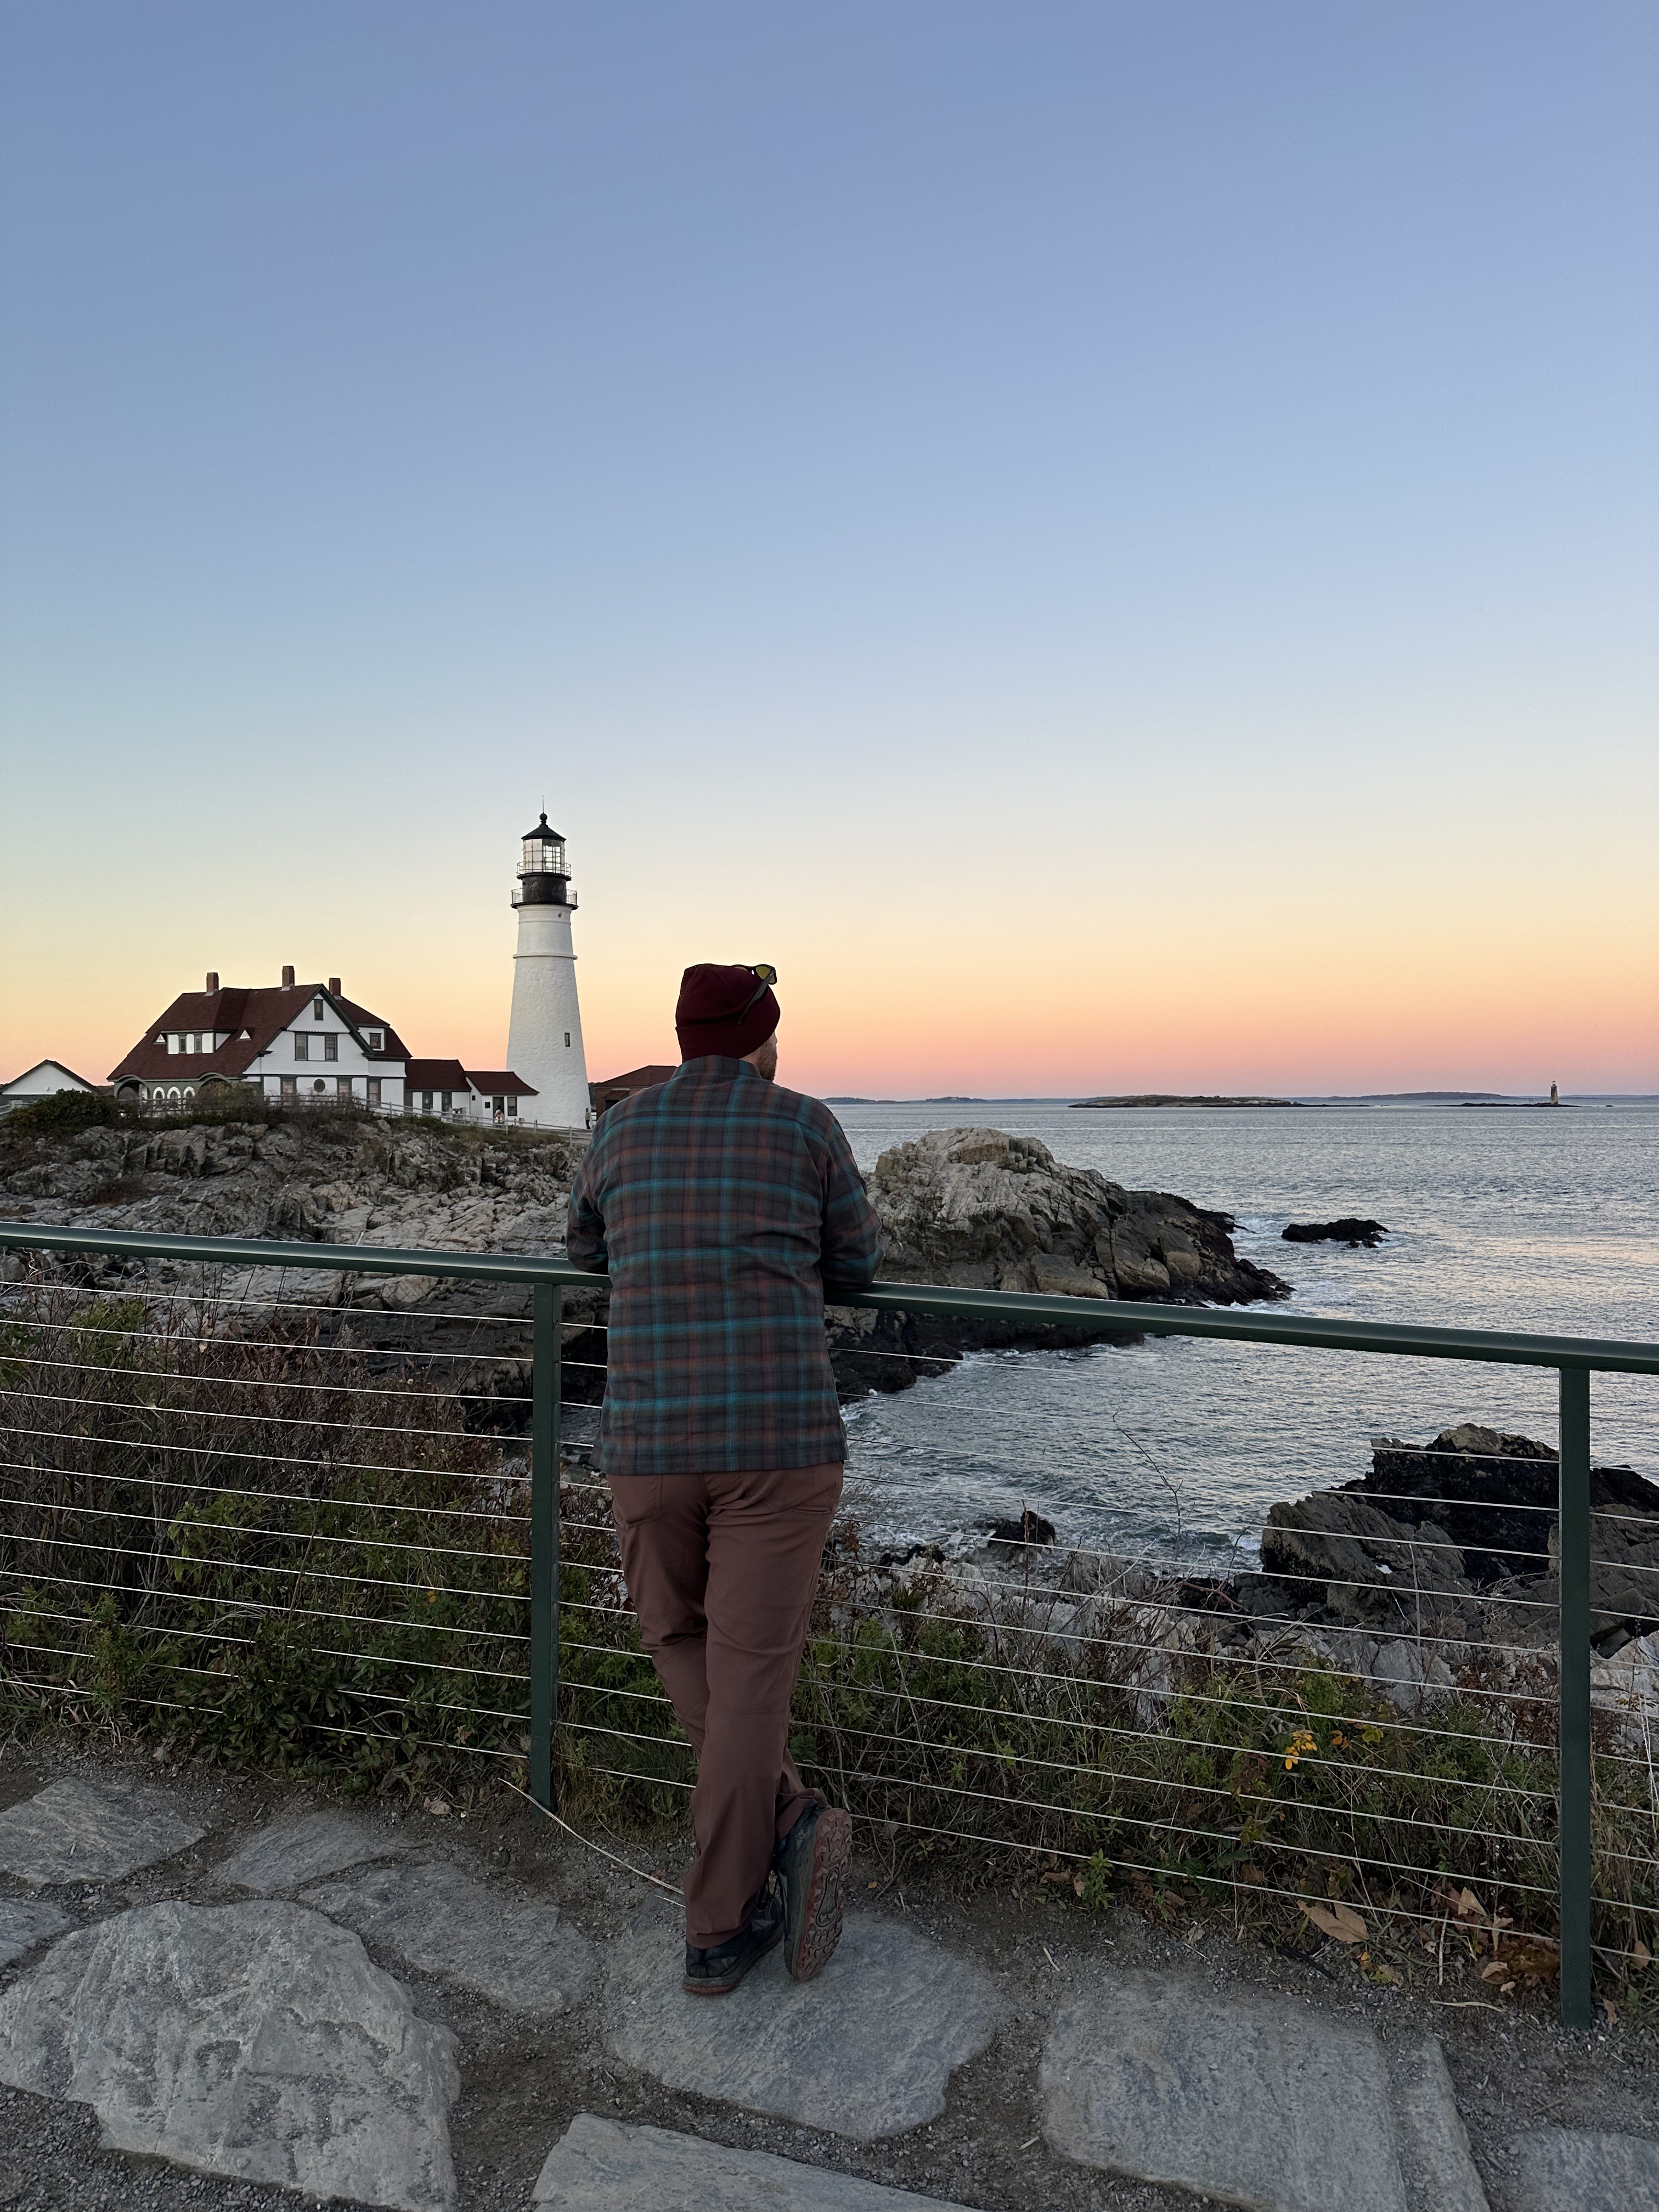
Head to Portland head lighthouse for sunset.
Drive to accommodations in Kennebuckport, ME.
🌛 Airbnb in Kennebuckport
Portland Head lighthouse at sunset
Day Ten
Explore downtown Kennebuckport and grab breakfast and coffee at Dock Square Coffee.
Souvenir shop around town.
Take a drive to Ogunquit for the day
Walk along the marginal way path
Explore the Perkin’s Cove area
Have one last lobster roll for lunch in town.
Drive over to York, ME and watch the sunset at Nubble lighthouse
Fun fact: This is where Patrick and I got engaged :)
🌛 Airbnb in Kennebuckport
Engagement at Nubble lighthouse!
This is truly a trip of a lifetime and should be on everyone’s bucket lists, I can’t recommend spending the fall in New England enough!
South Bubble trailHiking the Flume Gorge Fall camp set upWoodstock covered bridgeDowntown KennebuckportBar Harbor, METhunder HoleMaple farm tour!Hiking the Beech Cliff ladders trailHiking in Acadia Woodstock, VTMaple products in Vermont
Yosemite national park is one of the most magical national parks I’ve visited yet. It’s full of stunning landscapes, beautiful water falls, and jaw dropping valley views. Patrick and I recently took a two week cross country road trip and spent a weekend exploring Yosemite valley. Here’s a small guide of how we spent a few days exploring this incredible national park.
Things to Know About Yosemite National Park
🎟 There’s a $35 entrance fee to enter the park which is valid for 7 days. If you plan to visit a few national parks in one trip, I’d highly recommend the ‘america the beautiful’ pass. It’s $80 and valid for one year which allows you to visit any national park throughout the country.
⏱ During peak season, Yosemite requires a reservation entry ticket. The dates for the summer months are posted on their website. This year, it’s a little different, the park requires reservation tickets between June 15th-August 15th and again August 30-September 1st, 2025. Reservation tickets are $2 and valid for a 3 day period. One thing to keep in mind is reservation tickets can only be purchased online in advance, not in person.
⛰ The most popular area of Yosemite national park is the Yosemite valley area. This is where all of the iconic spots are (El Cap, upper falls, curry village, etc) and also where several campgrounds as well as some hotels are located. It’s the most central area to stay when visiting, which makes it very crowded! If you don’t stay in Yosemite valley, there are other options which will likely be at least an hour drive outside of the valley so keep that in mind.
🏕 There are 13 campgrounds in the park, and 4 campgrounds in the Yosemite valley area. If you are planning to camp, be prepared for campsites to sell out almost instantly when they become available. We ended up getting a last minute spot at upper pines campground a few days before our trip, but otherwise we stayed at the camp curry village tents. If you aren’t able to get a campground spot, I’d recommend checking the site frequently as it seems like people cancel often or the park releases some spots slowly. Be sure to check out the park’s website before visiting, reservations are not taken in person. We opted to sleep in Yosemite valley to make exploring more convenient but there are other campgrounds and hotel options outside of the valley as well.
Things to Do in Yosemite National Park
Go for a hike.
There are several beautiful hiking trails throughout the park, especially throughout the valley.
We hiked the iconic ‘mist trail’ all the way to vernal falls and it was incredible! It is definitely a well known hike which makes it crowded but we started earlier in the morning which helped beat some of the crowds. If you want more of a challenge, you can continue hiking to Nevada falls for a different view of the waterfalls. Be prepared to get wet from the vernal waterfall, the name of this hike is for good reason, there’s lots of mist! Although, on a hot day, the mist actually feels great. If you only have time for one hike while visiting, let it be the mist trail.
Another great trail we enjoyed was the sentinel meadow cook’s meadow loop. It’s along the well known boardwalks in the park and it provides stunning views of the valley and also the meadows.
Rent bikes!
This is a must do when visiting Yosemite! Biking around Yosemite valley should be on everyone’s bucket list, it truly gives such a unique view of the park and it’s so much easier to get to places without the hassle of parking a car. We rented bikes in Curry village but it’s also possible rent bikes at the welcome center in the valley. Prices vary but it was about $30 each for a half day rental and $60 for a full day rental.
Spend time in Curry Village.
This is another popular spot within the park! There’s several restaurants, shops, and the classic curry village tents. In the village, there’s also laundry and showers available for visitors. This was the only national park we’ve ever visited where the showers were free! I would recommend stopping here for souvenirs or if you’re looking for a great lunch or dinner spot. We really loved meadows grill and the pizza deck. Additionally, this was the only national park we’ve been to where there is a coffee shop at the village!
If you’re interested in staying in the camp curry tents, this is the website to book. I would recommend staying here, it was such a fun experience! We loved the convenience of walking up right in the village and walking to get our morning coffee. Keep in mind, the tents are comfortable but not luxurious. There’s shared bathroom and shower stations, and no air conditioning. We visited in June but the nights were cool which made sleeping conditions perfect.
Explore the meadows.
There are several meadows within the park that are fun to check out! We loved the meadow near Sentinel bridge and the El Cap meadow.
Stop by glacier point for sunset
This is a must see when visiting Yosemite. It’s about an hour drive from the valley area but definitely worth the drive, especially to catch sunset at glacier point. Here, you’ll find a frontal view of half dome and incredible views of the rest of the valley.
Stop by Tunnel view.
This is a popular pull off spot in the park after passing through the famous tunnel that leads you down towards Yosemite valley. This is a great stop to pull off and grab some photos of the valley opening up and get a peak at half dome.
My Tips
Yosemite is a very busy and popular park so I would recommend getting to spots early if possible and be prepared for crowds.
If you’re exploring Yosemite valley, find a parking spot early and plan to keep your car there as long as possible. We quickly learned it became very difficult to find convenient parking later in the day.
Yosemite entrance signTunnel ViewMornings at campHiking the mist trailGlacier pointBreakfast at campCurry Village areaBiking through Yosemite valleySnack near Vernal fallsHiking the mist trail!Glacier point at sunsetCamping in Curry Village tents
There’s been a lot of recent news and updates regarding the future of national parks. If you’ve read my blog before, you probably know national park travel is so important to me. If you’ve visited a national park before, you likely understand why they need to be protected. I consider it such a gift to have these stunning places throughout the country, full of beautiful scenery, incredible wildlife, and wonderful hikes and activities to explore. These places wouldn’t exist or thrive without the work and dedication of so many park rangers, forest service workers, and volunteers of the national park service.
The current administration recently fired thousands of public land and national park employees, leaving these magical places at risk. Not only for the visitors who cherish these places but for the wildlife that are able to call these places home.
The current updates have been very unsettling for me and I wanted to create a post sharing resources and things to be aware of if you also love and appreciate our national parks. I will also be sharing ways to advocate and do our part in maintaining the national parks to the best we can.
Things To Be Aware of Moving Forward
Due to the lack of staffing, there may be many changes within major national parks. It’s easy to not always recognize how much these workers contribute to the parks because of how much time and effort goes into caring for these areas. Now more than ever, it will be important for all of us to do our part. There’s a lot we still don’t know but, for now, these are things that may be a result of less staff to assist in maintaining the parks and public lands.
There may be unmaintained trails. With the reduction of staff, some hiking trails may not have their usual attention and care which could mean more fallen trees, rocks, or other obstacles that could interfere with the safety of a trail. Please keep this in mind when exploring and hiking. It will be important to do your own research, look up weather conditions before hiking, and use your best judgement!
More trash and litter. With less workers to care for and manage waste, this could possibly cause litter to accumulate in the park. Please do your part in picking up trash when you see it!
Less search and rescue availability. This is arguably the biggest loss with these new changes. If you run into a safety concern on a hiking trail or within the national park, there may not be help available for you. Again, it will be important to use your best judgement and come prepared with proper gear.
Campground and closures. There could be temporary closures and less campgrounds that can be maintained with less staff. Similarly to other tips, it’s important we are more aware of trash and leaving no trace. It will also be beneficial to check park websites to find out if there are any closures ahead of time when planning a trip.
Things We Can Do
Respect these parks and spaces. This should be the case anyways but with fewer staff, it will even more important to follow rules and respect these places, especially when it comes to wildlife! We are a visitor in their home, which is so important to remember when visiting a protected area like a national park.
Be patient. With fewer staff, national park workers will be even more overworked and understaffed. This could cause an increase in delays, lines, and less help available during your visit.
Sign a petition that helps protect these parks during this time. I will link a petition from the National Park Conservation Association that you can sign if interested. On the website, you’ll find a few different petitions and actions you can sign regarding the matter. Please consider signing or finding out more information on their website.
Call your representatives and share your feelings about the matter.
Volunteer at your local national park or national forest!
Continue to spread awareness about this with others and while visiting national parks moving forward! Share this post, write your own, talk with friends and family about this matter.
I will be sharing more information as we continue to learn more about these changes. National parks are truly so special and I hope we can all make an effort to continue to protect them.
Acadia National Park Yellowstone National ParkGlacier national ParkMammoth Cave national parkZion national parkArches national parkBryce Canyon national parkGrand Teton national park New River Gorge national parkRocky Mountain national park
National park travel has become such an important part of my life and easily my favorite kind of travel. There are currently 63 established national parks in the United States and each year, there are new rules, permits, reservations, and important information you need to know before visiting. Gone are the days of spontaneously showing up to some popular parks and having an impromptu trip. Planning is required to ensure your trip is what you hope and expect it to be! I created this guide, similar to last year’s with important information about certain national parks you may need to know before visiting.
Reservation vs. Park Pass
Many national parks require a park pass to access the park and are typically valid for 7 days. This is still needed on top of any reservation or permit required. I would recommend looking at your desired national park’s website to make sure a park pass is required or not, however, this can be purchased when entering the park. The main difference between the two is a reservation or permit that is required needs to be purchased in advance before trip dates. The entrance kiosks and visitor’s centers will not sell these types of reservations in person.
Types Of Reservations That May Be Required
It’s important to check on park’s websites when and what kind of reservations may be required. Typically, these kinds of reservations are specifically required during peak seasons (summer-fall).
Timed entry. These kind of reservations are becoming more and more popular amongst certain national parks. Although it’s an additional step and hassle in some way, I do believe these are actually helpful in reducing the amount of crowds during certain times of day. It also just helps everyone enjoy and protect the park in the best way! These kind of reservations may give you access to one section of the park, the entirety of the park, a road within the park, etc, depending on the park. If you aren’t able to access a timed entry reservation (if you’re planning a last minute visit) there are ways around this. If the time slot is 6am-4pm, that means if you enter the park BEFORE 6am, you’ll be able to get in. However, if you leave the park at any point before 4pm, you won’t be able to get back in until after 4pm. Similarly, you could access the park after 4pm. I touch on more tips on what to do if you don’t secure a timed entry reservation later in this post.
Vehicle reservation. This kind of reservation varies depending on the park and again, the purpose is to limit the amount of cars gathering in one area or section of the park. For example, in Glacier national park, a vehicle reservation is required to access the ‘going to the sun road’ during certain times of day and seasons.
Hiking permit. This kind of reservation is required when hiking certain trails that are typically more popular. For example, Angel’s landing in Zion national park now requires a permit to complete the entire hike.
Parks that Require Reservations
*as of January 2025*
Acadia National Park, Maine– requires a vehicle reservation to access Cadillac mountain if visiting between May-October. This reservation costs $6 and can be purchased on the park’s website. The park hasn’t officially released 2025 dates required for this permit, but I’m sure they will soon. Check out my blog post about Acadia National park here for more information on the park.
Arches National Park, Utah– requires a timed entry reservation (7am-4pm) between April-October. This year the park is not requiring tickets during some days between July and August. Tickets will be required from 7 am to 4 pm each day between April 1 – July 6 and August 28 – October 31, 2025. This reservation costs $2 per vehicle. Learn more on the park’s website. Check out my blog post about Arches National park here for more information on the park.
Glacier National Park, Montana– requires a vehicle reservation (7am-3pm) in various areas.
Due to Glacier’s popularity, the park has split the major areas of the park into three sections that ALL require reservations if you plan to visit. Reservations can be made four months before your trip dates and booking will become available starting February 12th, 2025 for this year. All sections require a reservation between the hours of 7am-3pm during June 13-September 28 time frame. The sections within the park that all need a reservation include:
Going to the sun Road
North Fork
Many Glacier
keep in mind, if you plan to visit all three areas of glacier, you may need three different types of reservation tickets. Check out my blog post about Glacier National park here for more information on the park.
Haleakala National Park, Hawaii– requires a vehicle reservation (3am-7am) that costs $1 per vehicle to watch the sun rise above the clouds at Haleakala Summit. Learn more on the park’s website.
Rocky Mountain National Park, Colorado-requires a timed entry ticket from May through October. RMNP has split the timed entry tickets into two sections:
Bear Lake corridor, timed entry reservation required to access the bear lake trails + access to the rest of the park, costs $2. Timed entry from 5am-6pm.
Rest of the park, timed entry reservation for the Rocky Mountains national park, excluding the bear lake trail area, costs $2. Timed entry from 9am-2pm. Check out my blog post about RMNP here for more information on the park.
Shenandoah National Park, Virginia– requires a day use hiking permit if you plan to hike ‘Old Rag trail’ which is one the most popular hikes in the park. Reservations are required from March-November and costs $1 (each person is required to have a ticket). Learn more on the park’s website. Check out my blog post about Shenandoah National park here for more information on the park.
Yosemite National Park, California– the park has changed it’s requirements each year and as of right now, Yosemite hasn’t released the requirements for entrance reservations or permits needed during peak season. I will be sure to update this post when any news is posted. Patrick and I plan to visit Yosemite this year so I will definitely need to have reservation information before visiting! The park has released other types of reservations that are required:
Horsetail Fall reservation– ticketed entry during the months of February on the weekends of February 8–9, February 15–17, and February 22–23, 2025. Note, this reservation is only required if you plan to visit on the listed days in February. This is a big attraction during the month of February in the park, so the reservations are listed for the weekends. However, if you plan to visit the park during these weekend dates even without going to Horsetail falls, you still need this reservation ticket. This reservation costs $2 and is per vehicle. Purchase tickets on the park’s website.
Half Dome hiking permit– this popular trail now requires a permit to hike as an attempt to reduce crowds. Learn more about how to obtain a permit through the park’s lottery system here.
Zion National Park, Utah– requires hiking permits for these trails; Angel’s Landing, the Subway, and the Narrows from top-down.
Angel’s Landing– the park now requires a permit to hike the entirety of this trail (without a permit you can hike all the way to “scout lookout” point). Similarly to Yosemite, permits are selected by a lottery system. It costs $6 to apply and if selected it’s $3 per person to hike this trail. Learn more on the park’s website. Be sure to figure out when the time period is to apply for the permit through the lottery that lines up with your trip dates.
The Subway- this hike requires a permit if you plan to hike it between the months of April-October and is selected through a lottery system as well. Learn more here.
The Narrows from top down– the narrows is one of the most incredible hiking experiences within the park! Many visitors hike this from the bottom up (I did!) but if you wish to hike the trail from the top down (16 miles total), you’ll need a wilderness permit. Learn more here. Check out my blog post about Zion National park here for more information on the park.
Mount Rainer National Park, Washington– last year the park decided to require a timed entry reservation for vehicles driving to either the Paradise Corridor and/or the Sunrise Corridor. Reservations were required each day from 7am-3pm from May through September for the Paradise Corridor and July through September for the Sunrise Corridor. Since the park tried this for the first time last year, they haven’t posted if they’ll be doing this again in 2025, I will update this post if they do. Learn more here.
It seems like more parks are trying to implement some kind of reservation system depending on the amount of crowds they see. I would recommend checking any park’s website you plan to visit prior to your trip to determine if any other decisions are made throughout the year to require reservations or permits to access areas.
National Park Checklist
Keep up to date with tracking what national parks you’ve visited! Download my free national park checklist below. I created two versions, horizontal and vertical PDF’s.
If you don’t get a reservation or if you missed your window to purchase one, here are a few options to still be able to access reserved areas of the park:
Book the reservations as soon as you are able. On the park’s websites, there will be a time when you are able to book. Some parks allow you to book a couple months in advance, and if you miss out, they reopen more reservations 1-2 days before your visit for an additional chance. It can definitely be stressful so I recommend logging on to purchase tickets as soon as the window opens (for example, most tickets become available on the park’s website at 10am EST).
Book a campground. If you book a reservation for a campground within the park, the park counts this as your reservation for timed entry or vehicle reservations, depending on the park. Be sure to check exceptions to purchasing reservation tickets if you are camping in the park. Also note, your campground reservation will only serve as a reservation ticket if the dates you plan to access the park and stay at the campground are the same. (i.e., if you camp one night and move to a hotel, you’ll need a reservation ticket to assess specific areas the days/nights you’re at the hotel and no longer camping).
Enter the park outside the required time. If you can’t purchase timed entry tickets, find ways to experience the park outside of the timed restrictions (i.e., if timed entry reservations start at 6am, enter the park BEFORE 6am). Just keep in mind if you leave the park before the reservation time frame is finished, you won’t be able to go back in until after the time restriction ends. (i.e., if you leave the park at 12pm, and the time restriction ends at 3pm, you won’t be able to go back into that area of the park until AFTER 3pm).
Do some research to determine which areas, activities, and hikes you may want to do that require reservations.
Keep in mind, when timed entry reservation periods end, there are crowds trying to access the park, arrive early in kiosk lines to ensure you don’t have to spend too much time stuck in line.
This past fall, Patrick and I went on a two week road trip through various areas of New England. The trip ended with some time in Maine where we first explored Acadia national park and then made our way down the coast to visit various coastal towns. The best part about this area of Maine is that these small coastal towns are all within a short drive from each other so it’s possible to pick a home base and make some day trips. Patrick and I fell in love with this area of Maine and enjoyed about three days exploring various little towns, eating amazing lobster, enjoying sunsets at gorgeous lighthouses, and to top off our time in Maine, we left engaged! Here’s a quick guide to a few of our favorite towns along the coast of Maine.
Portland, ME
Portland is a major stop when traveling through this area of Maine. We had a half day here and mostly strolled around the main areas of downtown going in and out of shops and enjoying some of the best lobster we’ve ever had! Some of our favorite stops:
Food
Portland Lobster Co. Hands down the best lobster roll we tried the entire trip! We liked it so much we went twice! If lobster isn’t your thing, they also have some other menu items but I’d recommend at least trying some of their lobster to say you did in Maine!
Holy Donut. This is an iconic spot in Portland! They are famous for their potato style donuts and typically have a line of people waiting throughout the day to try a donut. We were skeptical of a potato style donut but it was AMAZING! Definitely worth a stop! We went to the main location downtown on Commercial street but they have a couple locations scattered throughout the city. They close once donuts for the day are sold out so be sure to get there early if possible!
Shops
Soleil. This is a french inspired store with sweet decor and home gifts. Inside there’s also one of Portland’s “mini print vending machines” where you can put in some quarters and receive a small print created by a local artist.
There’s too many souvenir shops along commercial street in Portland but I’d recommend walking along and going in and out of some unique shops.
Activities
Portland Head lighthouse. A must see while visiting Portland! This is about 25-30 minutes outside of the downtown area but worth the drive, especially at sunset! This was definitely the most beautiful lighthouse we saw during the trip. Keep in mind, when we visited there was a gate in place that blocked access to the rocks around the lighthouse. While researching this spot, on social media it appeared that visitors could sit on the rocks and take photos with a closer view but this was not the case when we visited October 2024. This may be a temporary thing in the colder months but wanted to share.
Stroll around downtown! Portland seemed like a typical busy city with lots to do and see. We enjoyed walking down commercial and wharf street.
Take a walk down Wharf street. This is a popular street in the heart of downtown with lots of amazing restaurants. The street is well known for it’s cobblestone and moss covered buildings.
Take a boating tour. We didn’t do this, but we saw lots of signs about boating tours which may have been fun if we had more time.
Portland Head lighthouseHoly donutsSoleilLobster rolls at Portland Lobster co.Sunset at Portland Head lighthousePortland lobster
Kennebuckport, ME
When we were planning this road trip, we weren’t planning to stay in Kennebuckport or pass through it. However, we had a last minute change to our itinerary because we decided we’d rather have an airbnb instead of camp the last few nights of the trip so I quickly found us a cute spot to stay and it ended up being in Kennebuckport. We were so happy this came to be! Kennebuckport is such a charming coastal town. It gives that small town feel where all the locals know each other, everyone walks to work, and there’s only small businesses in town. I’d definitely recommended stopping or staying in Kennebuckport if you’re driving down the coast. Some of our favorite stops:
Food
Dock Square coffee house. We started our morning here one day and loved the coffee! It’s also just a sweet little coffee shop right in the heart of town.
Mornings in Paris. This is another popular coffee shop in town, we didn’t stop here but our airbnb host left us some coffee to use from this shop and it was really good as well!
H.B. Provisions. This is a great stop for anything you may need while passing through. There’s food, groceries, drinks, souvenirs, etc. We stopped here one morning for a breakfast sandwich before exploring and it was great!
Roma Pizza. We picked up a pizza from here quickly after our drive in from Acadia and it was delicious!
Alisson’s restaurant. We had dinner here after getting engaged and it was so tasty! They have a little bit of everything on the menu.
Shops
Scalawags Pet Boutique. This was such a cute pet shop! We found so many great souvineers to bring home to our fur babies.
Too Cool t shirt store. A great place to find souvenirs for yourself or loved ones.
Mountain Tops. Another great souvenir shop.
Any shops along dock square or ocean ave are worth stopping by!
Dock square coffeeDowntown scenes in KennebuckportDowntown KennebuckportInside shops within KennebuckportDowntown KennebuckportDowntown KennebuckportDowntown KennebuckportShops near dock square
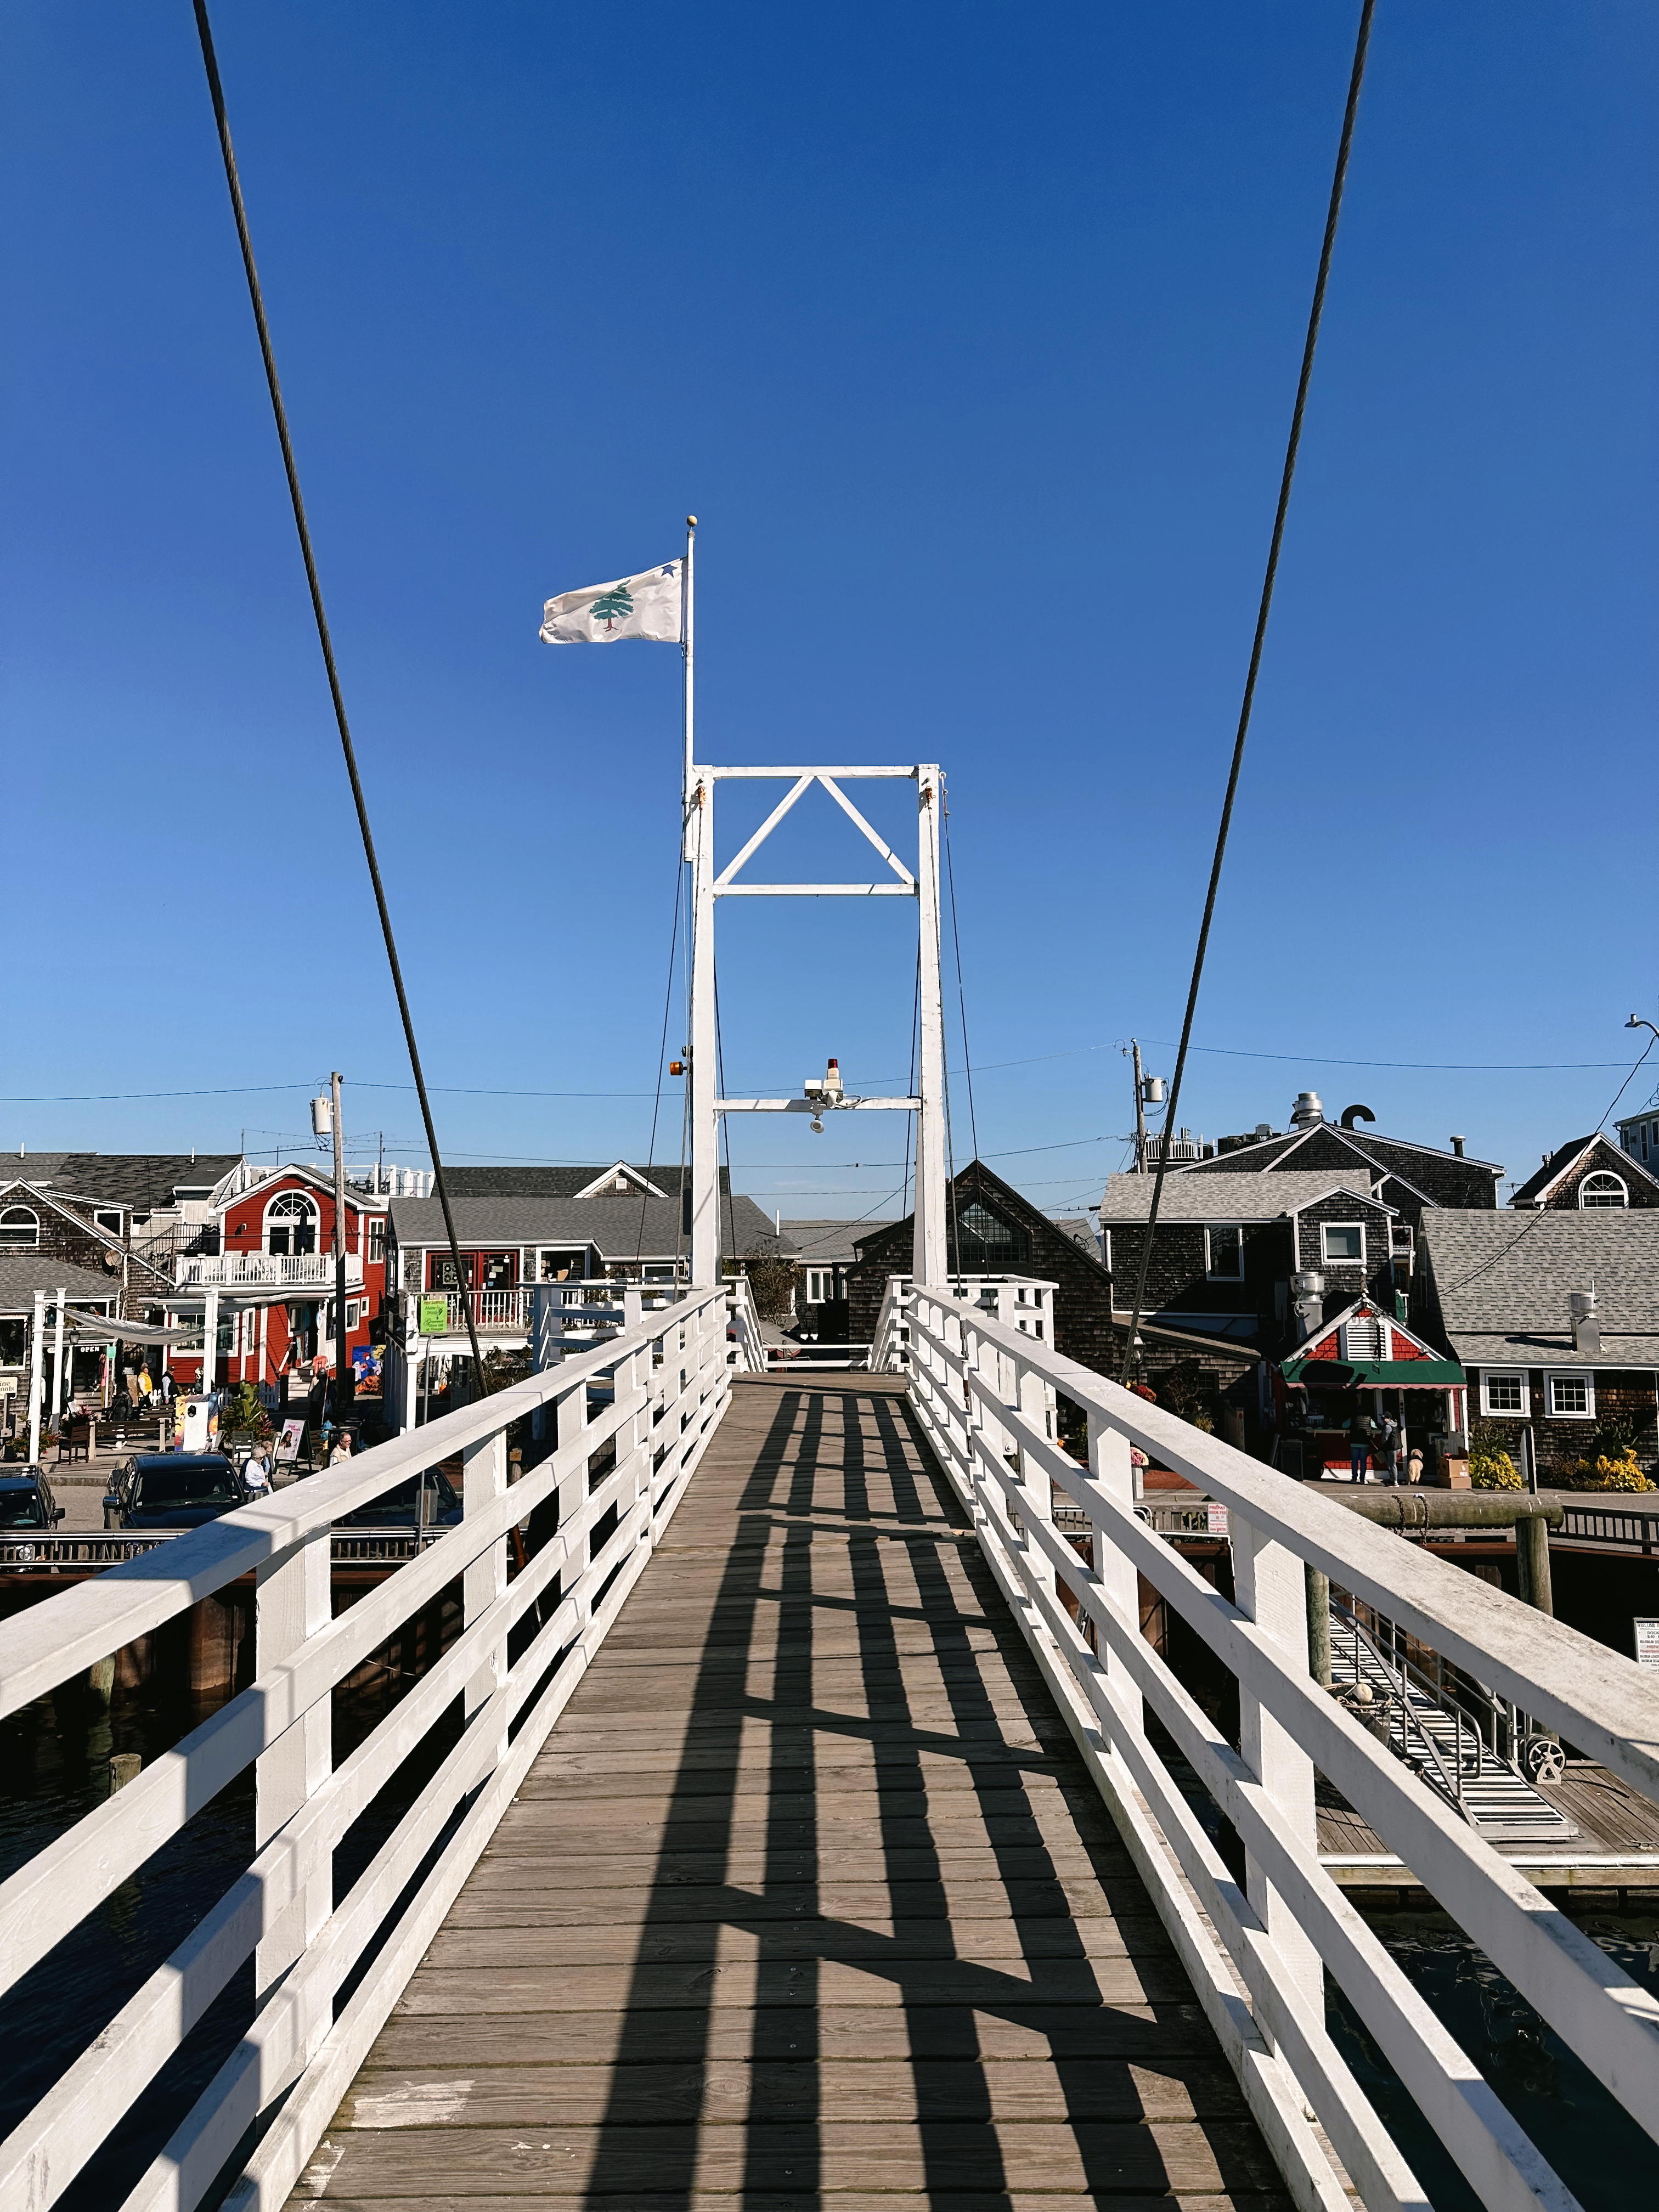
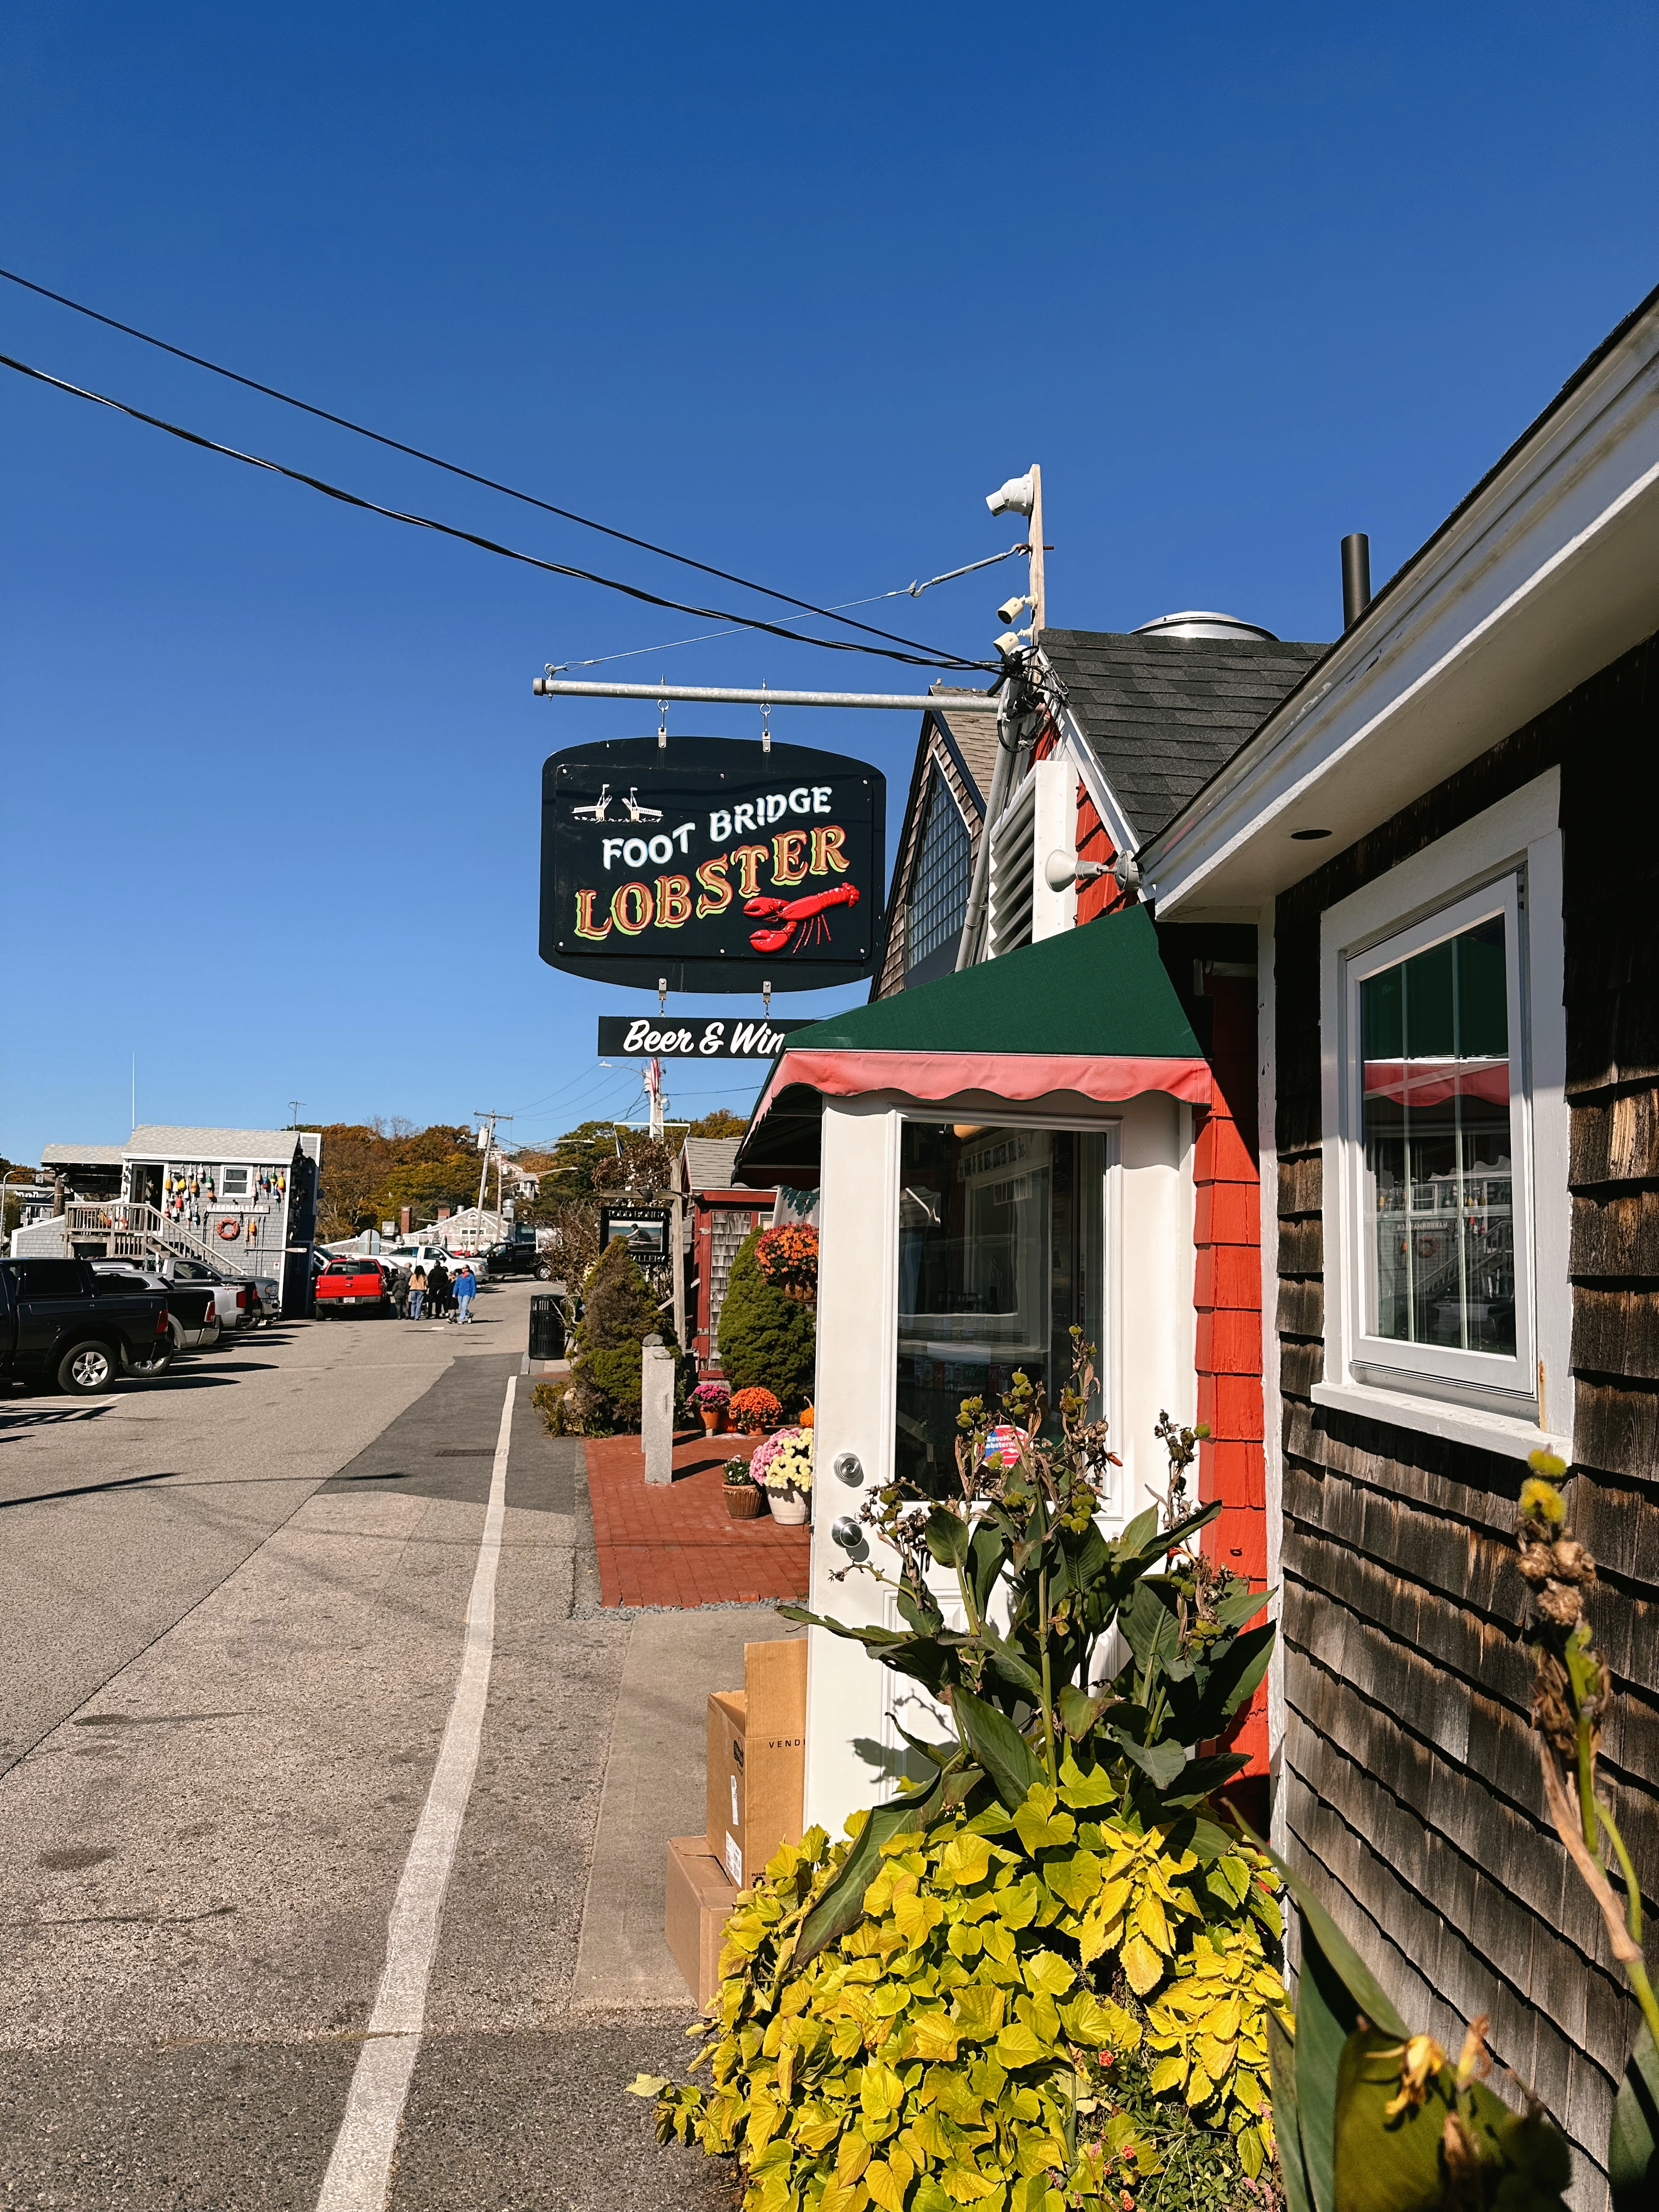
Ogunquit, ME
Ogunquit was a stop along the road trip I was excited about because I had seen some many other blog posts and photos highlighting the town’s beauty. It’s another charming coastal town with such a special feeling. We enjoyed spending an afternoon here walking around and soaking in more incredible Maine views. In the future, I’d love to visit this area again and stay overnight. If you’re visiting as a day trip like we did, keep in mind, parking can be a bit pricey. Our favorite stops:
Food
Foot Bridge Lobster. This was the only place we tried while visiting and we weren’t too impressed with their lobster rolls. There was several other little restaurants in town though so it seems like there are plenty of options!
Shops
Maine Originals. This was a cute souvenir and apparel store!
Nothing Better than Doing Nothing. Another great souvenir shop.
Dock Square Clothiers. A nice place to find a t-shirt or sweatshirt souvenir to bring home.
Perkins Cove Pottery shop. This was a sweet shop with handmade pottery done by a local artist.
Activities
Marginal Way. This is one of the top things to do in Ogunquit! Marginal way is a paved trail that goes along the coast line providing stunning views of the ocean and town.
Perkins Cove. This is a charming area in Ogunquit where most stores are located. It’s also a very picturesque area in town. You are able to drive through here but it seems mostly for foot traffic.
Walk along the Perkins Cove drawbridge. This is right near Perkins cove and visitors can actually push a button to open the bridge for taller boats to pass through.
Views along marginal wayPerkins cove viewsMarginal wayPerkins covePerkin’s cove drawbridgeViews from the drawbridgeFoot bridge lobster
York, ME
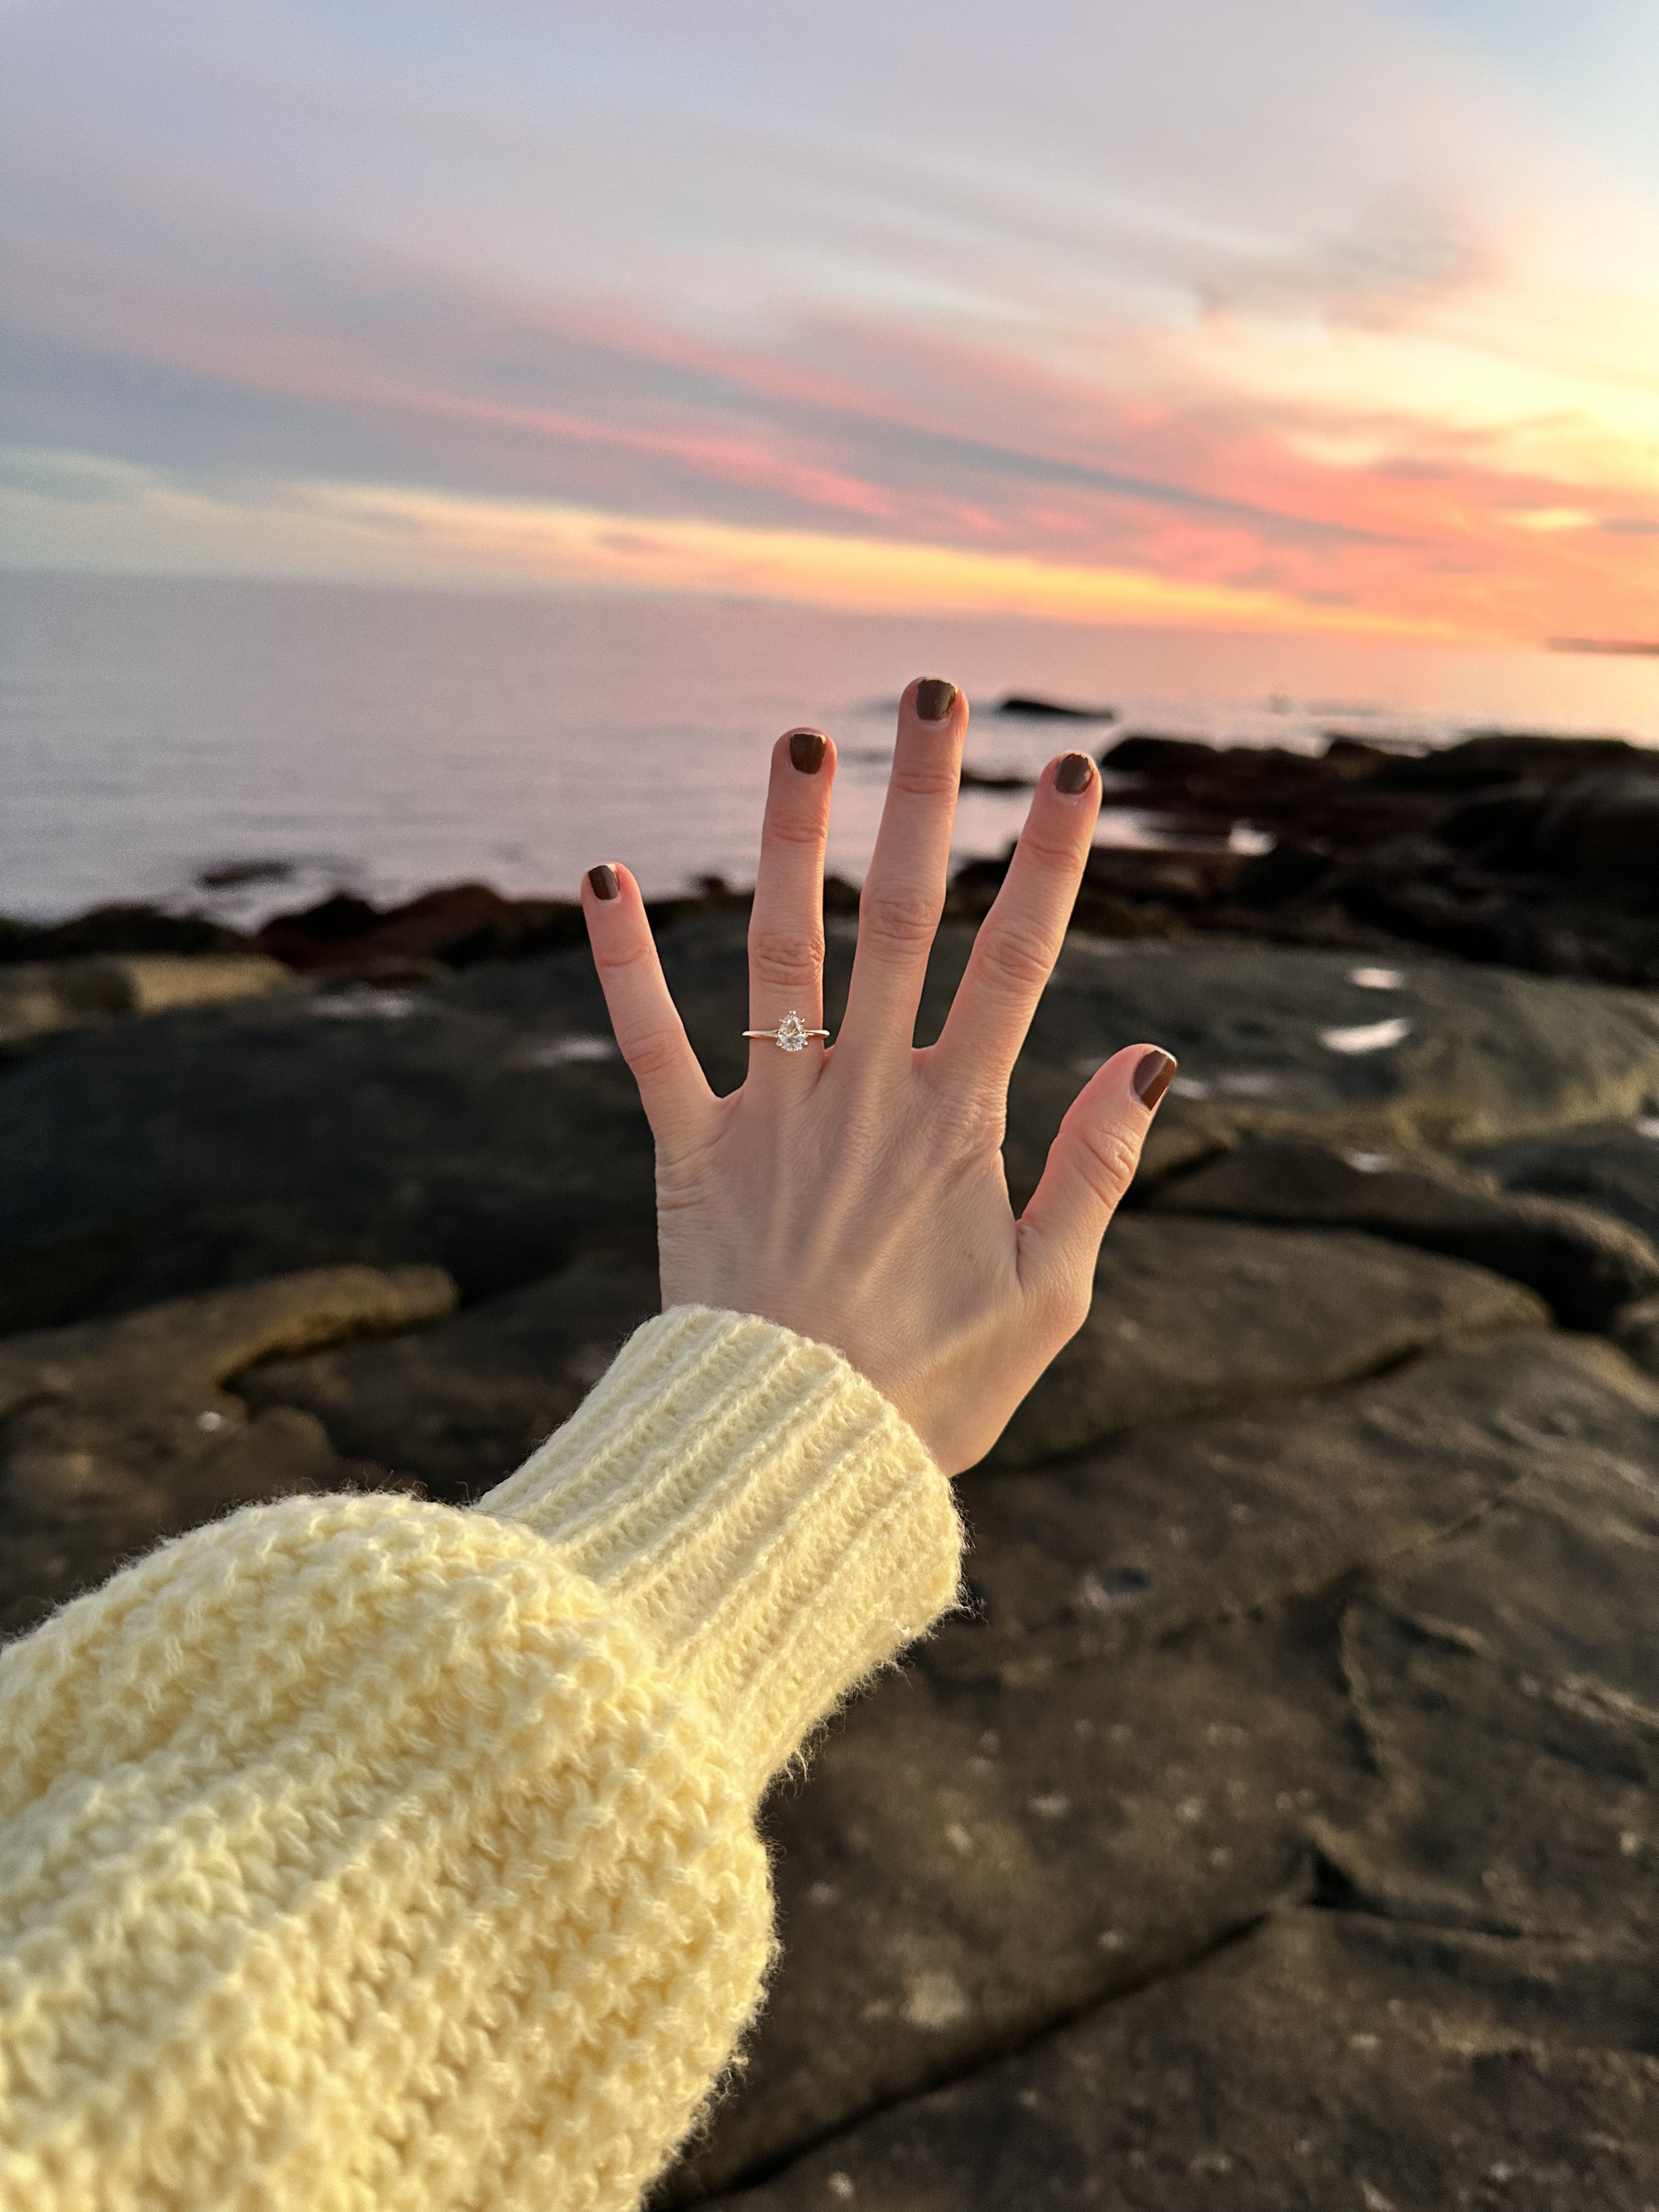
York was another last minute stop. We had some down time and we saw York was only 20 minutes away from Ogunquit and we decided to make the drive there for sunset. York ended up being one of my favorite stops because of the memories made here. One of the main things do to in York in visit Nubble lighthouse, it’s the heart of the town. We decided to spend sunset here and it was one of the most beautiful sunsets I’d ever seen. As the sun was setting, Patrick and I set up our tripod to take some videos and photos together, as we always do when traveling together, and to my surprise Patrick ended up proposing! It was such a beautiful moment and I couldn’t have asked for a better sunset and evening. York is a place I’ll cherish forever because of this incredible moment.
Since we were only in York for a couple of hours, the only thing I can really recommend is going to Nubble lighthouse for sunset! There is a sweet gift shop right near the lighthouse with bathrooms, souvenirs, and information about the town. While driving through the town, it seems like a sweet area with lots of activities especially available during the warmer months of the year.
Activities
Watch sunset at Nubble light house. Since we were only here for a brief amount of time, this is my only recommendation! It was a stunning place to view the sun setting.
Getting engaged at Nubble lighthouseSurprise proposal
Acadia national park is one of the most magical national parks I’ve been to yet. I had the opportunity to visit during the fall time and the fall foliage enhanced the beauty of the park. Acadia is located nearby Bar Harbor, Maine and it provides stunning mountain, coastal, lake views and scenery. Here’s a guide to things I’d recommend doing on a trip to Acadia.
Things to Know About Acadia
🎟 The park requires a park fee. It’s $35 for a 7 day period. I’d highly recommend purchasing the America the Beautiful pass if you plan to visit multiple national parks at once. The annual pass is $80 and gets you into national parks around the country for a year!
🦞 The closest town to the park is Bar Harbor and when I say close, I mean very close! Bar Harbor is about 15 minutes away (or less) from popular spots in the national park. The proximity is so convenient and it was so nice having lodging and eating options close by.
🏕 There are four established campgrounds within the park. I’d suggest making a reservation well in advance if you plan to camp, typically reservations open 6 months before your trip date, however, Acadia’s reservation period opens 2 months before your trip dates. We stayed at Blackwoods campground which is the most conveniently located campground in the park if you plan to visit major spots inside the park and Bar Harbor. Be sure to research on where in the park you’d like to be, the campgrounds are spread across the entire park. There are also no showers within the campgrounds so be prepared to find a way to shower elsewhere if needed. While we were staying at Blackwoods campground, there was a nearby shower house that is open 24 hours to the public. It’s located at 14 Otter Creek Drive.
Aside from campgrounds, there are plenty of hotels and lodging options inside Bar Harbor. It seems like a popular area, so I’d also recommend booking accommodations in advance if possible, especially if you plan to visit during the summer or fall time.
🌊 The park loop road is the scenic road that connects major highlights and viewing points of the park. Keep in mind, there is an area on the road that’s one way only so if you miss your stop, you’ll have to go around the loop again.
Best Things to Do in Acadia
Go on a Hiking Adventure
Acadia has so many incredible hikes! They are known for three hikes that require use of a ladder or iron rods to complete the hike. Although this may seem a little intimidating, it added such a fun element to a hike we’ve never experienced before. Here are some hikes I’d recommend adding to your list:
Jordan Pond path. This is an easy 3 mile loop trail near the Jordan Pond restaurant. This trail offers beautiful views of the “bubble” rocks from a distance as you walk along the perimeter of Jordan pond.
South Bubble trail. This was our favorite hike in the park! It’s a fairly easy to moderate 1.4 mile hike that brings you to the top of the south bubble rock. There are a few ways to complete this hike, we started at the bubbles parking lot and followed signs for the south bubble rock.
Beehive trail. The beehive is one of Acadia’s three iron rod/ladder trails. The beehive is considered the second most challenging as most of the hike requires use of the iron rods to hike to the top of the beehive summit. This trail is short and steep, only 1.4 miles to the top of the summit. If you are scared of heights, I’d reconsider completing this hike. Luckily, you can still hike to the summit by taking the Bowl trail which avoids the iron rods but still brings you to the top view point. If you do hike with the rods, I’d recommend going down the Bowl trail to make it a loop so you don’t have to use the rods on the way down. We really enjoyed this hike because it gave us such a different experience. Keep in mind, this is the park’s most popular hike so plan to hike early if visiting during busy season. We started around 7:00am on a weekday and by the time we were finished, there were so many people!
Beech Cliff Ladders trail. This is the third hike included in the ladder/iron rods collection and the least challenging. This is a 1.8 mile hike that is another short and steep trail with four ladders. This was such an enjoyable hike and it was on the quieter side of the park so we were one of the only couples there. The top view point gives you an incredible view of echo lake. For this trail, we parked at the echo lake parking lot. On the hike down, we took the Canada Cliffs trail to make this a loop and it was also easier to hike down without ladders.
Ocean Path trail. This isn’t technically a hike but this trail is along the park loop road and it provides stunning views of the ocean and the mountains of Acadia. I’d recommend walking along parts of it to experience a different perspective of the park.
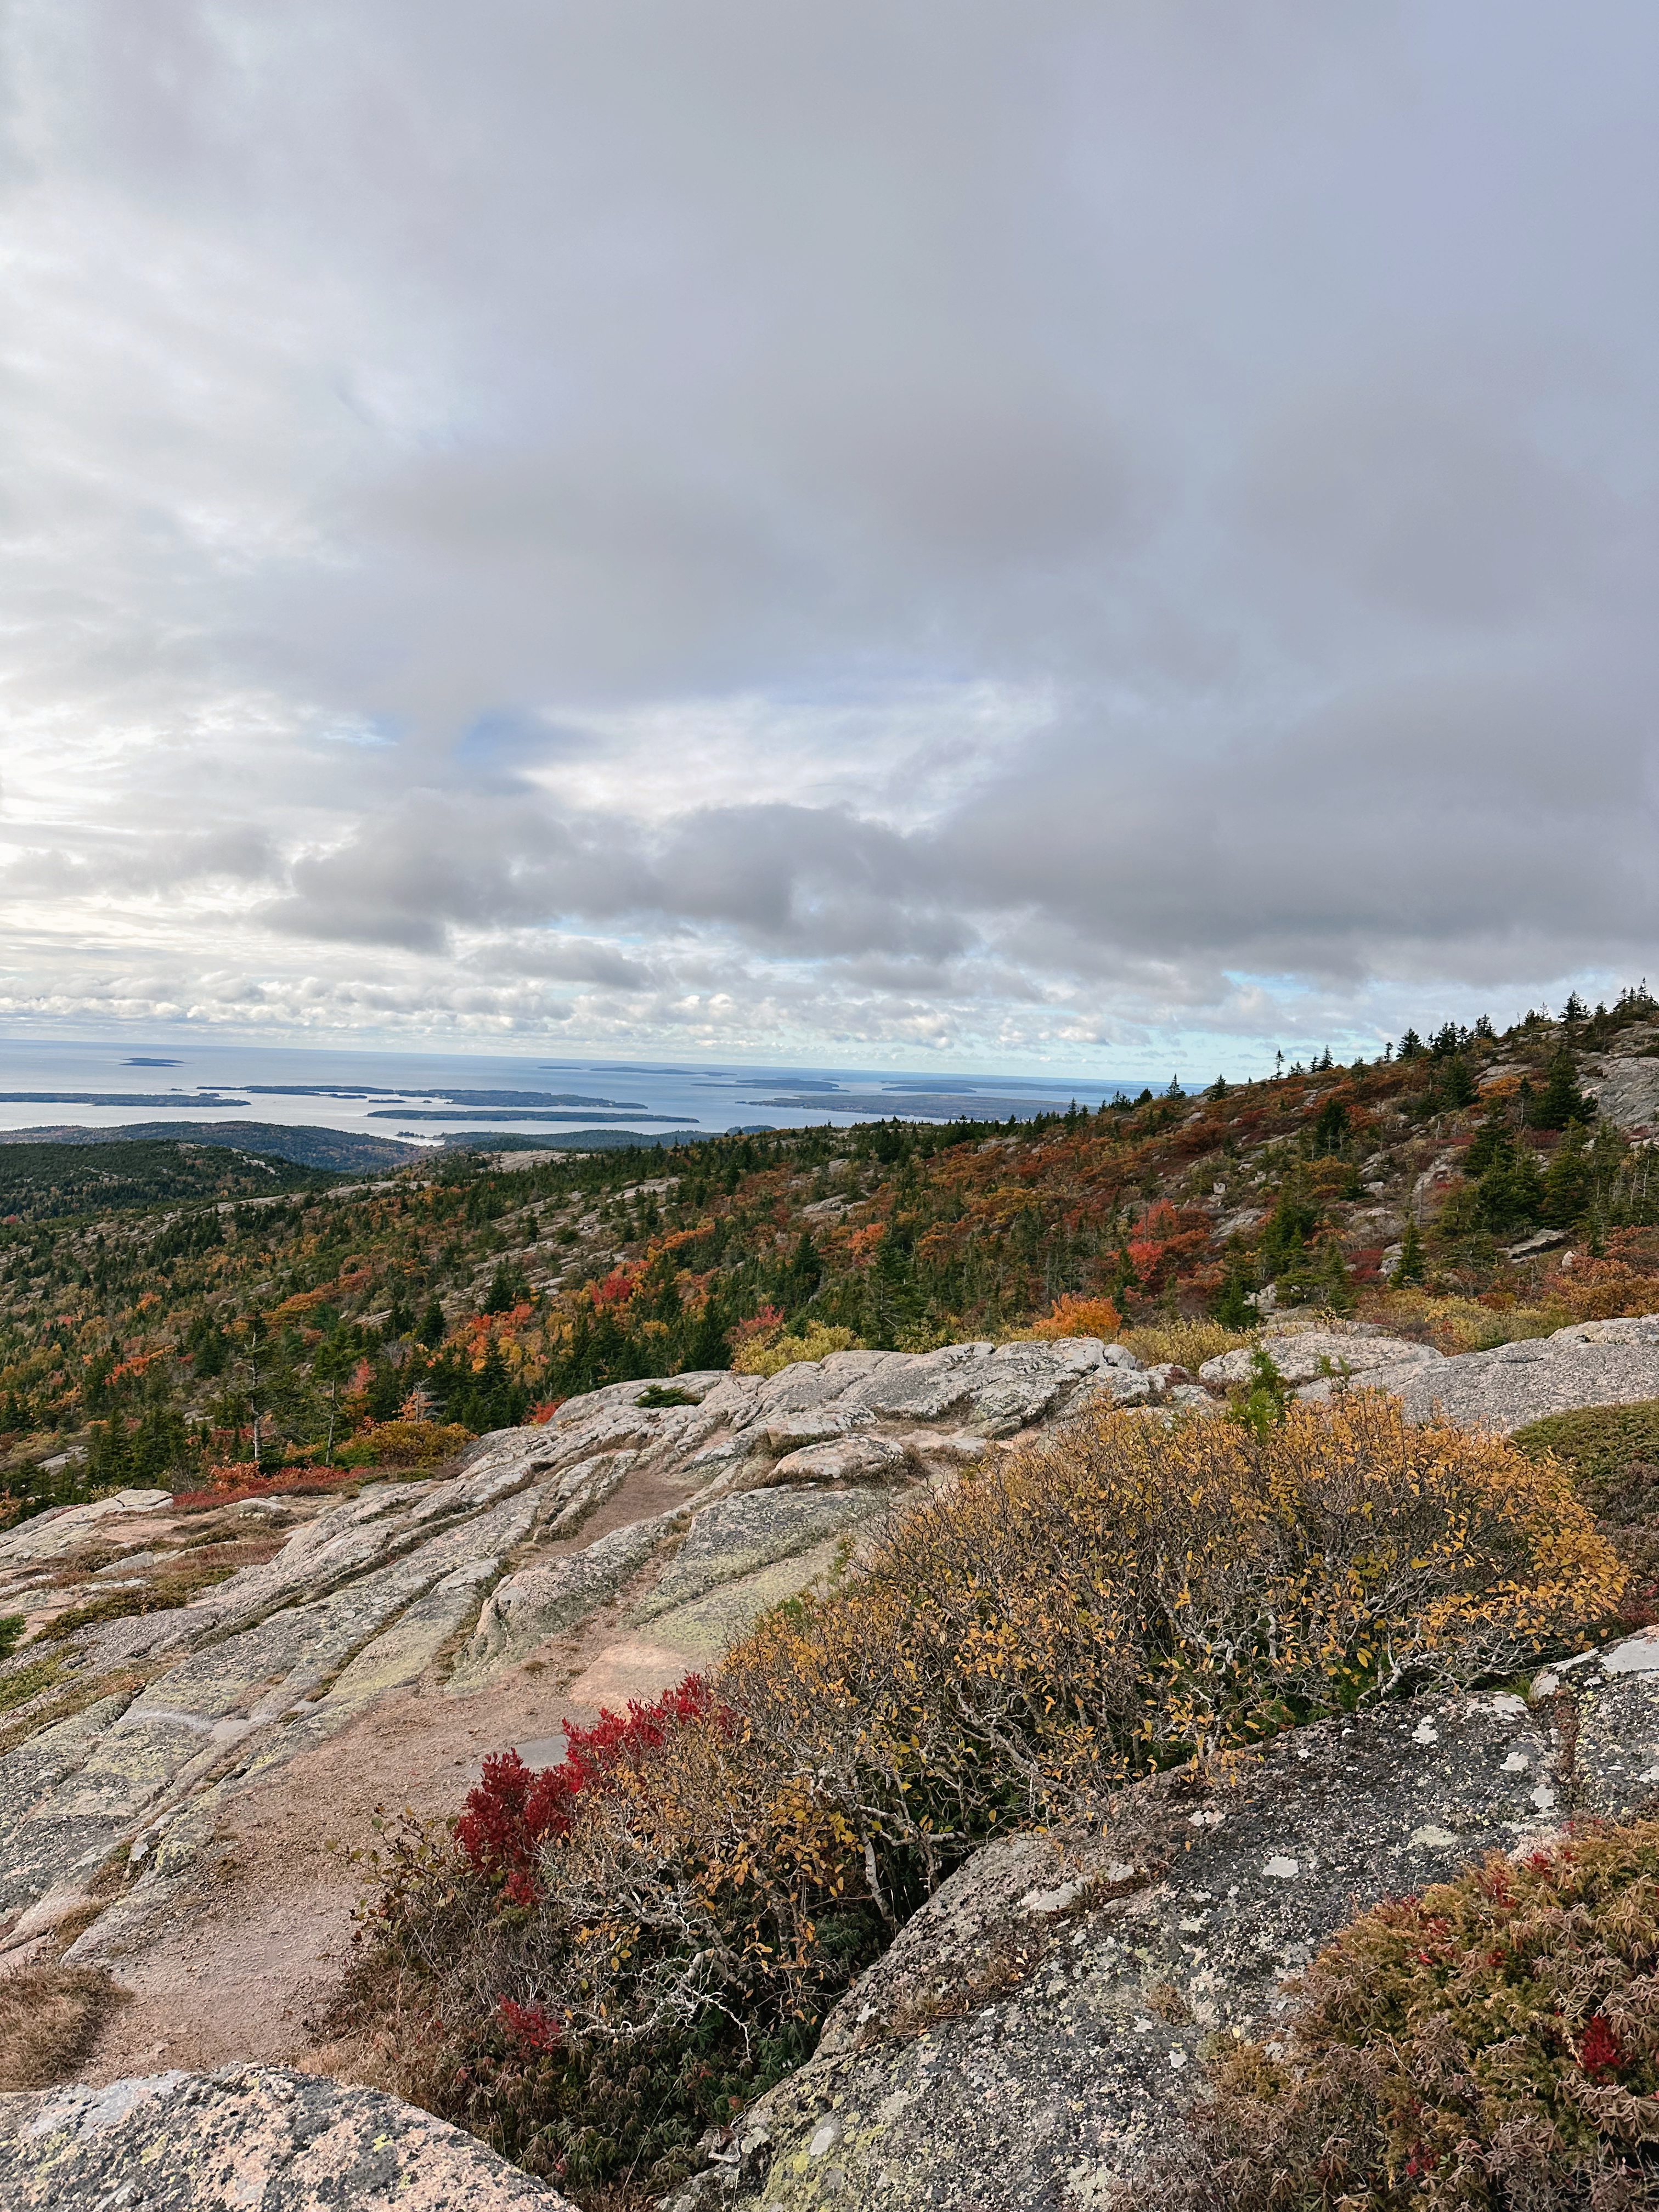
Drive to Cadillac Mountain
This is a must do while visiting the park. Cadillac mountain is the highest point in the park and there’s 360 views of the park, Bar Harbor, and other coastal parts of Maine. Keep in mind, during peak seasons, the park requires reservation tickets to limit the amount of crowds at a time. I’d recommend making a reservation for sunrise because during certain seasons, Cadillac mountain is the first point on the eastern coast that sees the sunrise. We were planning to visit during sunrise one day during our trip but unfortunately it rained so we rescheduled for a different day in the morning which was still beautiful!
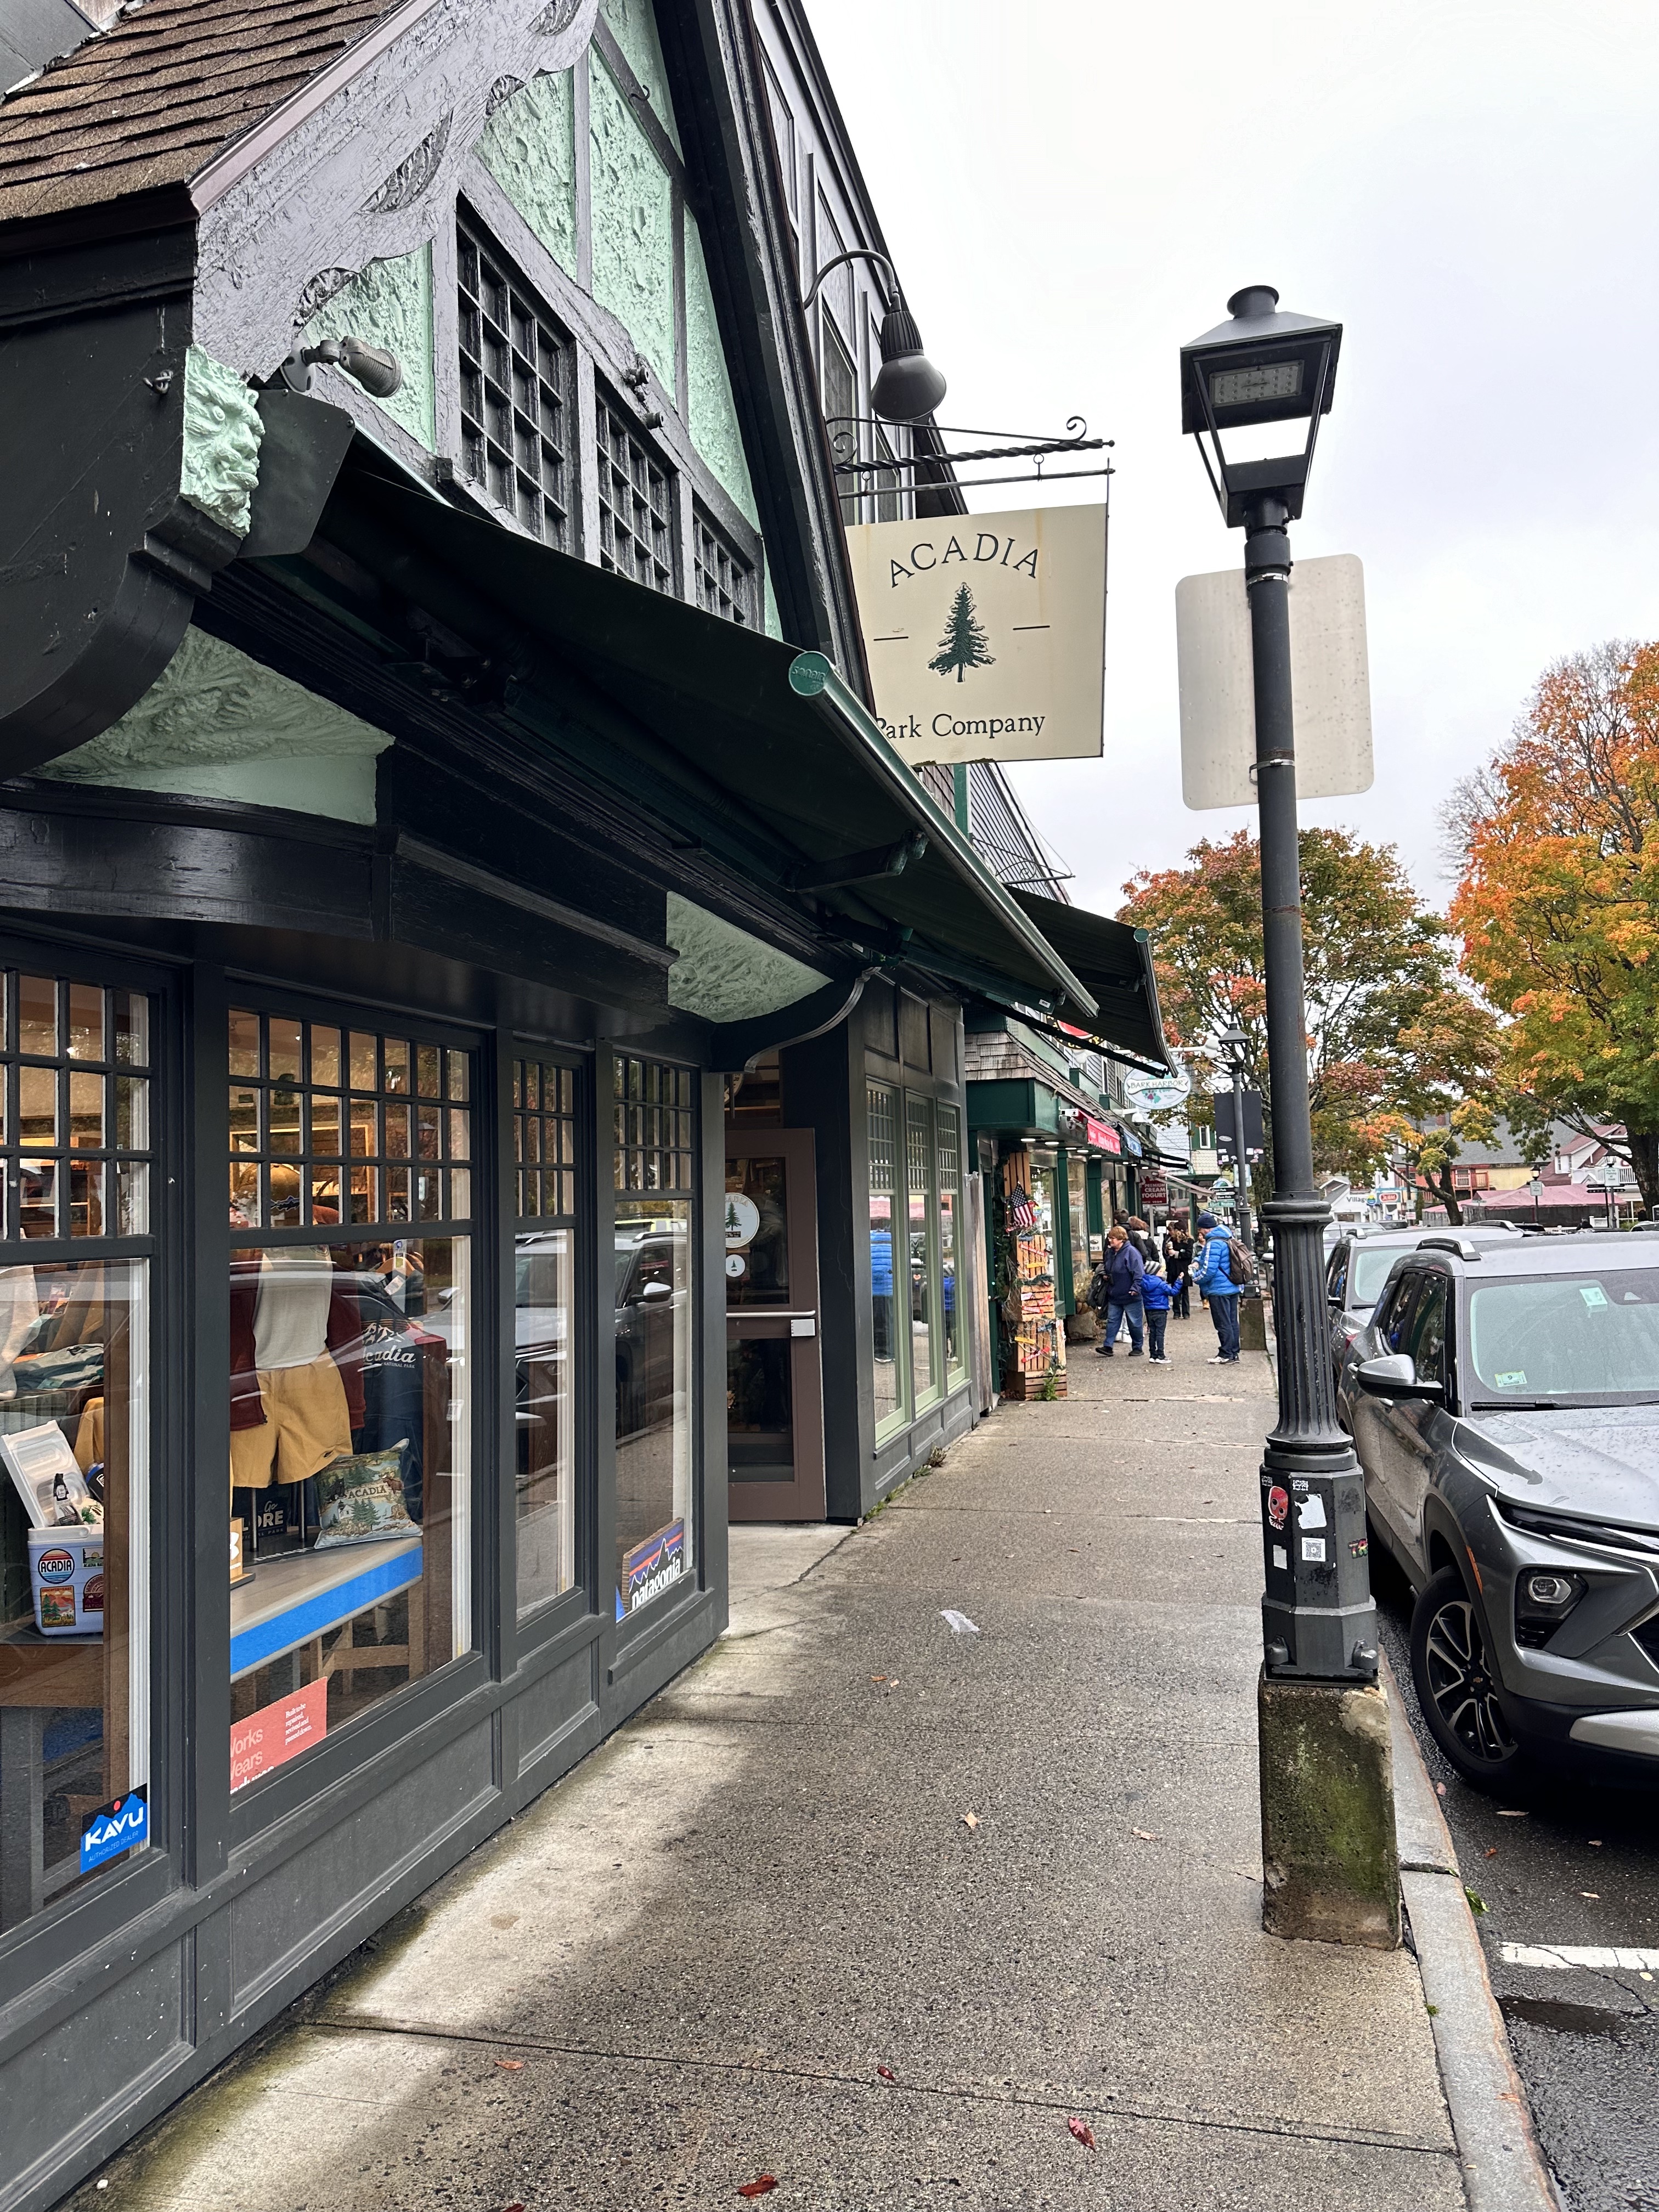
Explore Bar Harbor
As I’ve mentioned, Bar Harbor is an amazing Maine town! I’d take some time exploring the streets, shops, and restaurants. We spent several afternoons here shopping around for souvenirs and trying different restaurants. If you’re a camper like us, we were also able to do laundry in town which was helpful. Here are a few of my favorite spots in town I’d recommend:
Acadia Perk coffee ☕️
Cafe This Way (such great breakfast!)
Mount Desert Island ice cream 🫐 (be sure to try blueberry ice cream, a Maine must have)
Side Street Cafe 🥞
Cool As A Moose store (great place for shirt souvenirs)
Bark Harbor pet supply
In The Woods store 🌲
Christmas Vacation Shop (a great spot to find an ornament souvenir)
The Acadia Country Store
Frenchman Bay Lobster Rolls 🦞
Drive the Park Loop Road
As I’ve mentioned, this a beautiful scenic road! There’s a lot of trails and spots along the road so you’ll likely drive along this at some point. I’d recommend spending time at Otter cliffs, Thunder Hole, and Sand Beach which are all located off the scenic road.
Spend Time at Bass Harbor Head Lighthouse
This beautiful lighthouse is located in the Southwest harbor area of the park, about 20 minutes from the Bar Harbor area. This lighthouse is a must see while visiting the park. I’d recommend walking down to the rocks to get a great photo and view point of the lighthouse.
Visit the Jordan Pond Resturant
An iconic activity in the park is to have lunch at the Jordan Pond house restaurant and to try their famous popovers. This was on our bucket list while visiting, however, we didn’t have a reservation so the wait time was too long for us the day we tried. If you’re serious about trying a popover, I would recommend making a reservation or being prepared to wait for a while. The restaurant is beautiful and it’s surrounded by gorgeous Acadia views.
Acadia Tips
Be sure to make reservations for any necessary areas of the park. Right now, it seems like Cadillac mountain is the only requirement during busy season.
Book overnight accommodations as far in advance as possible to ensure you have a place to sleep. Acadia is a popular national park that draws a lot of attention so it’s helpful to book in advance when possible.
Entering the park, photo taken at the hulls cove visitor’s center signBass Harbor lighthouseExploring otter cliffsViews from south bubble rockThunder holeBeech ladder cliffs trailBeech cliff ladders trailTop of south bubble rockExploring downtown Bar HarborShops in downtown Bar HarborBeech cliff ladders trailViews along Jordan Pond pathBeehive trail iron rodsViews from the top of Beehive trailCadillac mountain viewsA foggy afternoon on the south bubble rock
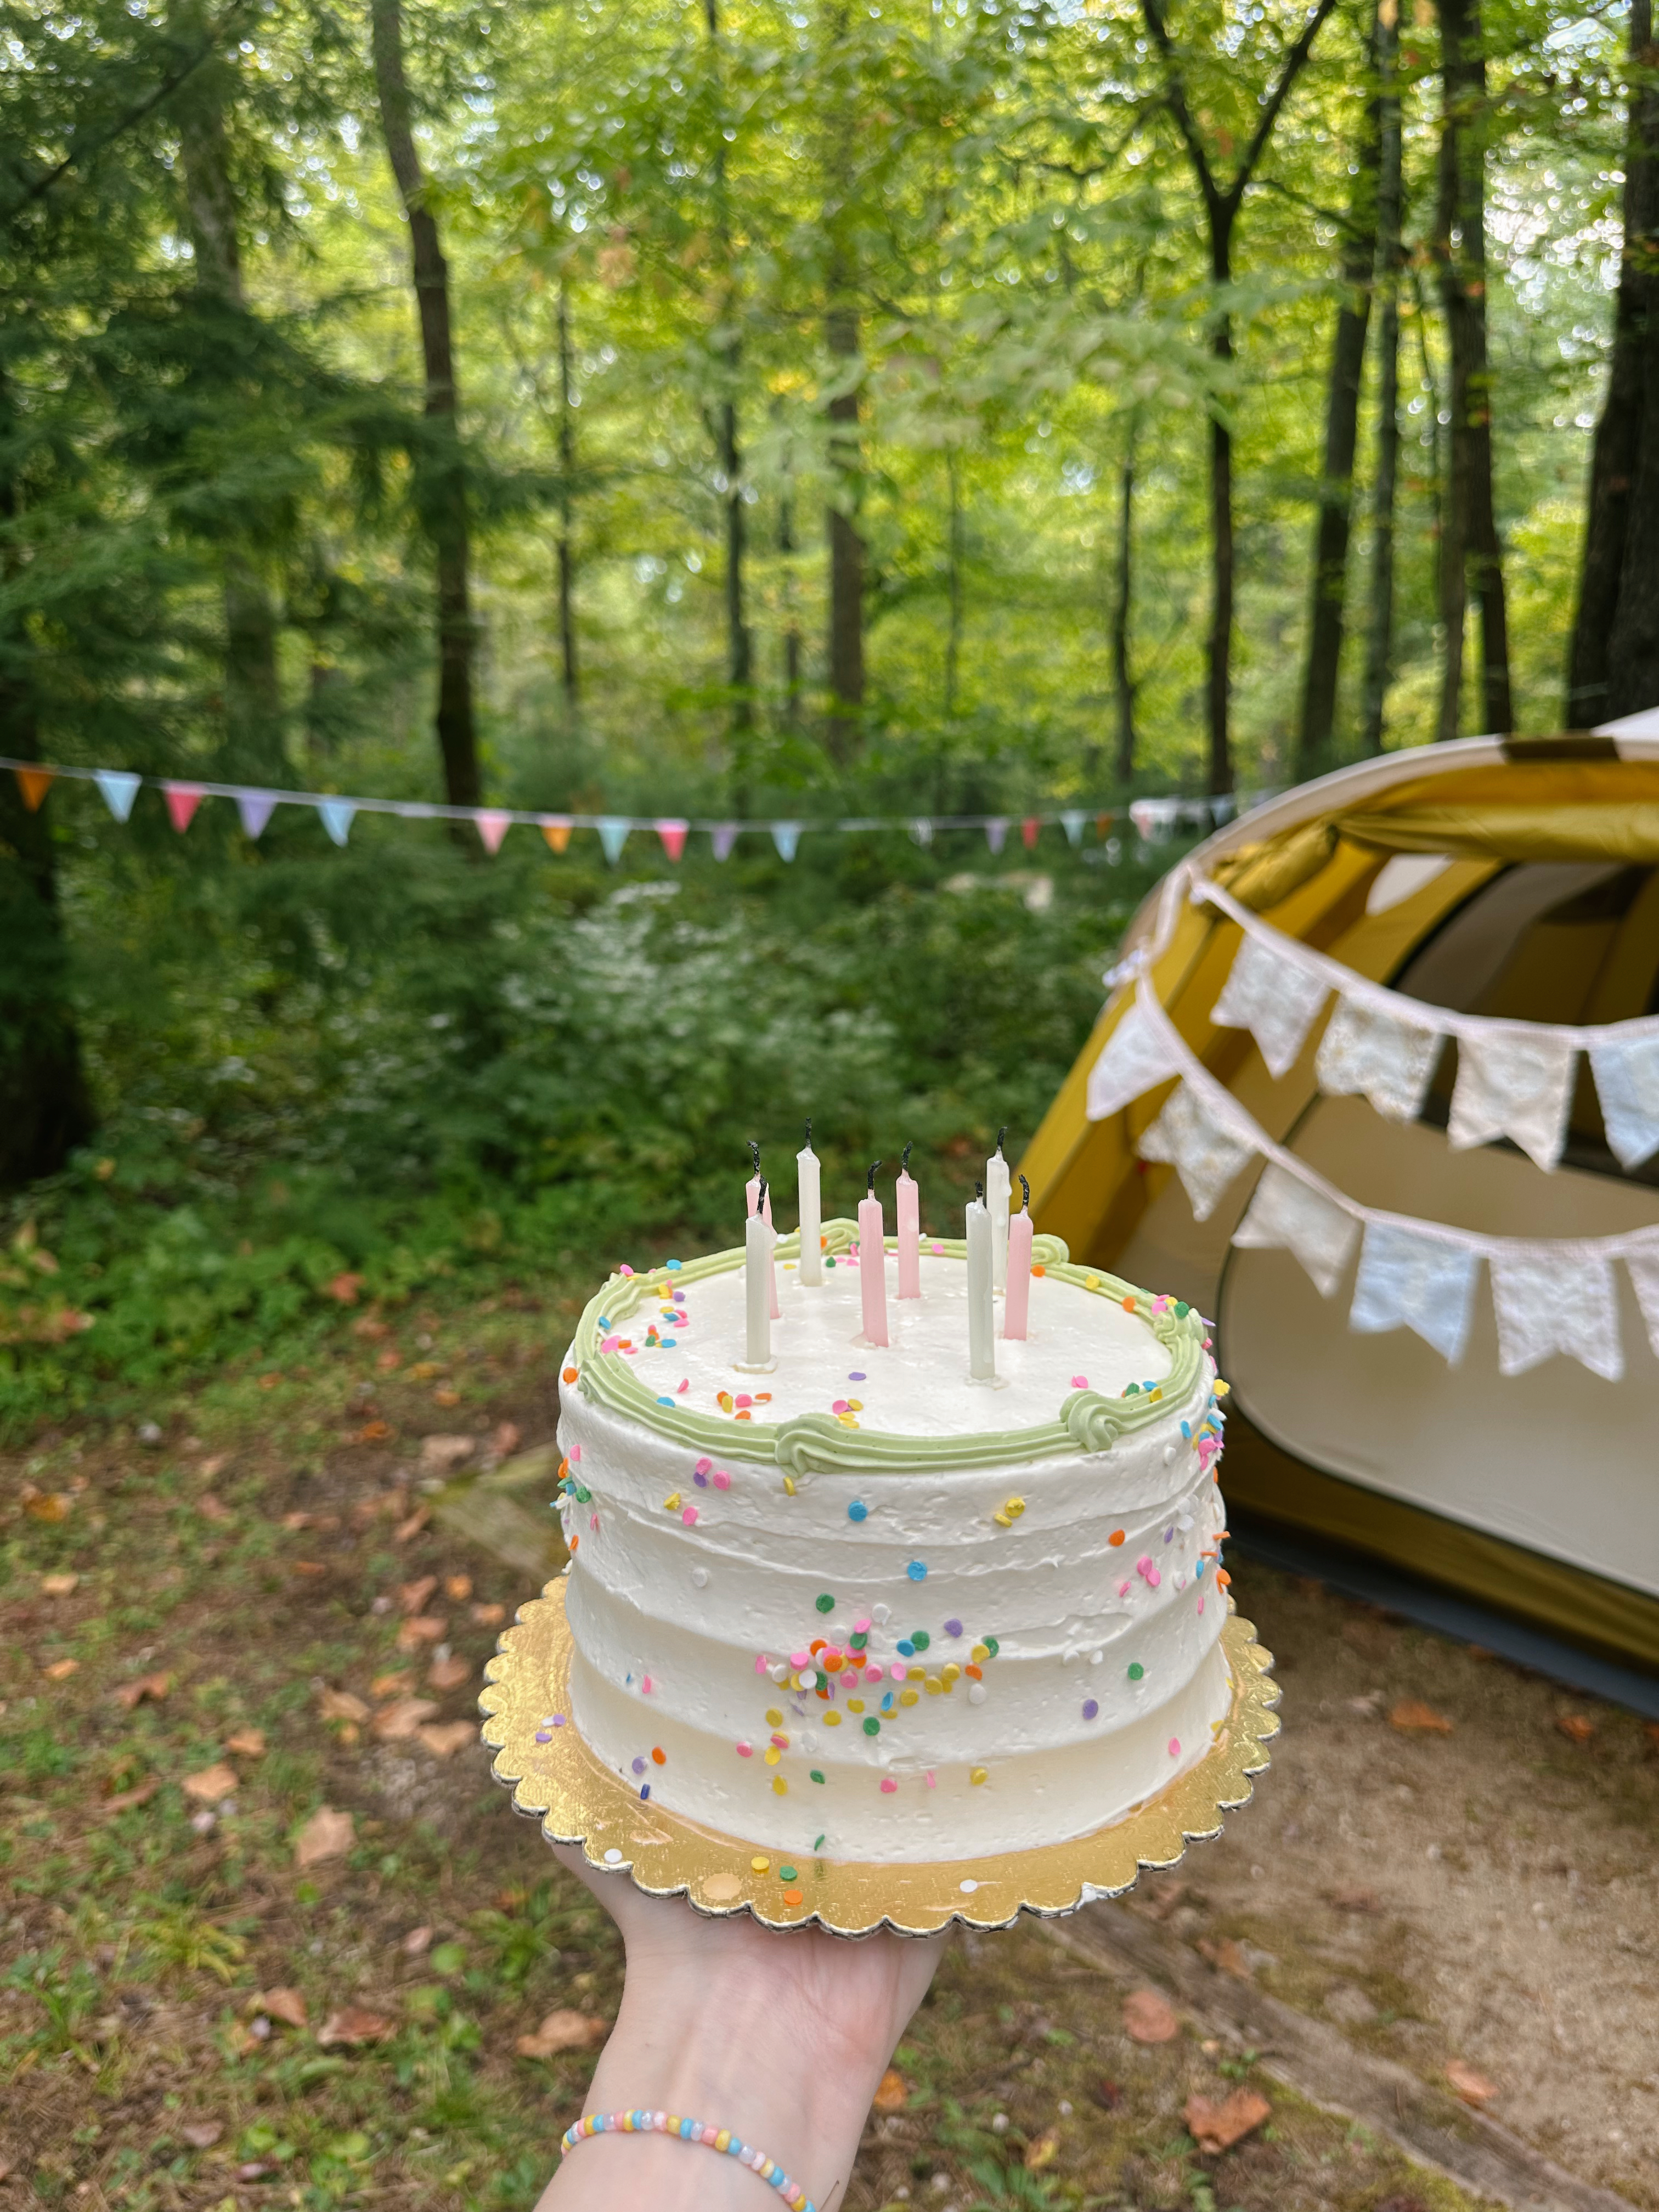
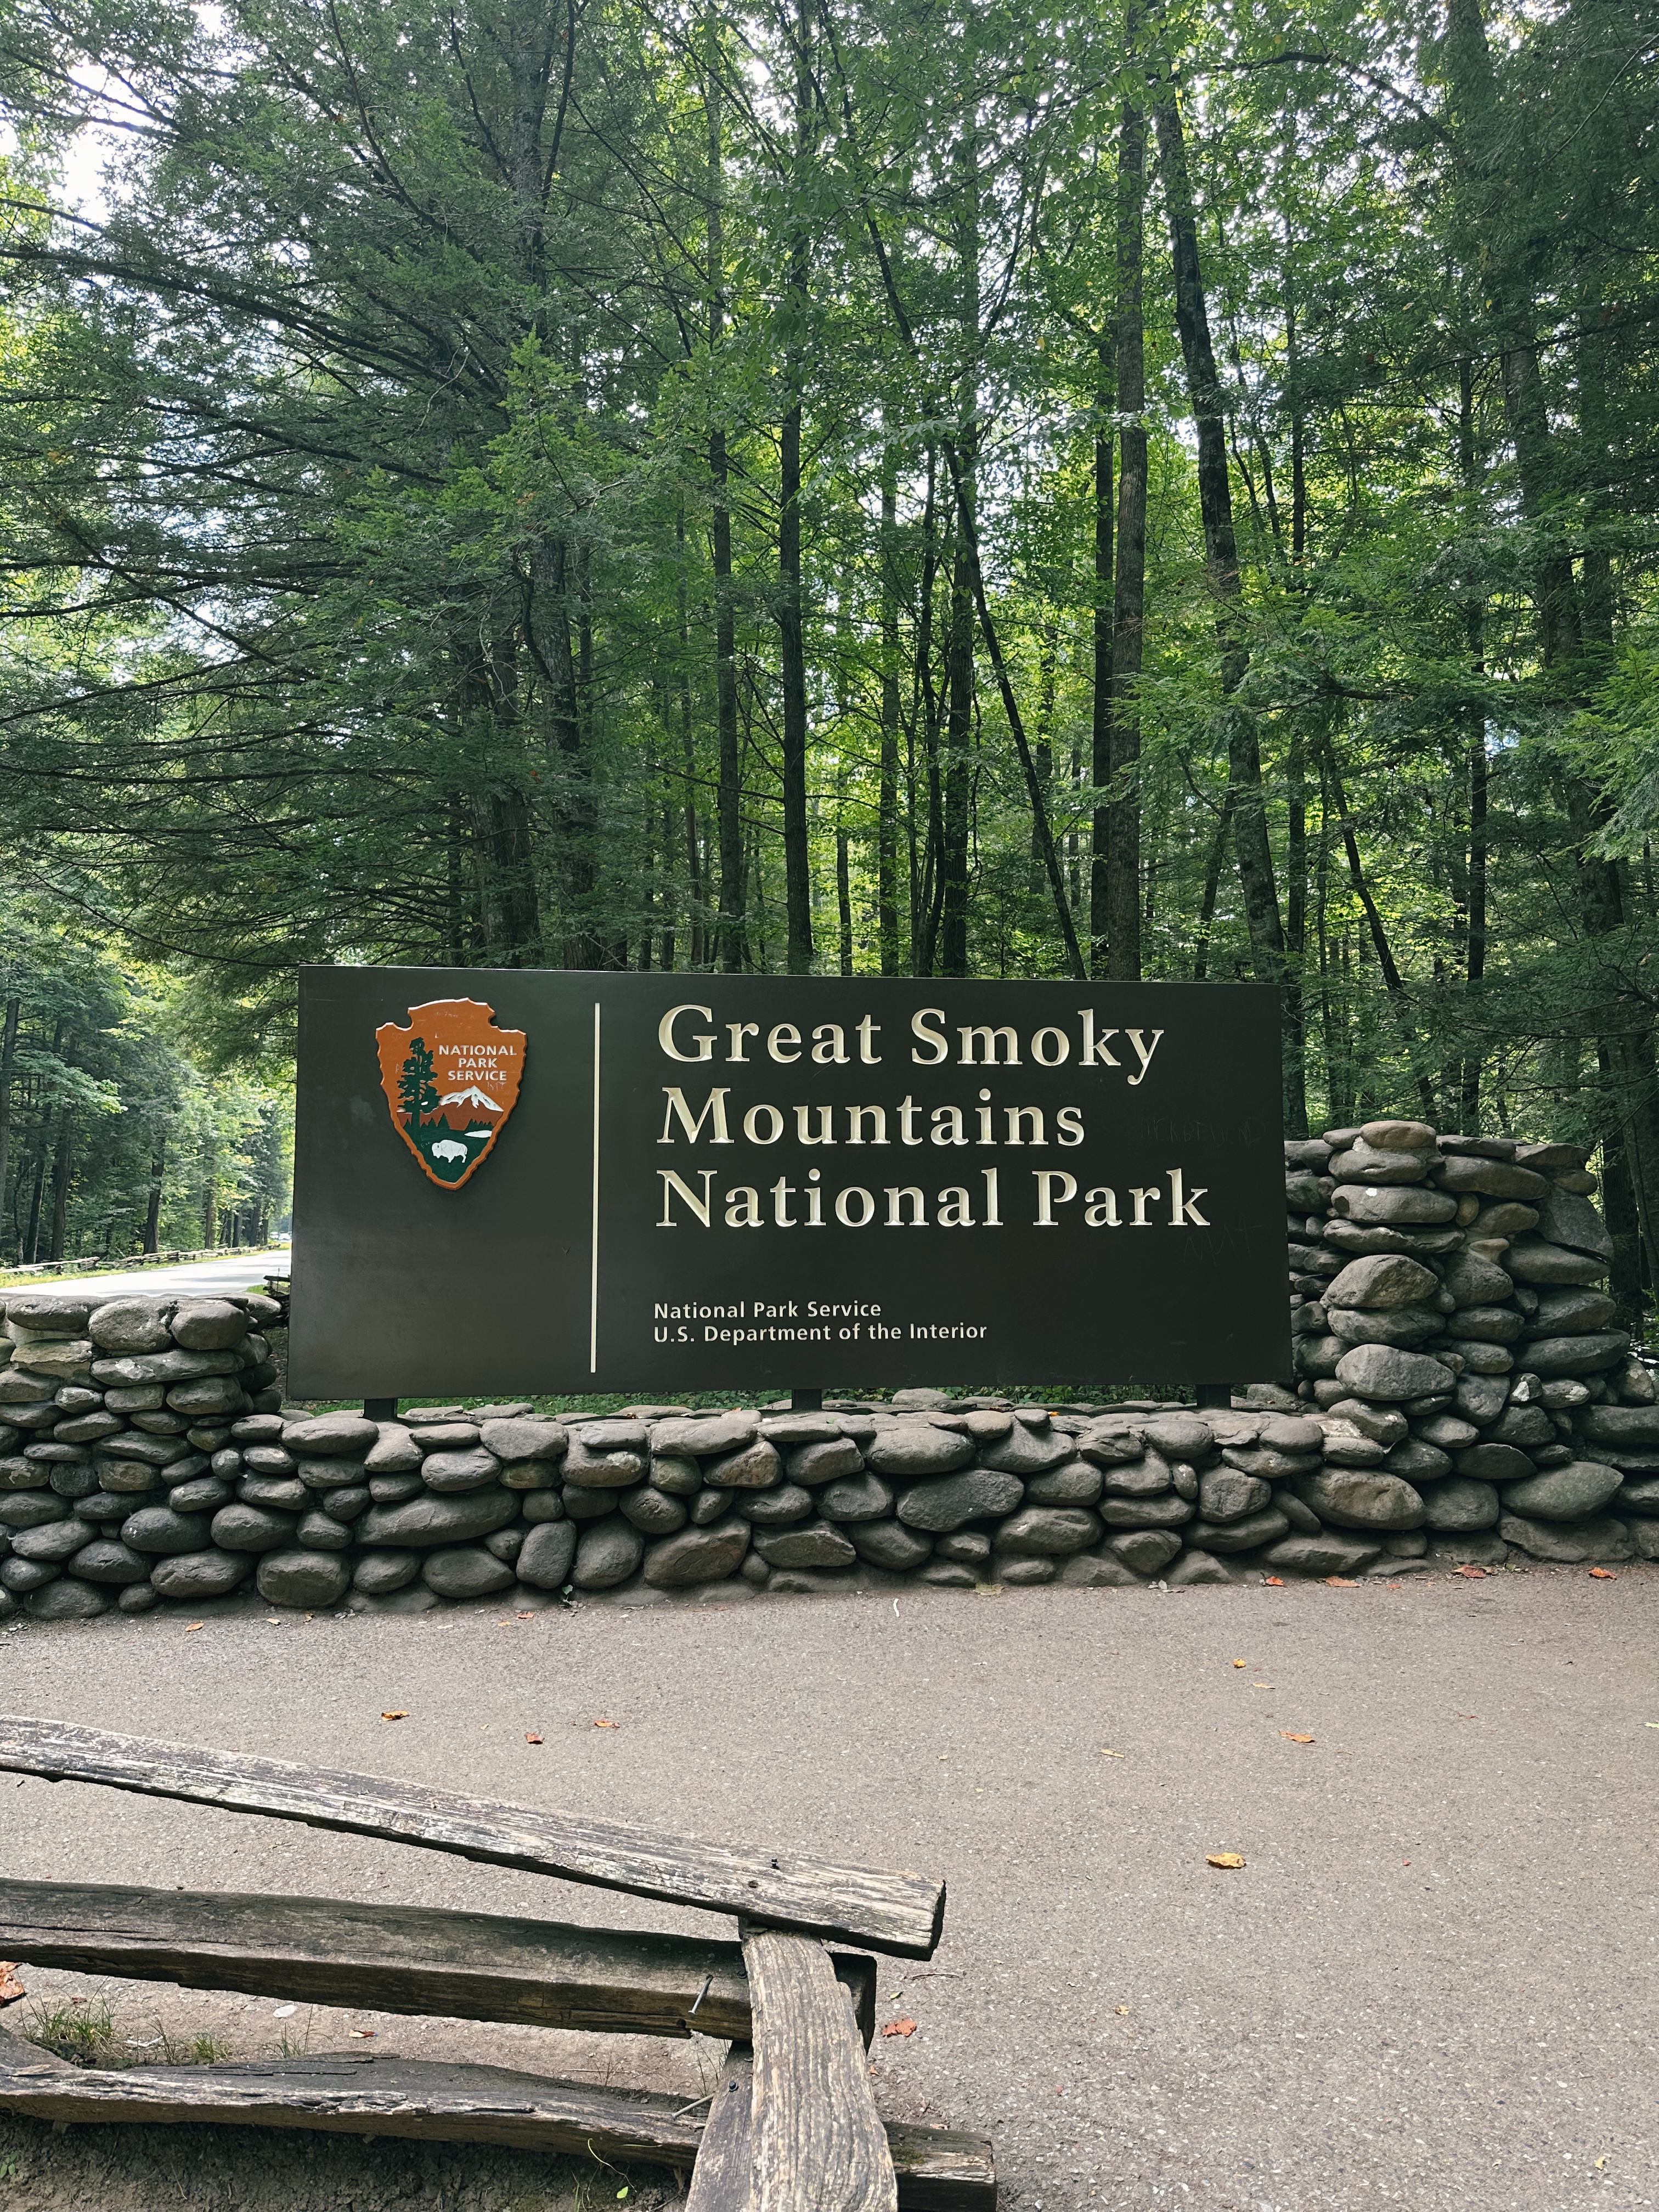
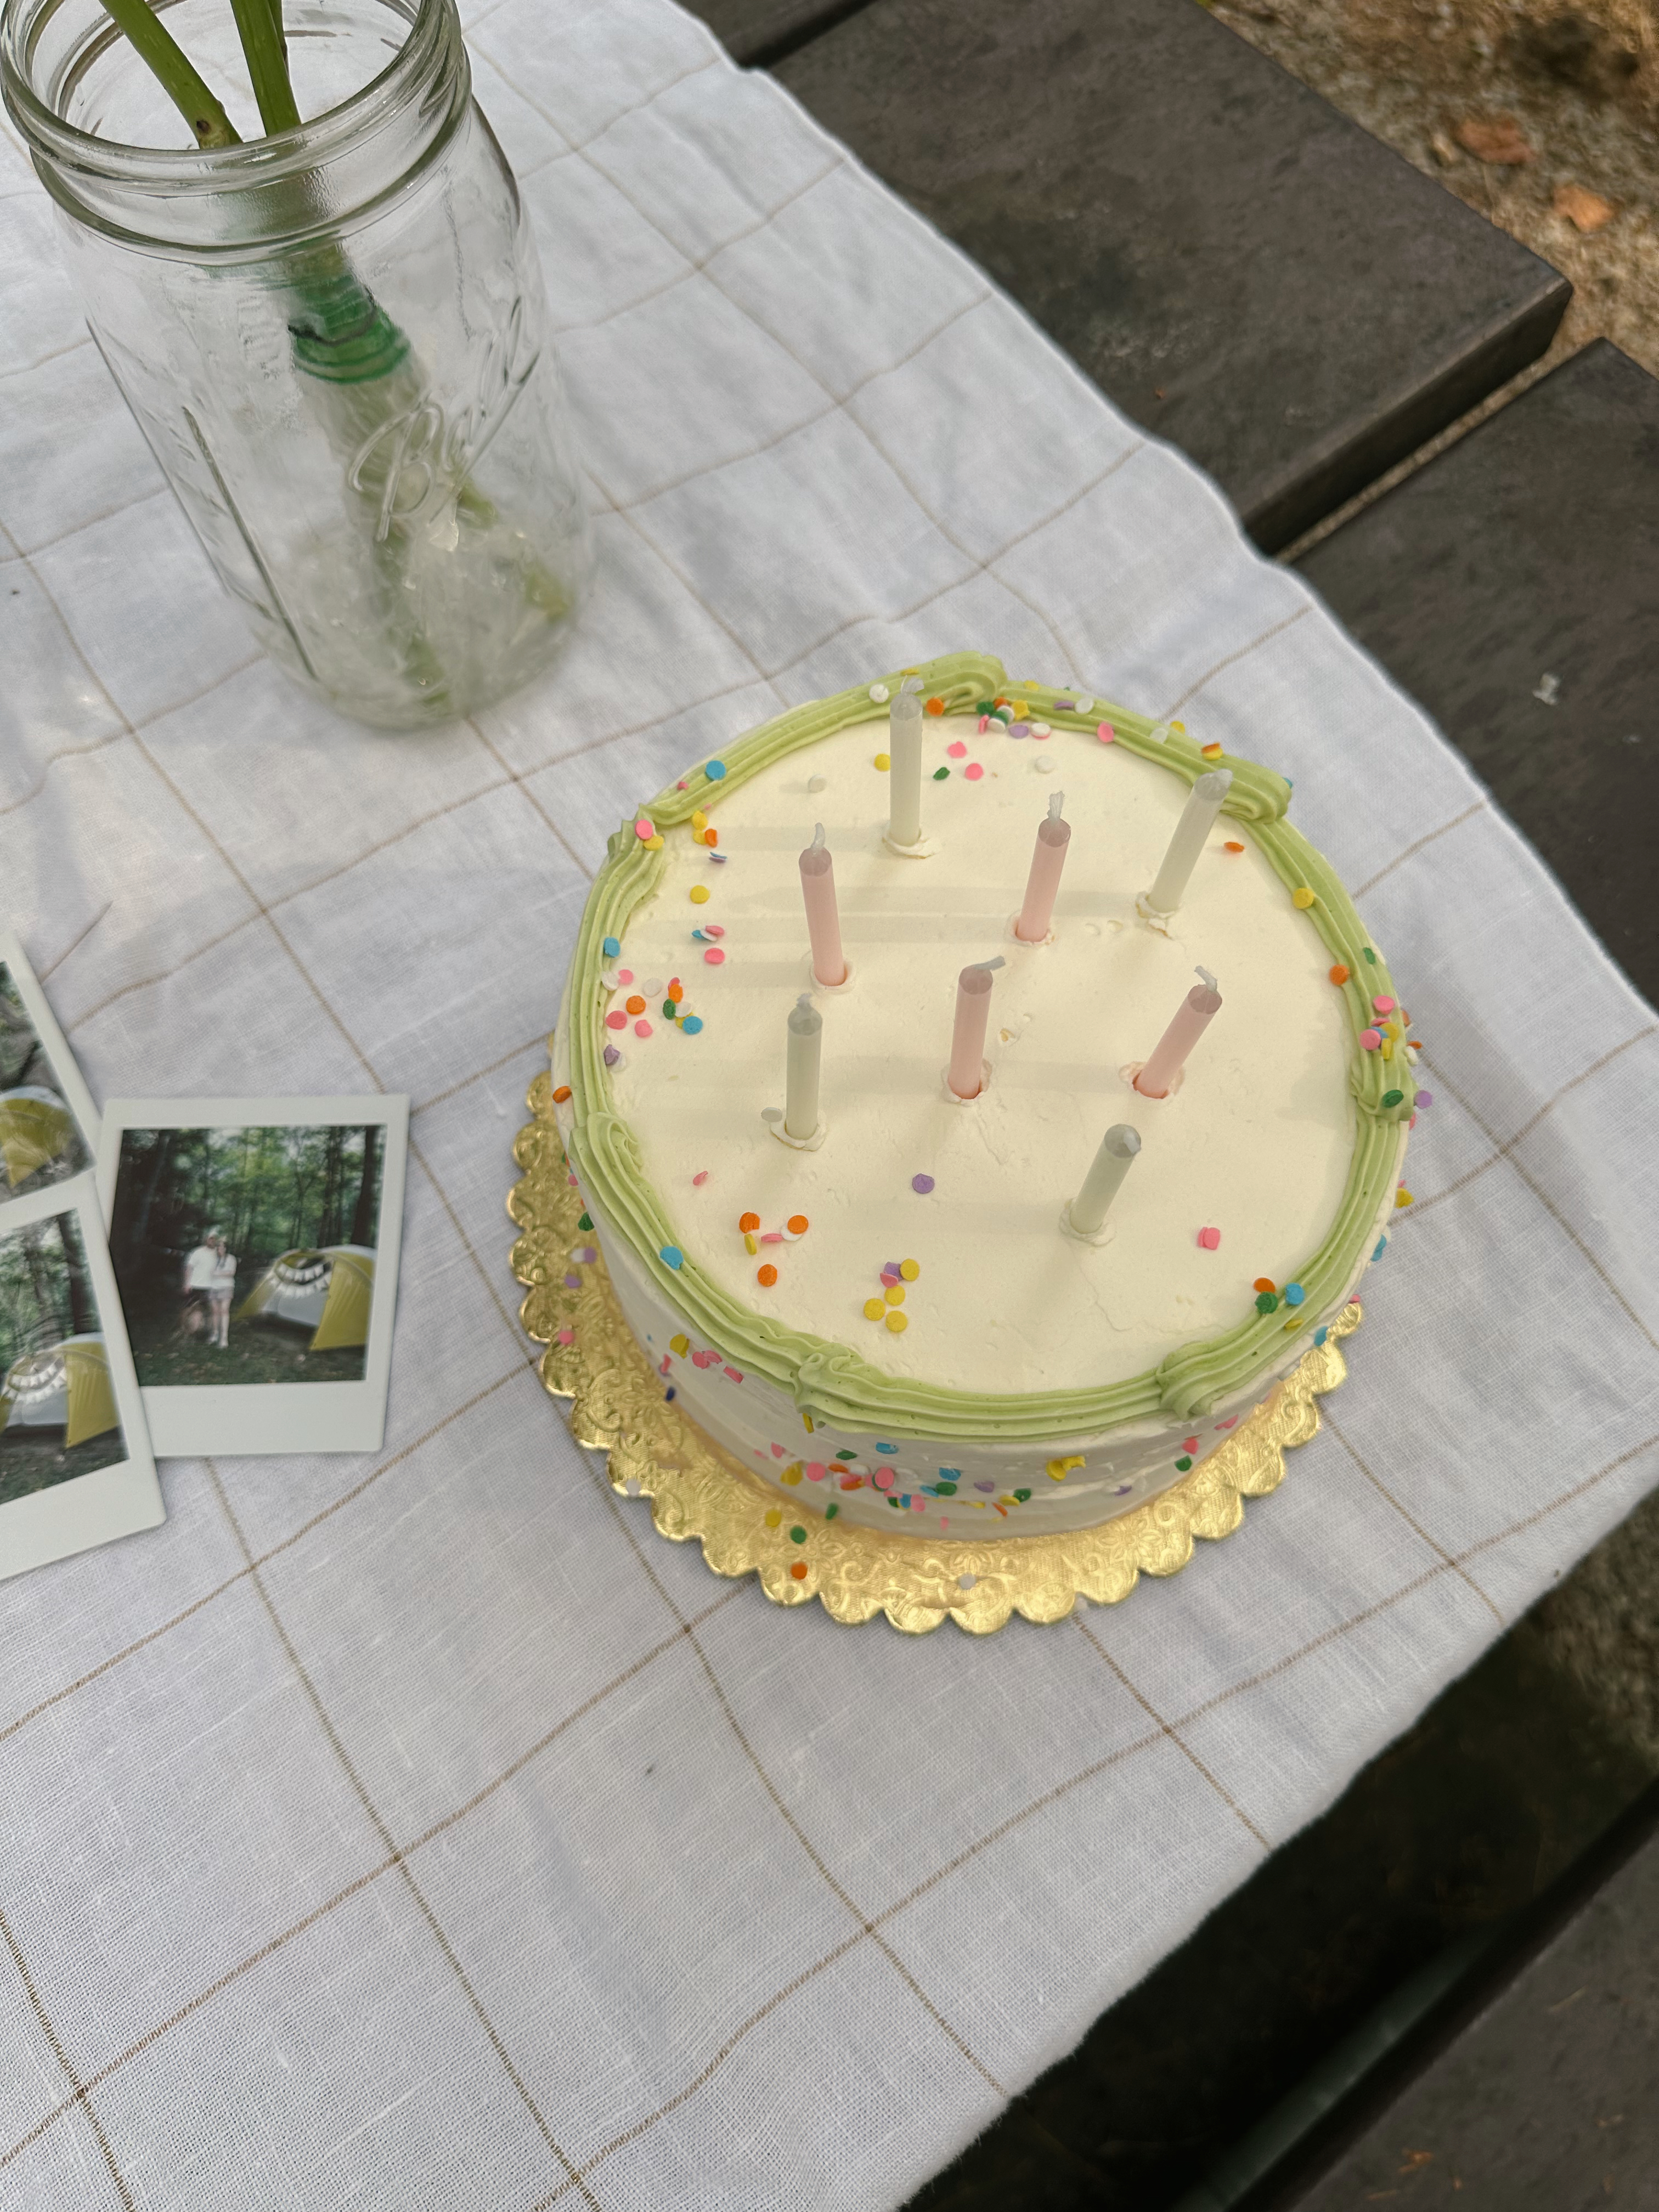
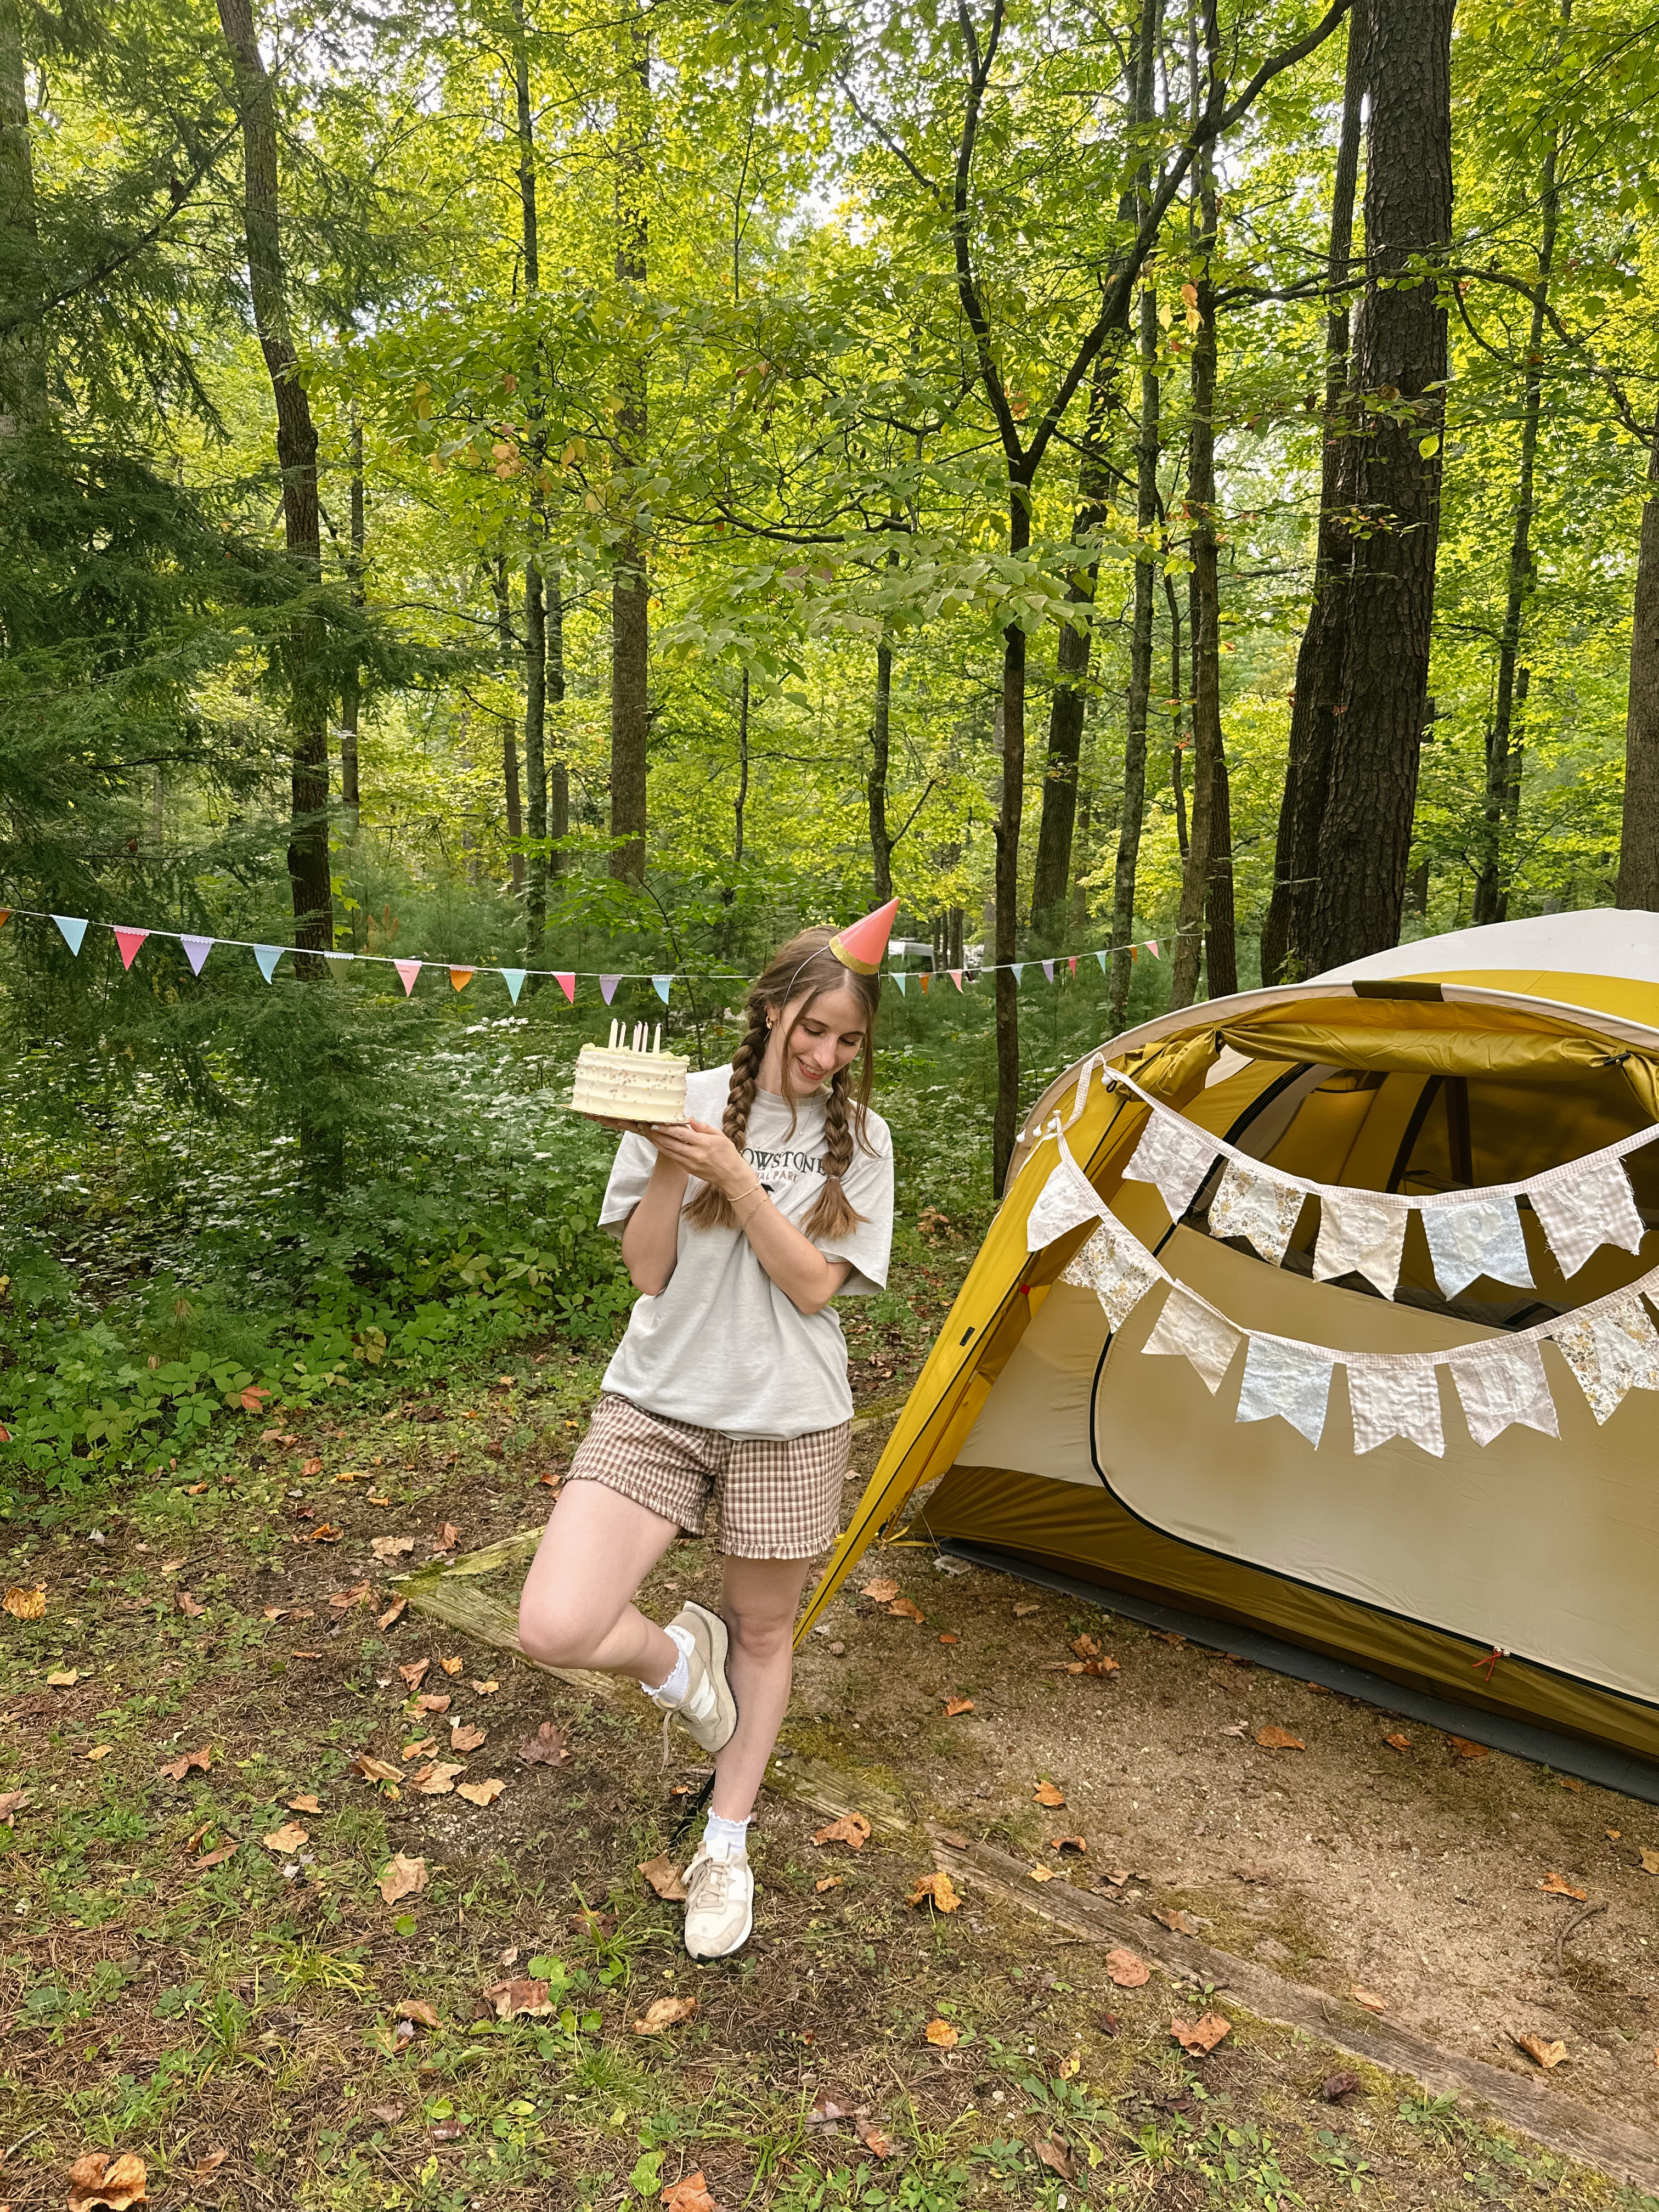
Patrick and I recently spent a long weekend in the Great Smoky Mountains national park. This was our second time visiting the park and it was just as magical as we remembered it being three years ago. This trip was special because it’s the first time we’ve gotten to revisit a national park we’ve already been to and we were celebrating my birthday. This trip, we were able to do and see a lot more compared to our first trip in the park. Here’s a weekend guide to the park based on some things we did:
Things to Know About the Smoky Mountains
It is FREE to enter the Great Smoky Mountains national park, which is such a plus for visitors!
As of last year, the park requires a parking pass if you plan to park your car anywhere inside the park for longer than 15 minutes. There are a few parking pass options you can select. For a one day pass it’s $5, for a weekly pass it’s $15. There are kiosks in several areas of the park where you can purchase a parking pass which takes card only. It’s also possible to purchase a pass online before visiting the park.
If you plan to stay inside the park overnight, there are a few campground options. There are 10 campgrounds located within the park:
Smokemount
Cades Cove (we stayed here one night this trip)
Elkmount
Cosby
Abrams Creek
Big Creek
Cataloochee
Deep Creek
Balsam Mountain
Look Rock
Keep in mind, the campgrounds are located in various areas of the park (the Smokies are huge!) so it’s important to pick a campground central to the area you’ll be exploring. The campgrounds don’t offer showers so also be prepared for this as well. We stayed at Cades Cove for one night this trip and enjoyed how central the location was to the cades cove scenic loop area.
If you’d rather sleep in a hotel, cabin, or another accommodation, it would be best to look in the towns surrounding the park; Gatlinburg, Pigeon Forge, Sevierville, and Townsend. We ended up finding a cabin just outside of Gatlinburg for the remainder of our stay and it was great!
Things to do in the Smoky Mountains
Cades Cove loop. This is the top activity I’d recommend doing while visiting the park. Cades Cove offers a scenic 11 mile one way that you can drive along. There are so many pull off spots you can use to soak in the stunning views. You will definitely see wildlife here while driving through, this past trip we saw black bears from a distance but three years ago, we saw a family of black bears pretty close to the road which was incredible! This area does get crowded since it’s so accessible, so be prepared for lots of crowds and people driving slow to soak in the views and capture photos. There’s also an option to bike the loop and you can rent bikes at the convenience store before starting the loop. The Cades Cove visitor’s center is located along the loop, there are bathrooms there and a store you can stop by as well.
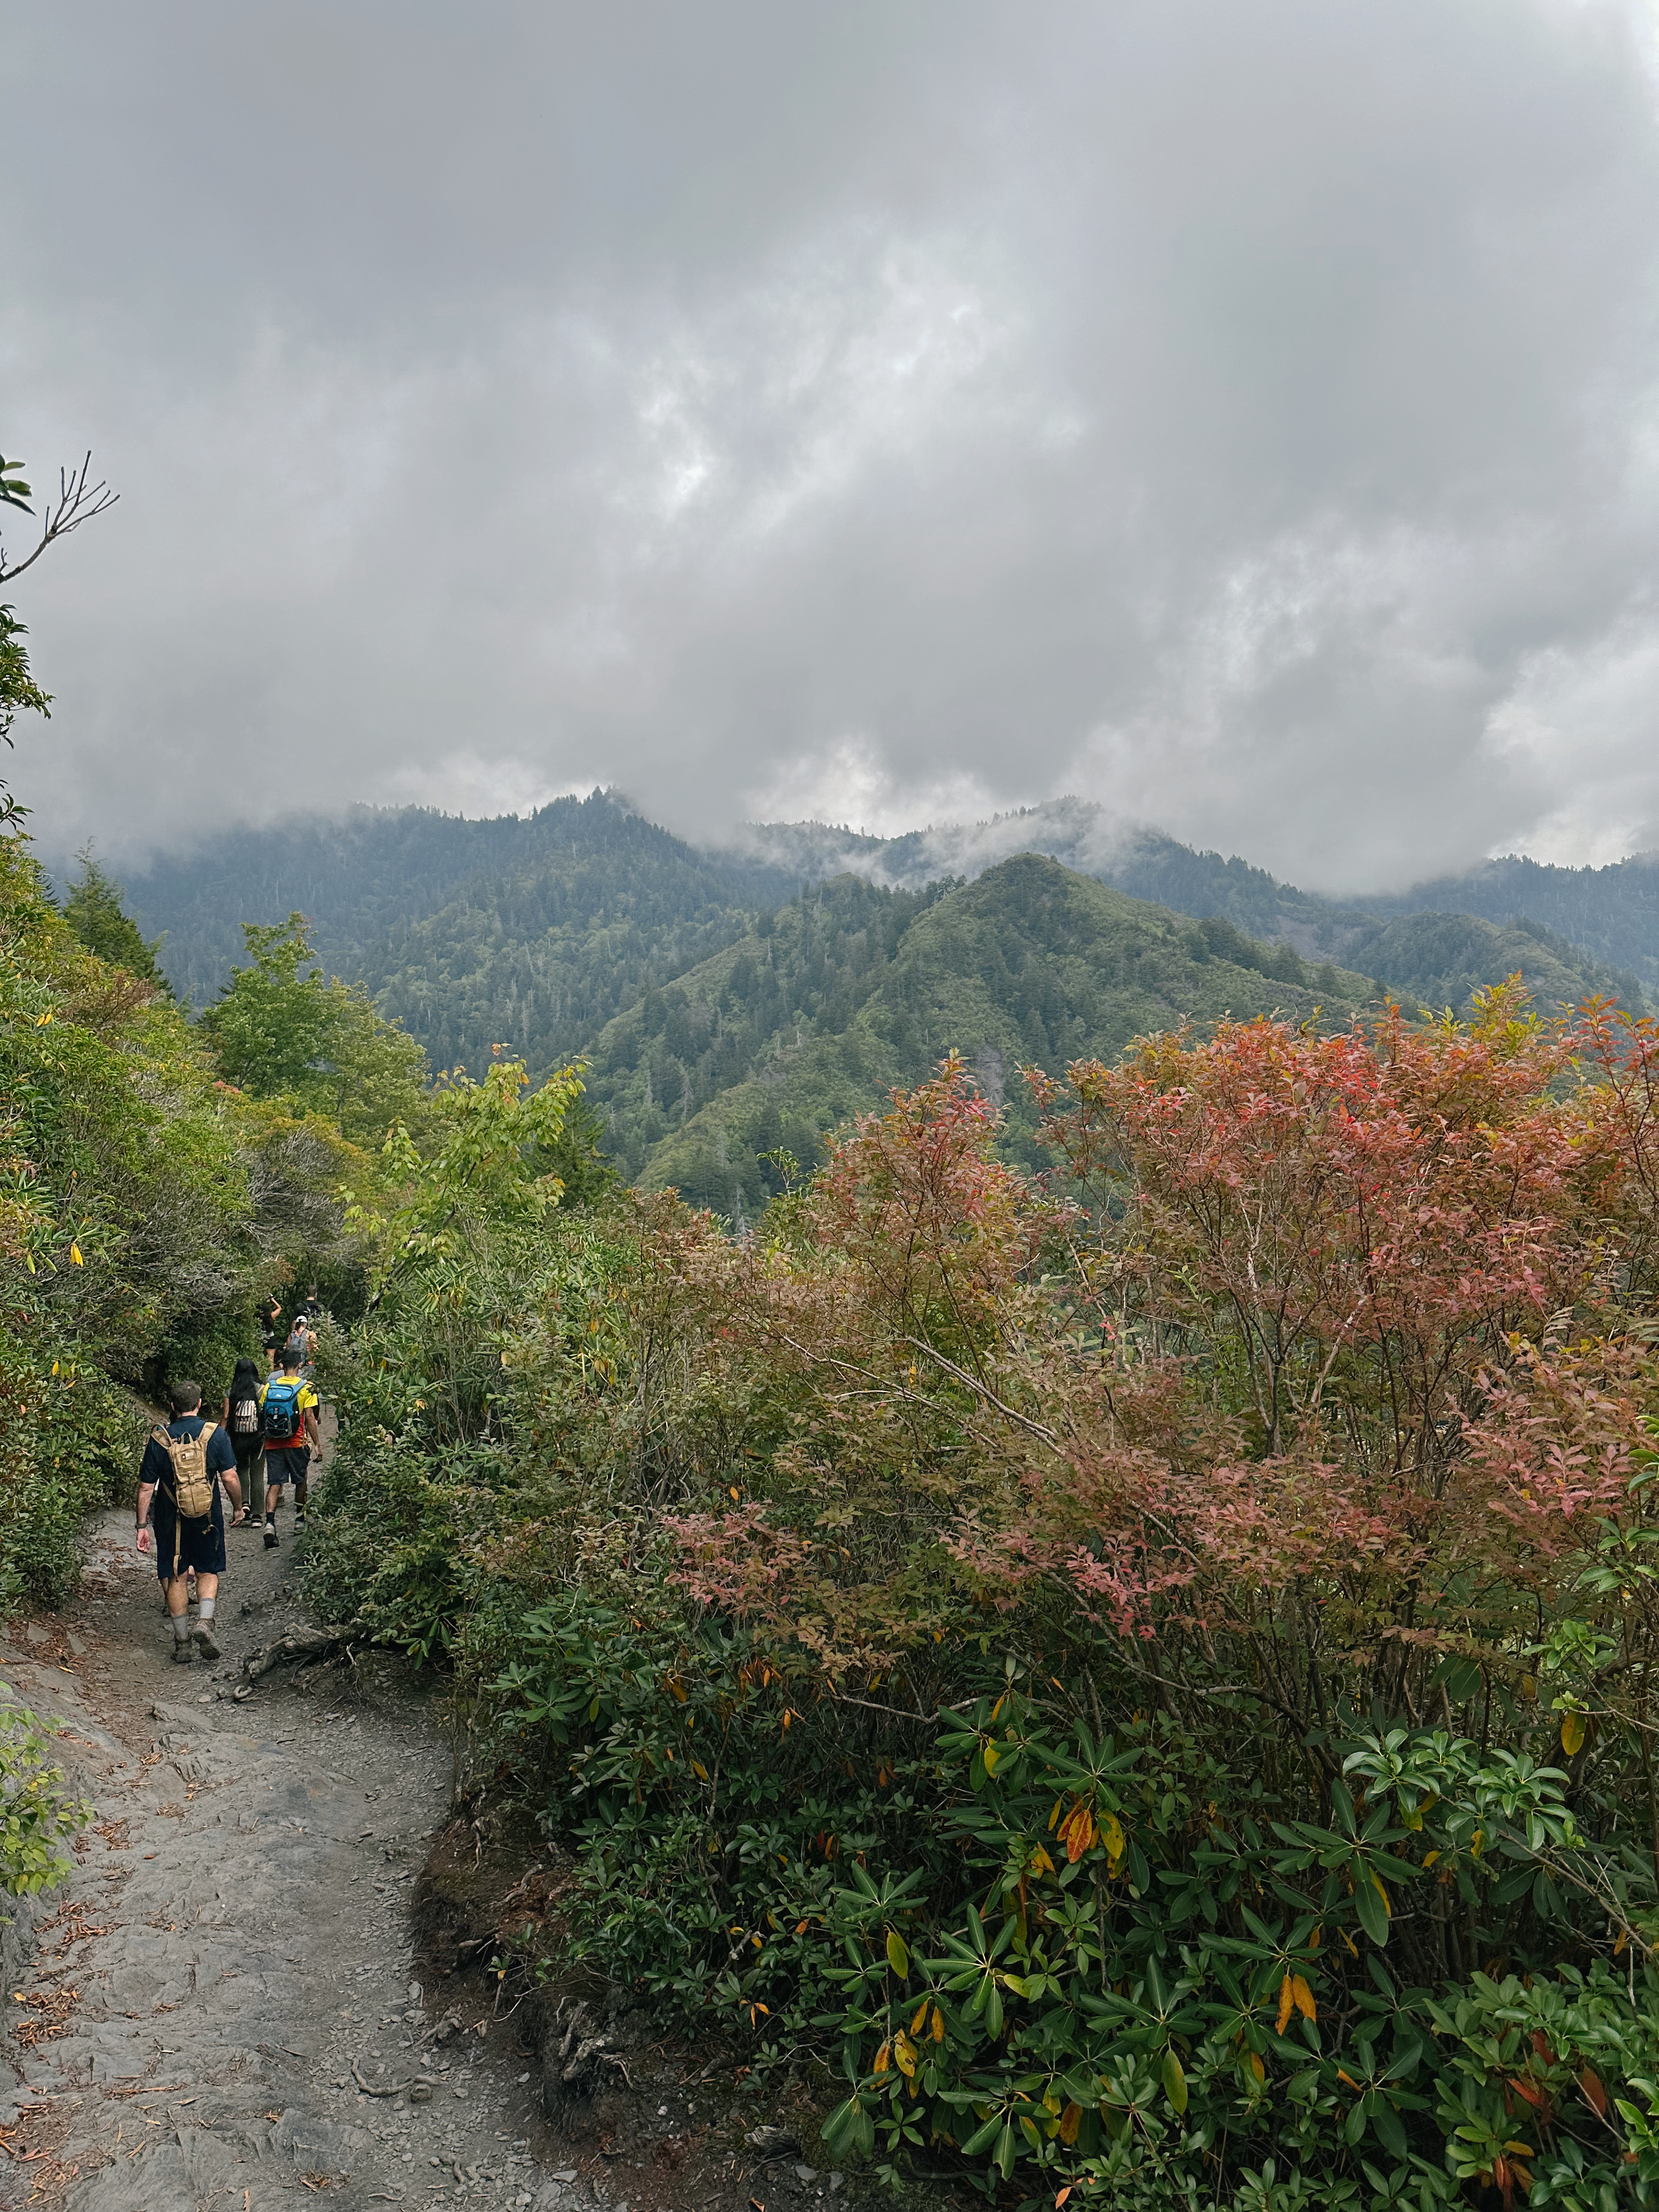
Newfound Gap Road. Another scenic road I’d recommend driving along is the Newfound Gap, it’s extremely scenic and also offers plenty of pull off spots. This road also takes you to popular hikes like the chimney tops trail and the alum cave trail.
Drive parts of the Blue Ridge highway. We had this on our list for the weekend, but weren’t able to fit it. The south end of the Blue Ridge highway is located close to the North Carolina part of the Smoky Mountains. It’s a long highway but worth driving along parts to soak in more mountain views!
Visit popular towns nearby. As I mentioned, the park is located around so many towns that offer lodging, restaurants, and souvenir shops. We spent some time exploring Gatlinburg and Pigeon Forge. I’d recommended exploring or checking out a restaurant in town. These towns are definitely overcrowded, especially in the summer time but still worth driving through.
Hike! Of course when visiting any national park, there will likely be some great hikes to try. This trip we planned for two popular hikes and I’m so glad we had the opportunity to hike these trails. Keep in mind, during the summer months, the parking lots for the trails fill up extremely quickly! We weren’t able to get to either hiking trail early in the day so we had to circle around a few times to find a parking spot. Some hikes I’d recommended adding to your list:
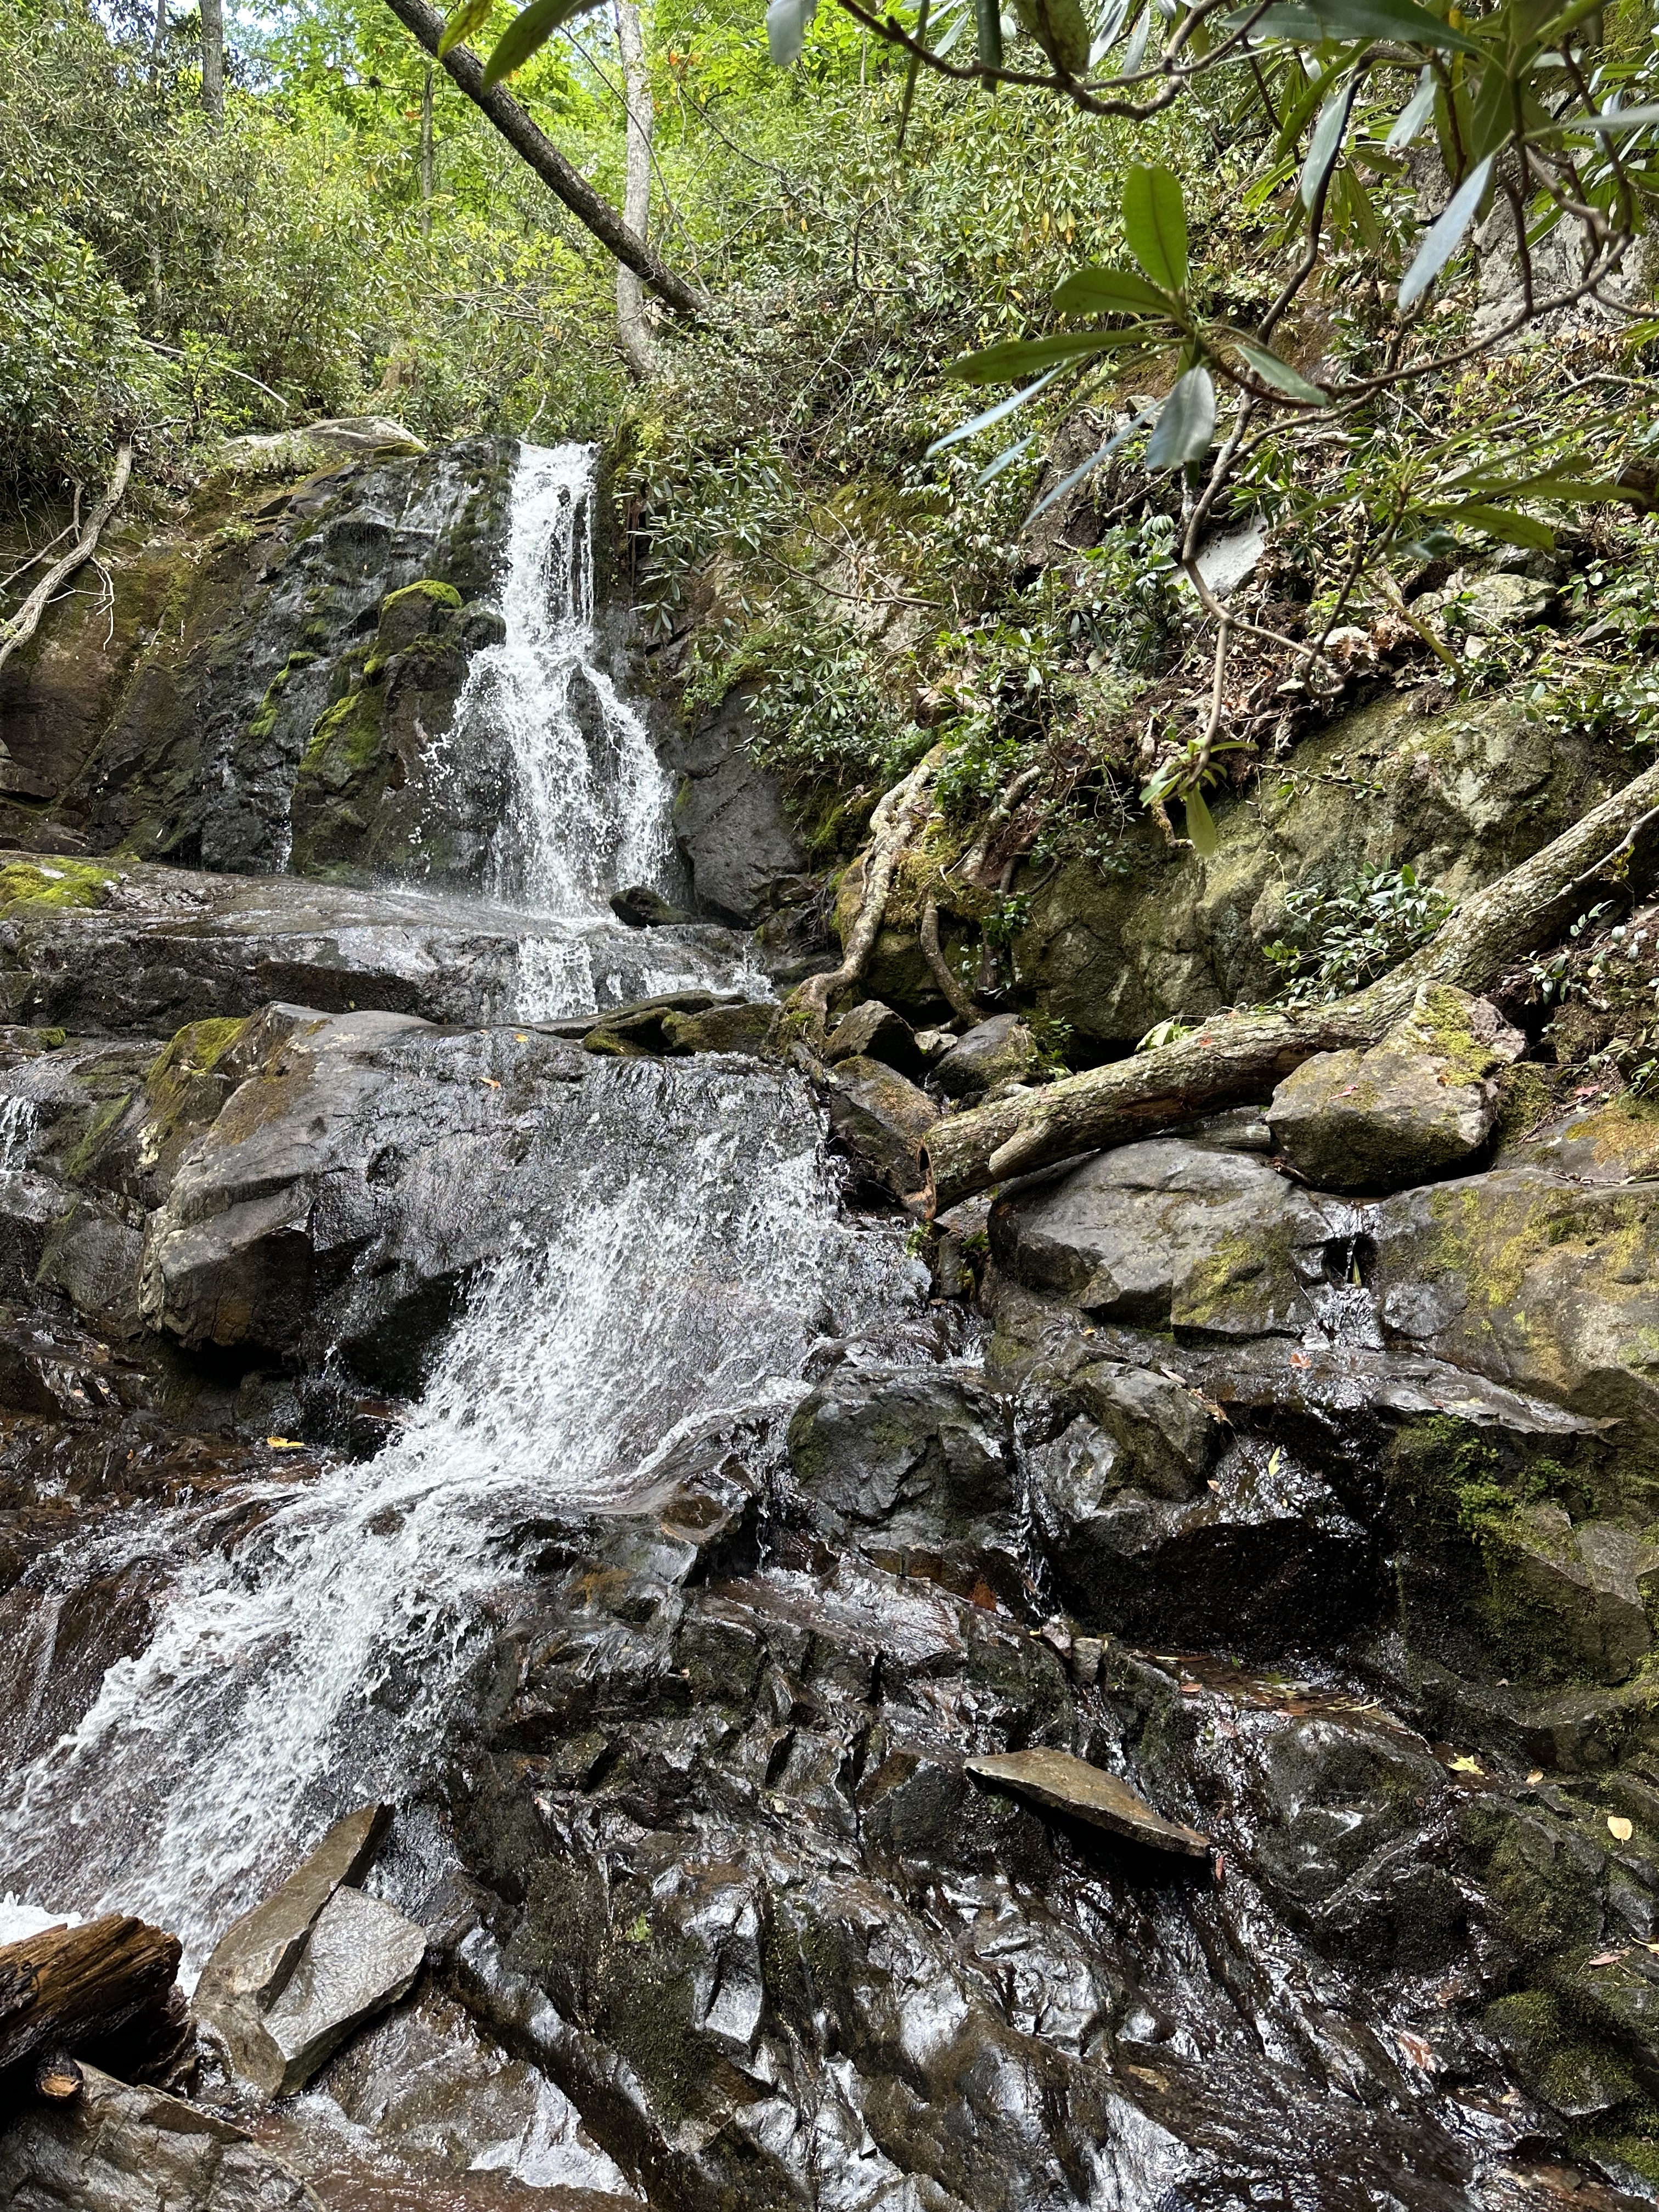
Laurel Falls. This is one of the most popular trails in the park and likely because it’s fairly easy to complete. Hiking to the falls is about 2.5 miles round trip. Once you get to the falls, there’s an upper and a lower area to explore. Accessing the lower falls is a bit risky so we decided to stay near the upper falls.
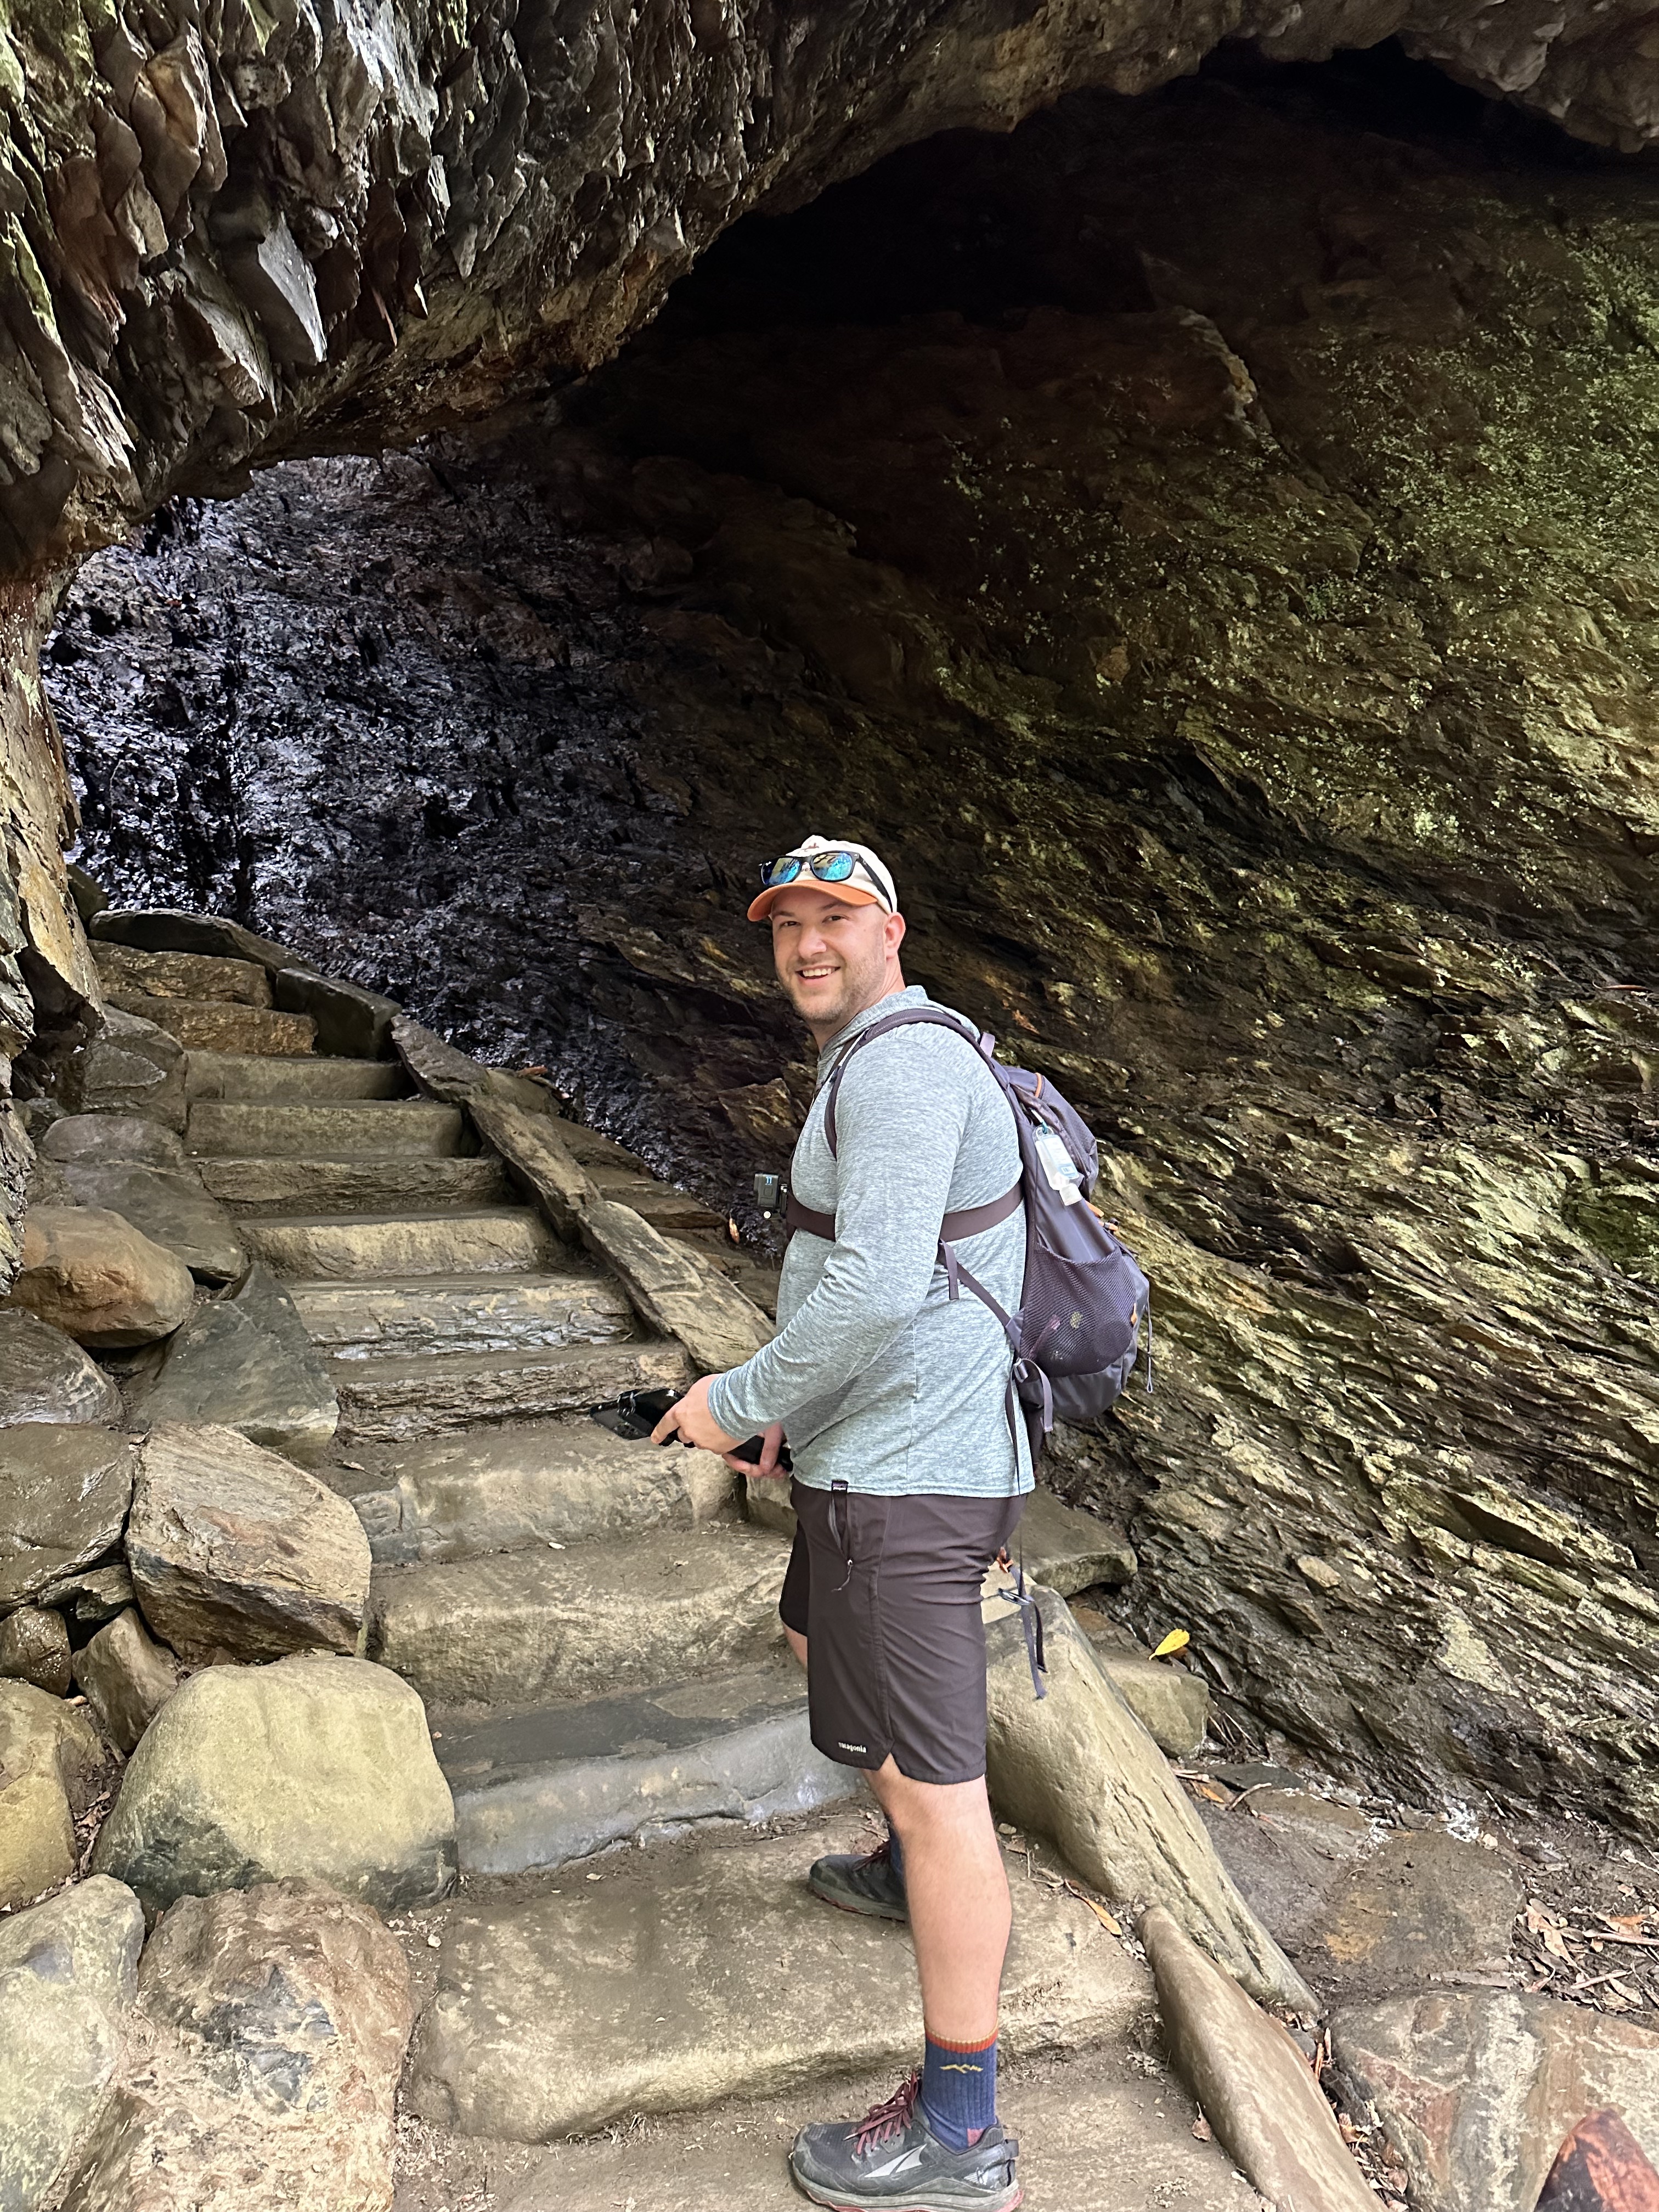
Alum Cave. This was our favorite hike we completed this trip! There are a few options to complete this hike. You can hike to the Arch Rock only which is about 1.4 miles one way, or you can continue and hike to the Alum Cave Bluffs which is about 2.3 miles one way. We decided to hike all the way to the bluffs and in total the hike was close to 5 miles round trip. Hiking to the bluffs was a bit challenging, and most of the hike was uphill but the views at the top made it all worth it! Another option is to continue hiking from the Bluffs all the way to Mt. LeConte, which would make the hike a total of 10 miles round trip. I’ve heard continuing on to the LeConte is stunning but very challenging.
Rainbow Falls. We completed this hike on our last visit to the park and it was stunning! I’d recommend also trying this hike if you only have time for one trail.
Abrams Falls. We wanted to hike this trail last time we visited but it was closed due to construction. It’s located within Cades Cove and also seems like an incredible hike that we want to try on our next trip!
Go Fishing. If you like to fly fish, the park has some great rivers that are easily accessible. One thing to keep in mind is you do need a Tennessee or North Carolina fishing license if you plan to fish inside the national park. Fishing licenses can be purchased online, they are not sold at any store in the park.
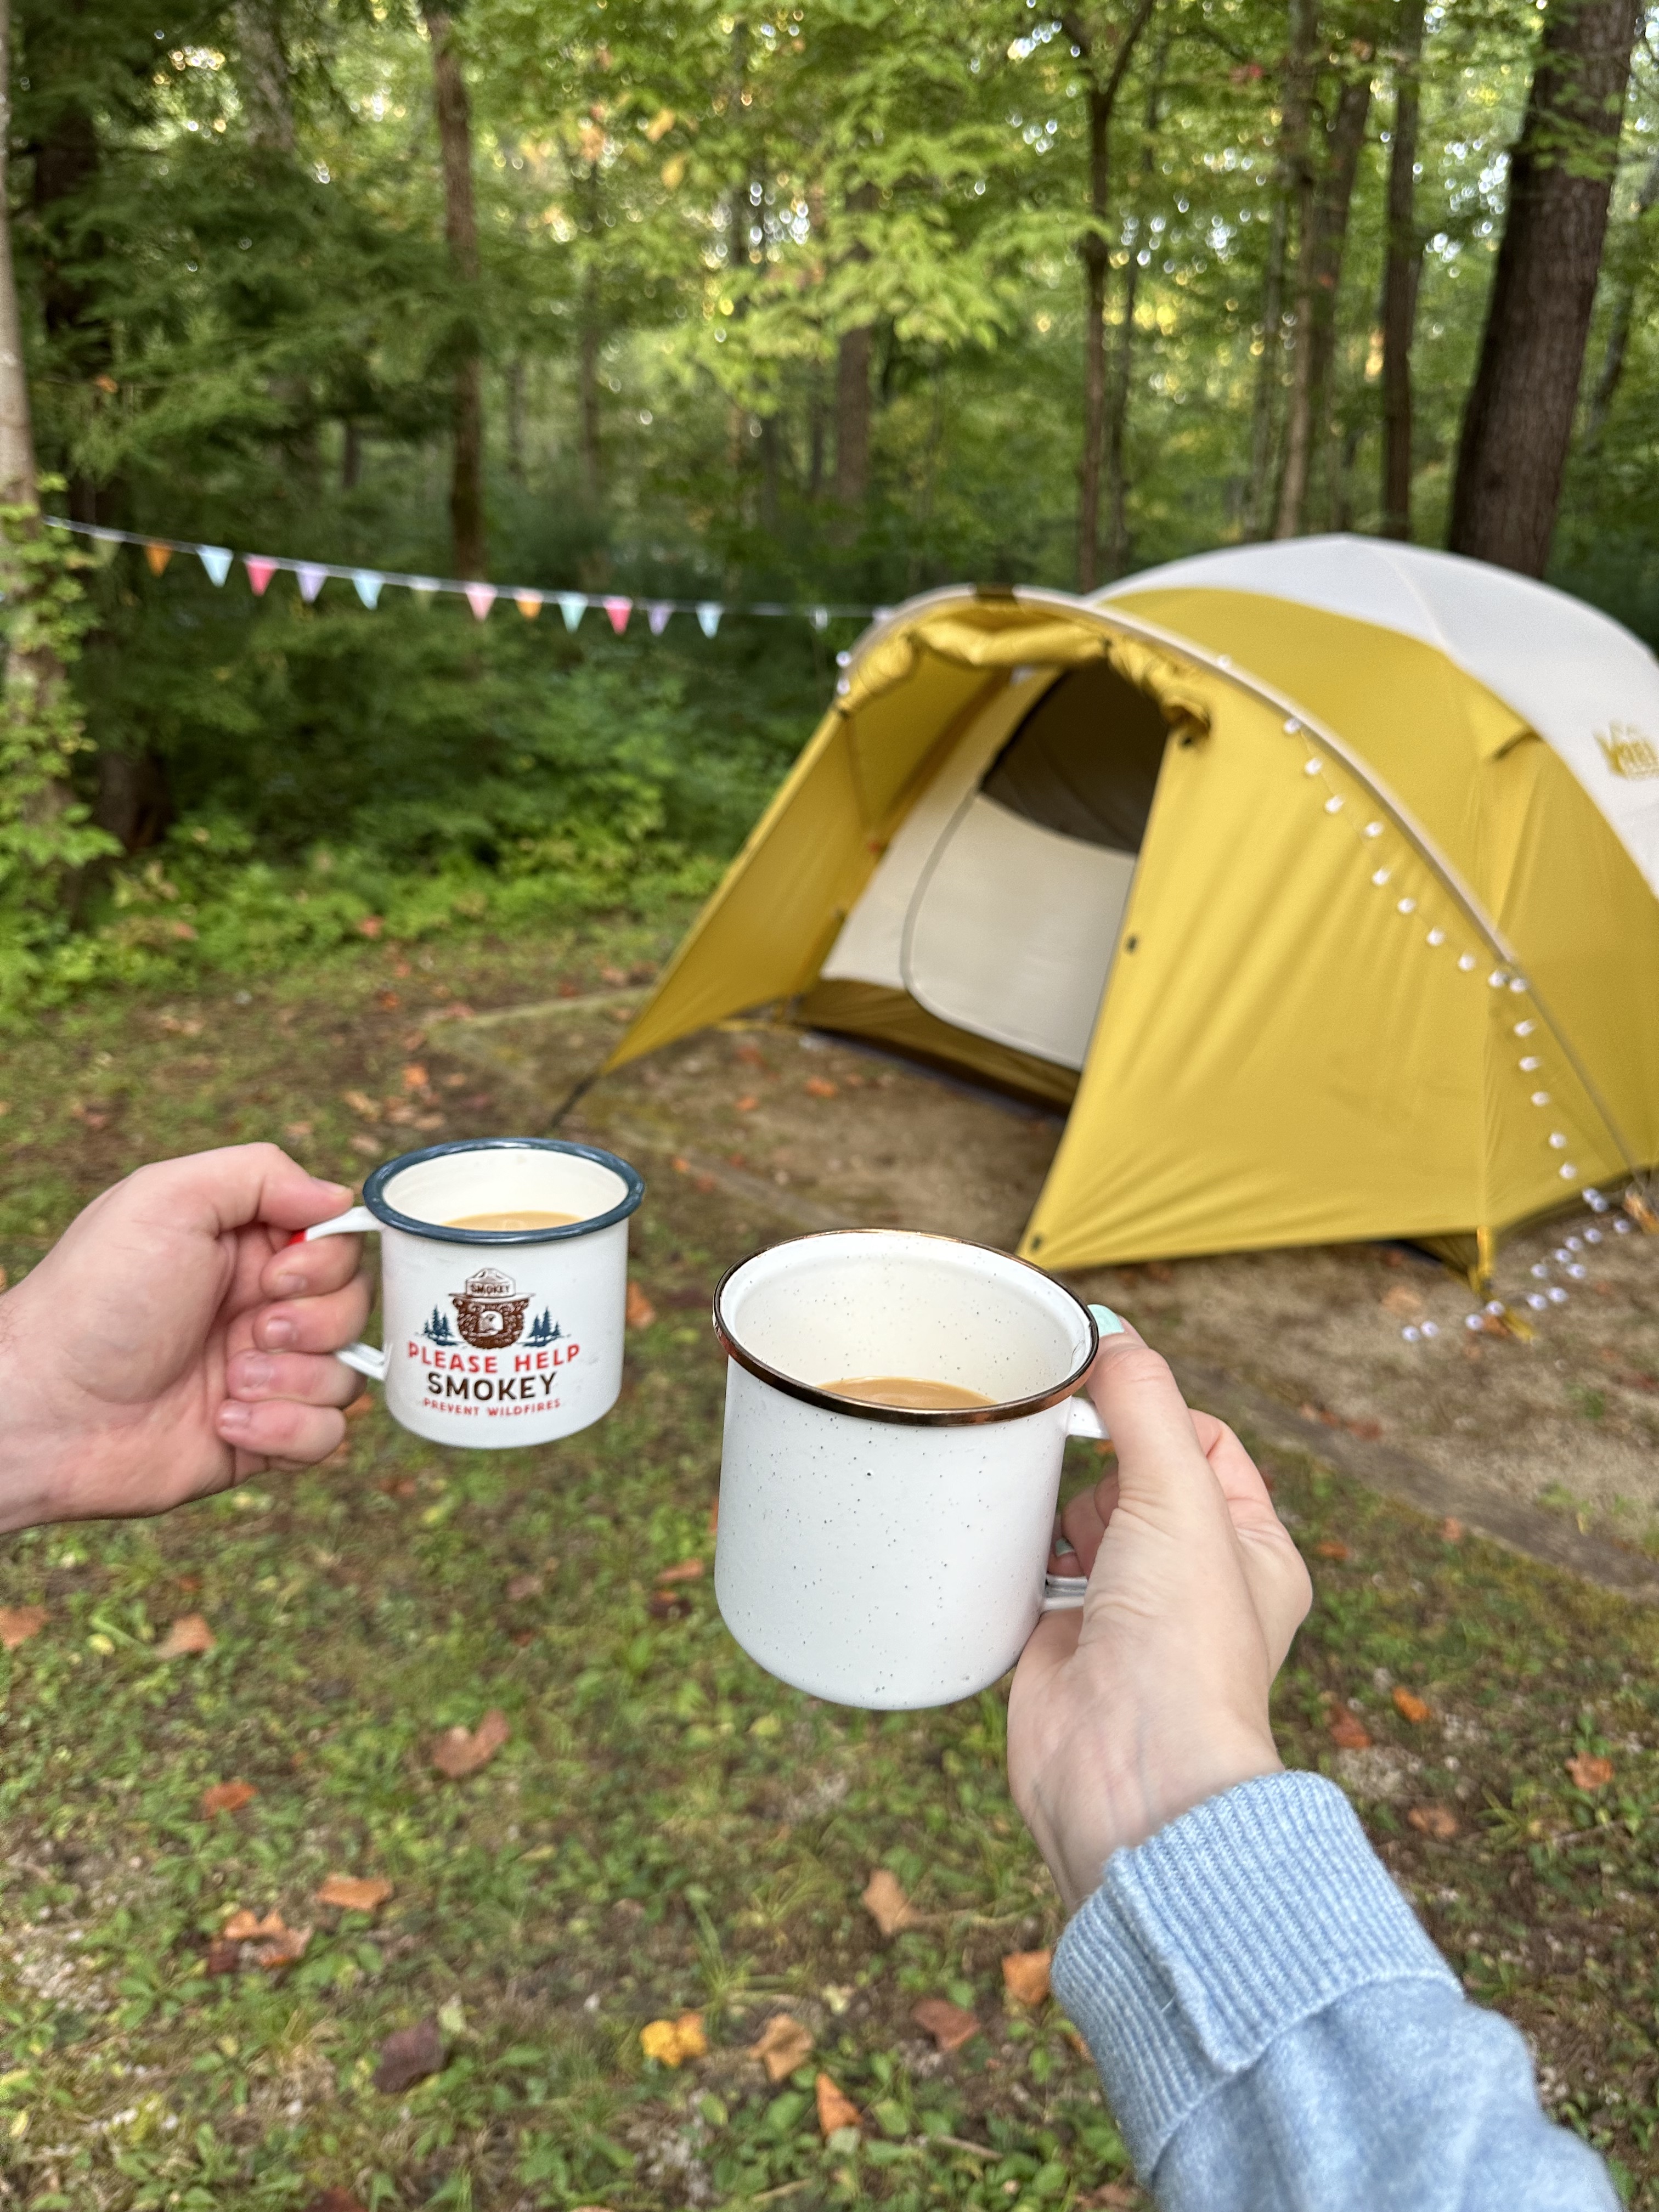
Views along Laurel FallsEntering the park from GatlinburgMorning coffee at campPatrick along the Alum Cave trailCelebrating my birthday at campHorses in Cades Cove!Laurel FallsCelebrating my birthday at campViews along Alum Cave trailArch Rock in Alum Cave trailBirthday celebrations at campBridge views along Alum CaveHiking along Alum CaveTop of Bluffs along Alum Cave trail
I still consider myself new to the camping world. Before I met Patrick, I could count on one hand the amount of times I had camped. Camping became more frequent in my life when Patrick and I started traveling to national parks and forests and wanted a budget friendly way to sleep. Although it was an adjustment at first, I can now say, it’s one of my favorite ways to travel.
Since I’ve learned a lot from experience the last few years, I thought I’d share some camping essentials I’d recommend if you’re just starting out or if you’d like to camp more.
Camping Essentials
🏕 Tent: Having a tent is an obvious essential while camping! Although we’ve done our fair share of car camping, tent camping is more spacious and there’s better air ventilation. We recently invested in a new tent, REI base camp 4 and I’m so excited to test it out on our next camping trip.Before we were using the marmot limelight and loved it! Either are perfect options for first time campers. I’d recommend doing some research when picking a tent, it’s important to find a tent that will be durable and hold up during weather conditions.
🧊 Cooler for food storage : Having a cooler for your food is a must especially if you’re planning to camp. I’d recommend a basic cooler like this one for a weekend camping trip.
🍳 Cooking Prep: The convenience of cooking your own food while camping is so important! We love our Eureka stove, it’s perfect for cooking any meal and storing it easy! Having your own stove is also ideal if a campsite doesn’t have a stove top over the fire pit. We also use a pots and pan set from stanley and have enjoyed the easy set up of this equipment.
🛏 Sleep Prep: If you want something more than a sleeping bag while tent camping, I’d recommend a mattress! While camping we’ve tried an air mattress, a trifold mattress, and sleeping bags. For the last three years, we’ve been consistently using a full sized trifold mattress that fits well in our tent and car. We’ve learned throughout the years how essential proper sleep gear is while camping and it’s definitely worth the extra money! I’d recommend doing some research to determine what would be most comfortable for you.
🛋 Lounging: While camping, it’s also important to consider the gear you’ll use outside of your tent for relaxing. We love our camp chairs from Woods, they are so big and cozy, perfect for relaxing by a camp fire!
💧Water Jug: It’s important to have plenty of water while camping. We like to carry a water jug, especially during our longer trips. Most campgrounds and national parks also have water fill up spots which comes in handy if you have a big jug to fill up.
🔦 Lighting: Lighting is essential while camping, especially if you are camping during the fall and winter months when the sun goes down sooner. We like to have head lights, a lantern, and sometimes string lights to maximize our lighting if needed.
🩹 First aid kit: It’s always a good idea to have a first aid kit to prepared for any accidents.
Extra Things to Consider
These items are more of an investment and I’d recommend if you plan to camp often or for long periods of time. Although camping is meant to be minimalistic, I believe it’s still important to have some items that bring comfort and enhance the experience.
☎️ Satellite Phone: We always carry our garmin in reach mini while camping and hiking in more secluded areas. Typically most campgrounds have little to no service and it’s nice to have some security of reaching out for assistance if needed in an emergency or to reach out to people at home if needed.
🚽 Travel Toilet + Biodegradable waste bags: We invested in a travel toilet a couple years ago and it is amazing! It definitely comes in handy if the campground toilet is far away from our site or when we camp in primitive areas that don’t have any bathroom facilities. This travel toilet set up is so easy and you can purchase biodegradable waste bags and waste gel to ensure you are disposing properly. We also use a privacy tent at times if the campground is less secluded and we need to use the travel toilet.
🧊 Travel refrigerator: This cooler is great when traveling long distances or camping for long periods of time. No ice required and it has a refrigerator and freezer side. It does have to be plugged in but if you have the right equipment, it’s a nice investment piece to ensure proper food storage and care while camping.
🚰 Jet boil: This is convenient for quick food prep. The jet boil is able to boil water very quickly and definitely worth the extra money.
🚿 Rinse Kit: The rinse kit is great for showers if needed or for rinsing off dishes. Sometimes campgrounds have showers and dish stations, and sometimes not so we like having this as a backup solution for both.
🔌 Jackery: Another investment piece that may be necessary if traveling and camping long distances. This device charges our electronics and cooler throughout our entire trip. The battery lasts a decent amount but does have to charged up when running low. It can be recharged through a typical outlet or through solar panels which you can purchase on their website.
🔋 Jump start battery: This was a new purchase for us, for a long time we had been borrowing it from my sister, and although it’s an investment item, I consider it a necessity. There were a few times, our car battery died on us when camping out west and this was a relief to have this for a quick charge!